Search This Blog

Showing posts with label craft quickie. Show all posts

Monday, July 22, 2013

Tutorial: DIY Fold Over Elastic Hair Ties


Fold Over Elastic (FOE) hair ties are everywhere.  You can find them on Etsy, Forever 21, American Eagle, and even Walmart.  They are cute, colorful, won't damage your hair, or leave a crease in your hair when removed.  Unfortunately, they are also horribly overpriced. 

I've slowly been packing up my hospital bag in preparation for this little baby.  The idea of being able to pull my hair up during labor, and let it down afterwards for some photos is super appealing (even though I'm going to be a hot sweaty mess). So, I made up several sets of these elastic, and gave some to my expectant sister in law as well.

Do you want to make some for yourself, and the whole neighborhood?  All you need is some fold over elastic, which you can find at most craft stores. I purchased mine from The Ribbon Retreat.  I was able to pick up several fun colors and prints for much less than at Joann's. You will also need some craft scissors, and a lighter or candle for heat sealing the ends.


So pretty.


Measure out 9.5 inches of elastic, and clip.

You can tie a couple of different kinds of knots, a simple overhand knot will work, and will allow for a little bow like ends...

...or you can tie a side knot.  This is the knot that I see most frequently. Whichever knot you choose, you'll want to keep the ends about an inch long. After you've tied the initial knot, give the tail ends a tug to tighten the knot, and then pull on the loop end to tighten it even more.  Your knot should be quite secure after tugging.


Angle off the tail ends with your  scissors.


Place the tail ends near the flame of a lighter or candle to heat seal the ends.  Sticking them IN the flame is not necessary, or the best idea.  You'll burn the elastic, rather than seal the ends.


Nice and sealed to prevent fraying.


Now gather up your favorite color combinations, and put them together for easy gift giving, and a pretty presentation.  My Sister In Law received a pretty set along with a bottle of dry shampoo, because new mamas don't have time for showers or curling irons.

Thanks for reading.  Love this idea? Don't forget to pin it.

Tuesday, May 7, 2013

Mother's Day: Flower Pins


What mom doesn't love flowers on Mother's Day?  There are probably a few out there, but I always welcome flowers in May.  Unfortunately, I don't have great luck with keeping them alive.  My flowers, even potted, have a limited life span.


Give a bloom to your mom this Mother's day that will last though out the month and beyond.  A simple flower brooch or pin will bring life to a bag, scarf, sweater, or lapel.


I purchased all of my supplies from The Ribbon Retreat (flowers, pins), though this is not a sponsored post.  You could easily make your own fabric flower, and glue it to a pin, but this was a simple one step process. Turn on glue gun.  Add a small dot to the back of the felt circle, and adhere the pin.  Done and done.


Simple flower bloom to last all year long.


My pins are for sale locally at the Blackfoot Gift Bazaar, and used as scarf pins, a fun way to wear your shirred scarf (also for sale at the gift bazaar). Since these take no time at all to make, why don't you spend a few more minutes and make mom a nice sheer shirred scarf to accompany her pin, or even a handmade bag.  Perfect for the season.


Monday, January 16, 2012

Infinity Circle Scarf Tutorial


I thought that I'd share a tutorial for a simple infinity, or circle scarf.  I know you've probably seen a number of different tutorials for this type of scarf, but they are really easy to make, and very versatile.


You will need one yard of light weight (apparel) fabric.  This particular material doesn't have any stretch to it, and is some sort of polyester blend.  I bought it at a discount fabric store, and unfortunately they never give you much information about the material. Voile would be a great choice for this type of project.

You will cut your yard of material into two eighteen inch strips.  My original piece of fabric was 36"x 42", so once cut, I was left with two 18"x 42" strips.

...keep reading...

Wednesday, January 4, 2012

Selfish Sewing: Shirred Scarf

You can see the bobbin side of the shirring in this shot.
In an effort to expand my wardrobe, and bust my fabric stash, I've been sewing a bit more for myself lately, and may I just say that it feels great. I've made a couple of scarves lately, and I love how quick and easy they are to make.  I also love that one size fits all. If you are trying to think of something to give a new mama, a scarf is a perfect option.


This particular scarf is a shirred scarf.  It was made by using two widths of material that were sewn together to form a long strip (I believe that I cut my material to be 9 inches wide).  I used a narrow rolled hem to finish off the edges, and I then shirred two rows using elastic thread. My shirred rows are roughly 3 inches from each edge.

You can find my tutorial for this scarf here.


One thing that I'd really like to do this year is use up the fabric that I've collected over the past couple of years.  I've picked up fabric on sale, but unfortunately it seems that I've collected it quicker than I've been able to use it up.  This particular fabric I've only had since June, but still that is 6 months. I'd like to use the fabric I have before I decide that I no longer like it.  

So, what are your favorite stash busting projects, and how long do you hold onto fabric before passing it on?  I'm thinking that eventually I'll have to have a fabric stash swap with some local sewists.


Thursday, October 20, 2011

Top-toberfest: Crocheted Lace Embellished Top


Source: modcloth.com via Tricia on Pinterest


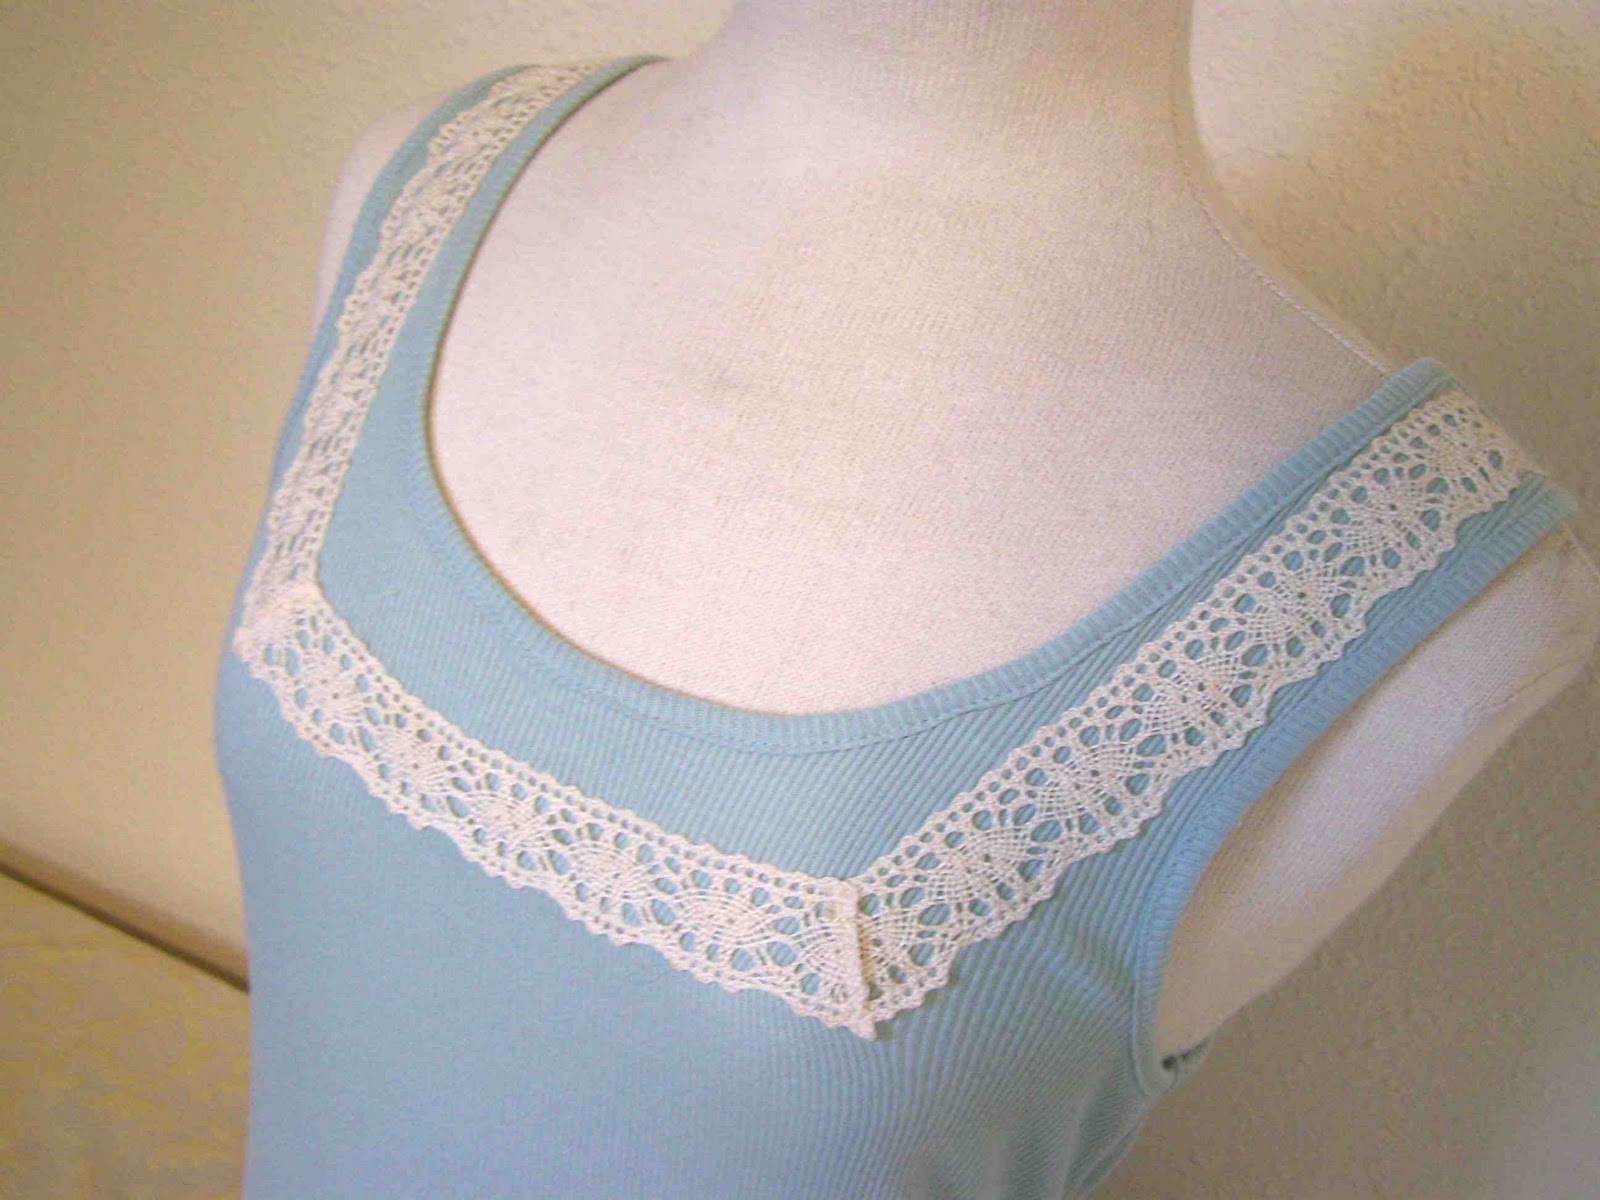
I love all of the lace embellished tops that I've seen around lately.  Lace is so feminine, and dresses up any outfit.  I picked up a plain tank that was on clearance at Wal-mart, and purchased some crocheted lace at a little local gem of a fabric store.  The lace was only a dollar a yard! While I'm not one to sport a tank on its own, I love to layer them under cardigans or over a longer sleeved shirt.


Want to embellish your own tee or tank?  You can find the full tutorial below.

Tuesday, September 13, 2011

Sewing For Baby: Pack and Play Sheets


With a toddler at home, I'm anticipating that our new baby will spend a lot more time in the port-a-crib than our first did.  With Clark I would throw down a blanket and let him have tummy time while I worked around the house.  Although Clark is a tender little guy, I'm pretty terrified that he is going to clobber our new baby and try carrying him around the house when I'm in the restroom or preparing dinner.  Hopefully we can use the pack and play to prevent that from happening.


Because I'm anticipating using our port-a-crib more, I figured that I should make up some sheets for it.
I found this great tutorial online by Modest Maven on how to make sheets for port-a-cribs, or pack and plays.  She claims that she can make these sheets up in 15 minutes, and I have to say that I believe her.  I made two different sheets, and probably got down to around 20 minutes each using my serger.  

Don't worry though, if you don't have a serger you could easily make these.  Hop on over to her blog for the full tutorial.

While we're on the topic, does anyone have any advice to share on helping toddlers adjust to a new sibling?  Clark is really excited, but I have a feeling that it is going to be harder than we expect for us all.


Monday, August 29, 2011

Sewing For Baby: Burp Clothes


Every new baby needs a burp cloth at some time or another.  While not all babies seem to have quite the same projection, burp clothes are a nice thing for any new mother to have on hand.

I used some of the scraps of material that I had on hand from the mitered corner receiving blankets, and some minky from the car seat canopy and cuddle square, to make a few quick burp clothes.  I made two different styles of burp clothes.  The two shown above are based on a free pattern from Cloud 9 fabrics, you can find the pattern and tutorial here

They are flannel on the front, and cuddle fabric on the back.


I also used up some fleece and flannel to make some serged edged burp clothes.  Both styles of burp clothes come together really quickly, and would make a nice, practical, and inexpensive gift for any new mom and baby. The great thing about the fleece backed burp clothes is that it provides a moisture barrier, that way nothing seeps through the flannel and onto your shirt. You can find the tutorial for the fleece and flannel burp clothes here.

Thanks for reading, and for all of your kind comments on our "nursery".


Sunday, August 28, 2011

Sewing For Baby: Lightweight Knit Swaddle Blanket


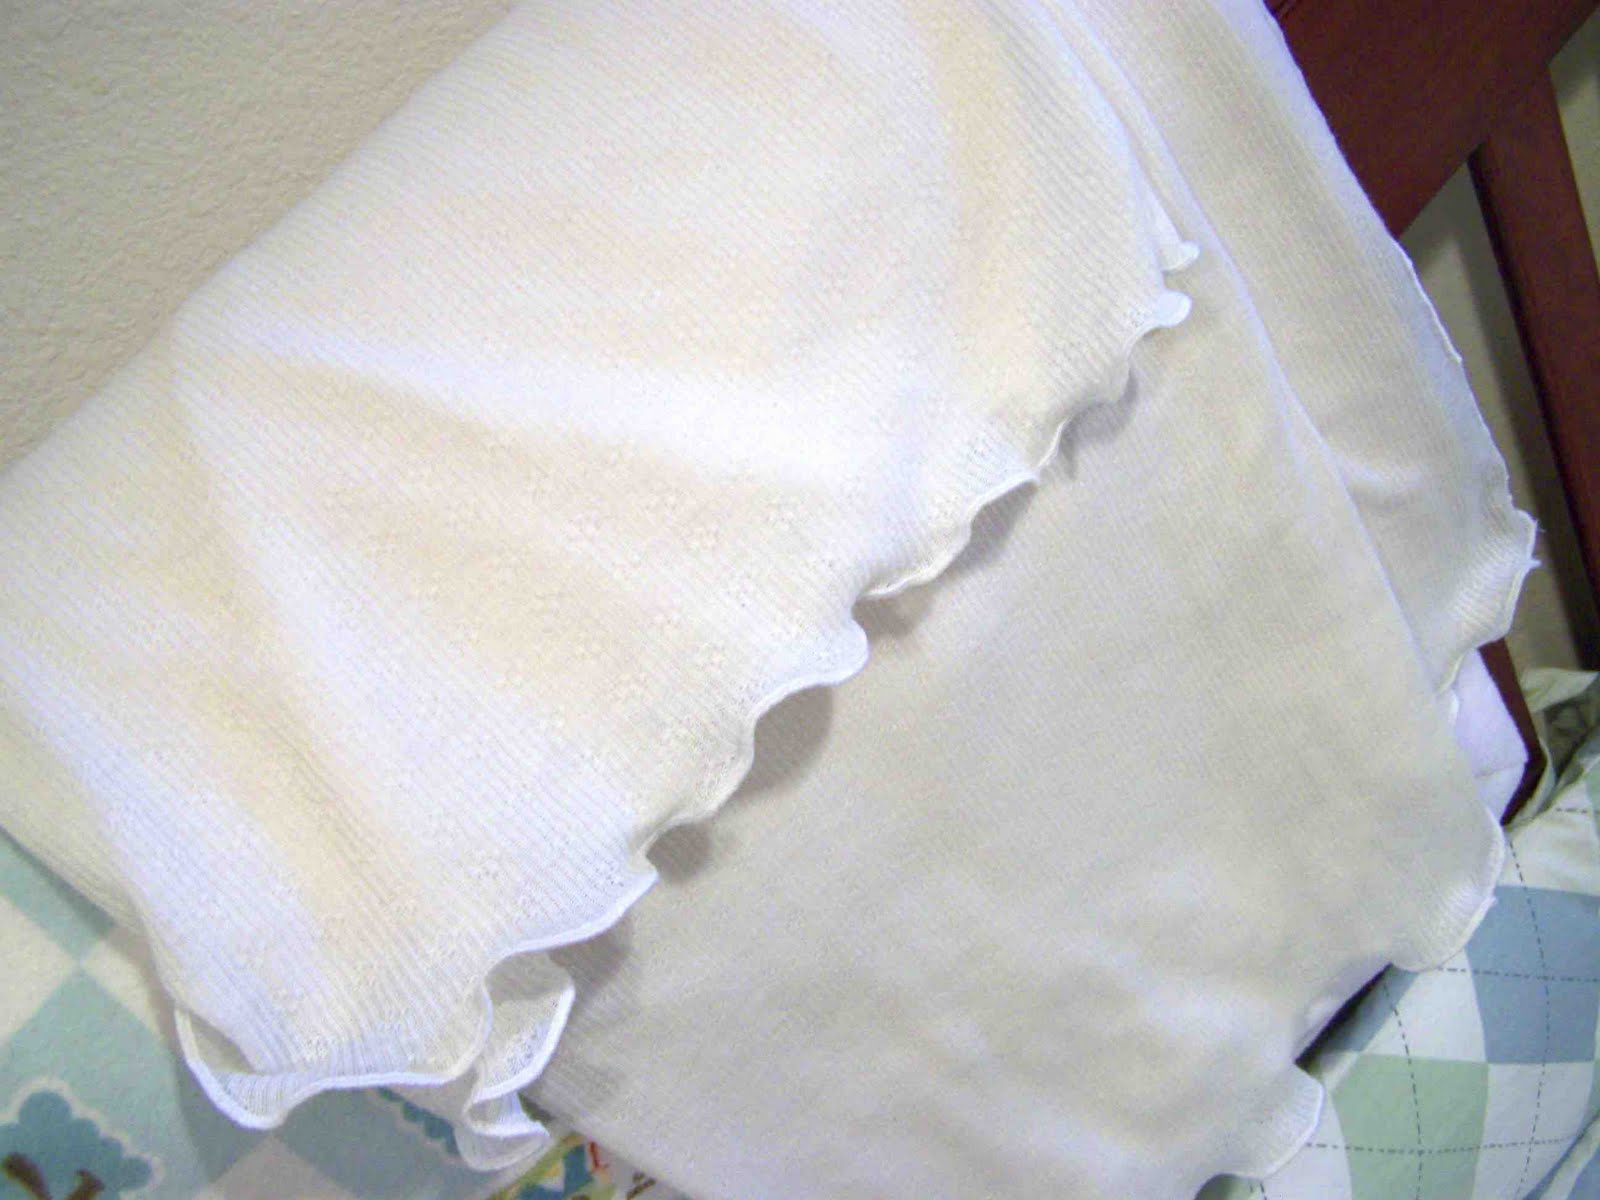
Here's another sewing project for baby.  This one was extremely quick, and easy.  I don't know if you've ever seen the Aden and Anais swaddle blankets, but they are super soft and lightweight gauze material.  My sister received some at her last baby shower, and uses them all of the time when nursing.  They are light enough that the baby gets plenty of fresh air when snuggled up close to mama.  While I'd love some myself, they aren't in the budget at the moment.  Fortunately, I came up with an alternative.  I've had this extremely thin and light knit fabric in my stash for some time now.  I've used it in the past for baby tights, but hadn't found a suitable project for the remaining fabric that I had on hand. When sorting through my stash a few weeks back I realized that this would be the perfect material for a lightweight blanket.


 I cut a 42" square piece of material.  Set my serger settings for a scarf edge finish, and serged all four sides.  It was honestly such a fast project, and I can't wait to wrap my baby up in it.

The scarf edge finish is almost like a rolled hem, and it created a nice lettuce leaf effect on the lightweight knit.


When I purchased the fabric I found it for a dollar a yard, so this blanket cost me a little over a dollar to make. Huge savings compared to the Aden and Anais blankets-Woohoo! Now I'll go spend the savings on a box of diapers...urgggg.


I thought that I'd show you a quick pick of the finished nursery area.  It is part of our bedroom that sits in our basement.  We are fortunate to have a daylight window, along with a dividing wall.  The wall that the crib is up against separates our bed from his. We have just enough privacy, but I won't have to run upstairs for those mid-night feedings.

Thursday, August 18, 2011

Sewing for Momma: Stretch Lace Belt for Pregnancy (or anytime really)


You don't have to be very far along in a pregnancy before your pre-maternity waist disappears.  In the first and second trimesters I like to pretend that I still have a waist by wearing a belt above my belly. By the time the third trimester hits your rib cage has expanded , and the space between your belly and bust is practically non existent. It makes it rather uncomfortable to wear a belt, at least a traditional belt.


I was recently playing around with some of the stretch lace that I purchased for my maternity bands.  I found that I could cut one long strip, stitch the ends together, and create a rather comfortable maternity "belt".  It could easily be dressed up with a ribbon or brooch of some sort, and I also think that it would be fun to layer a normal belt over the top of the lace layer (once my abdomen isn't being inhabited by a growing babe).


Anyway, it's just a silly little project that I thought I'd share.  Have a great weekend!


Tuesday, August 16, 2011

Sewing for Baby: The Pacifier Pocket


One more baby item crossed off the list.  A pacifier pocket, it's something that I tried to make when Clark was using a pacifier.  My version was square, terry cloth, and all together poorly designed.  I hadn't been sewing long, and my stash of fabric was sad to say the least.  Ashley of Make It and Love It, recently shared this cute little pattern for her version of the pacifier pocket on her blog.  The pattern and tutorial are free for personal use, and are much better designed than my first attempt.

I decided to make a couple of different pouches.  The green version was made from scraps from the car seat cover that I recently made, and the orange version is scrap from Clark's rocket quilt.

I pretty much followed the pattern as she wrote it.  The only change was on the closure.  Snaps and I don't always get along, so I opted to use velcro in their place. I also topstitched around the edges of the pocket flap, because I just can't resist.


The project was pretty quick and painless.  There was a bit of frustration easing the curves at the base of the pocket (you'll notice the puckers on the green pocket), but that was all due to my lack of patience.

If you have a pacifier taking babe in your life, and need a good scrap busting project, this one's for you.  You can find Ashley's tutorial here.

 If you were wondering, the pacifiers fit nicely into the pocket, with pacifier leashes and all.


Wednesday, August 10, 2011

Sewing For Baby: Pacifier Leashes


One thing that I love about all of the craft blogs on the internet, is that I can save myself a lot of work by following someone else's tutorial.  I don't have quite as much energy as I normally do, and often the thought of coming up with an entirely new project is overwhelming and exhausting.

Today's project, the pacifier leash, is a combination of a couple of different online tutorials.  Dana of Made offers a fantastic tutorial for her pacifier clip. I followed her basic instructions, but wanted to have an elastic loop to attach the pacifier to the leash.  Dana's version offers a velcro tab closure, but it just doesn't work for all pacifiers.  Disney of Ruffles-and-Stuff, has her own tutorial that provides basic instruction on attaching an elastic loop fastener.


I made several different pacifier clips from a variety of fabrics.  I used some quilter's cotton, home decor fabric, and even some left over minky scraps.  All of the fabrics worked well, though the home decor weight fabrics were more difficult to turn.

It feels nice to have a few more practical baby projects out of the way.  I'm desperately trying to finish all of my baby related projects this month.  Next month I need to focus my attention on preparing our home, and planning a birthday party for Clark.  His birthday is within a week of my due date, and I know that once the baby arrives I won't have the time or the energy to plan/prepare anything. The thoughts of not having a Halloween costume for Clark have also been keeping me up at night (that, and the RLS and leg cramps that plague pregnant ladies everywhere).

Thanks so much for reading.


Tuesday, August 9, 2011

Sewing For Baby: Baby Animal Hats

Source: Moth and Sparrow
Moth and Sparrow offers adorable free (for personal use) patterns for knit baby hats.  When I stumbled upon the image on Pinterest they were instantly added to my list of things to make to welcome baby. She offers patterns for A Fox, Raccoon, and an owl.


I couldn't resist turning the little owl pattern into a penguin hat.  I tilted and elongated the beak, and slightly altered the face shape.


The hats are easy to sew up, and don't take much time at all.  I left all of my raw edges unfinished....laziness mostly, but you really don't have to worry about knit fraying much.


If you're expecting a baby, or simply can't resist sewing up cute little things, then I highly recommend trying out this project.  I used scraps from my knit pile, but you could certainly cup up a soft old t-shirt or two to whip these up.