Search This Blog

Showing posts with label beginning sewing. Show all posts

Monday, June 11, 2012

Tutorial: Hooded Towel


Today I'm sharing a tutorial for a project that has been around forever.  I know that there are many many tutorials out there for hooded towels, but I can't help but share one more.  Hooded towels are really popular in our home.  I made Clark his first hooded towel right after I started this blog, and he wants to use it every bath time.  They're perfect for the beach, the pool, and the bath. The hood keeps them nice and warm. 

Miles not so recently outgrew his infant hooded towel, and I finally got around to making him his own big boy hooded towel.  This one should last him for several years, or until he wears it out.  Hooded towels are super simple to make, here's how I do it....

Read More...

Tuesday, May 15, 2012

Technique Tuesday: How To Sew A Straight Line


Sewing straight lines is pretty basic when it comes to sewing.  I don't know that it can really be considered a technique, but more of a necessary skill.  Unfortunately, sewing a straight line isn't always as easy as it sounds.  So, I thought that I'd share a few tips and tools to help keep those lines and seams straight.
Basic presser foot, quilting guide, rubber band (in case you didn't know).

 Your sewing machine has a lot of built in tools that are ready to help you obtain those straight and even stitching lines.  If you understand what those tools are, and how they work, they are quite helpful.


Wednesday, December 21, 2011

Christmas Light Onesie


After celebrating Halloween and Thanksgiving with his pumpkin on his bumkin, I decided that Miles needed a Christmas onesie as well.  There's nothing plastered on his behind this go round, just a string of appliqued Christmas lights.


Christmas shirts are something that I get a kick out of.  There's a lady at our church that has a whole collection of festive attire.  At our last Christmas party she had a bright green sweater that lit up and played music. It was perfect....for her.  I myself prefer to make subtle references to the holiday through color choices, but to each their own.  


I do think that it's fun to dress up a chubby little baby in holiday themed shirts, especially if it is their first time celebrating that holiday.  If you noticed, my Christmas shirt for Clark is a bit more subtle (although he is still insisting that I add some Christmas lights to the front of the shirt). You can check out my holiday onesies from last year here.


Merry Christmas!
This little guy decided to roll over yesterday, it kind of breaks my heart to see him grow up so quickly. 


Sunday, August 28, 2011

Sewing For Baby: Lightweight Knit Swaddle Blanket


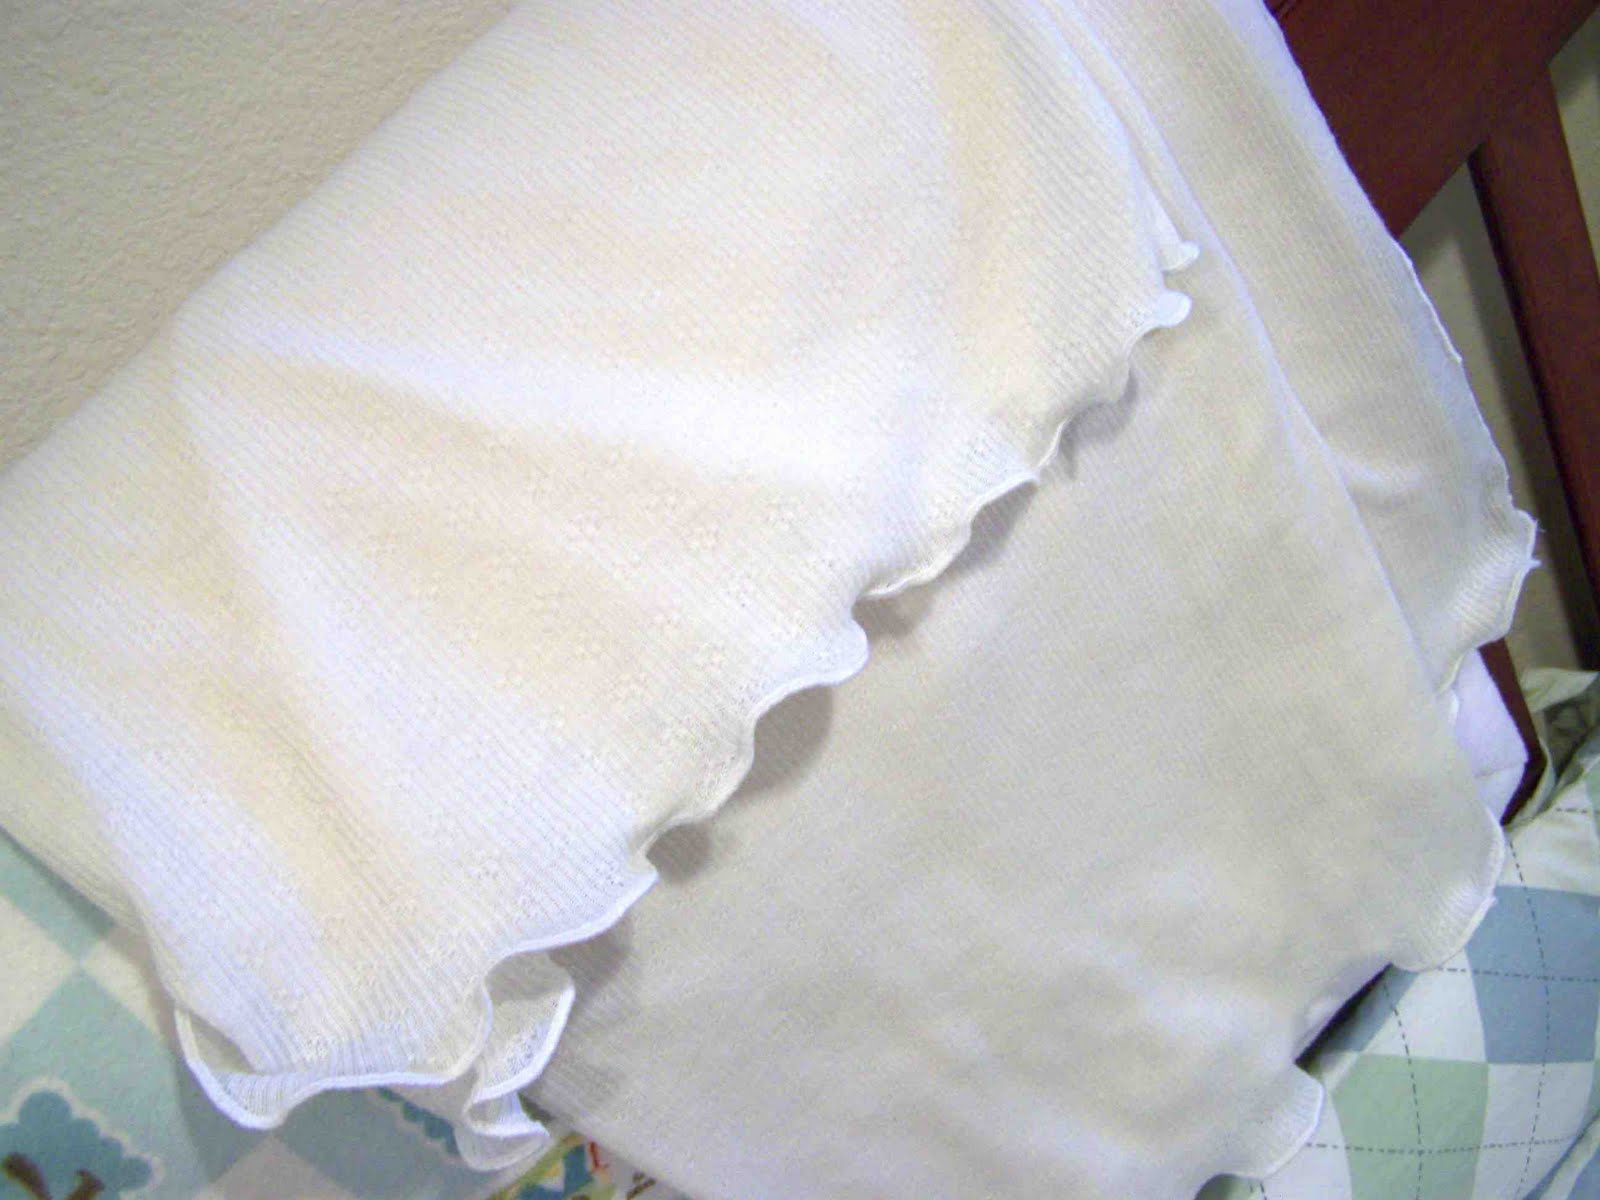
Here's another sewing project for baby.  This one was extremely quick, and easy.  I don't know if you've ever seen the Aden and Anais swaddle blankets, but they are super soft and lightweight gauze material.  My sister received some at her last baby shower, and uses them all of the time when nursing.  They are light enough that the baby gets plenty of fresh air when snuggled up close to mama.  While I'd love some myself, they aren't in the budget at the moment.  Fortunately, I came up with an alternative.  I've had this extremely thin and light knit fabric in my stash for some time now.  I've used it in the past for baby tights, but hadn't found a suitable project for the remaining fabric that I had on hand. When sorting through my stash a few weeks back I realized that this would be the perfect material for a lightweight blanket.


 I cut a 42" square piece of material.  Set my serger settings for a scarf edge finish, and serged all four sides.  It was honestly such a fast project, and I can't wait to wrap my baby up in it.

The scarf edge finish is almost like a rolled hem, and it created a nice lettuce leaf effect on the lightweight knit.


When I purchased the fabric I found it for a dollar a yard, so this blanket cost me a little over a dollar to make. Huge savings compared to the Aden and Anais blankets-Woohoo! Now I'll go spend the savings on a box of diapers...urgggg.


I thought that I'd show you a quick pick of the finished nursery area.  It is part of our bedroom that sits in our basement.  We are fortunate to have a daylight window, along with a dividing wall.  The wall that the crib is up against separates our bed from his. We have just enough privacy, but I won't have to run upstairs for those mid-night feedings.

Tuesday, August 9, 2011

Sewing For Baby: Baby Animal Hats

Source: Moth and Sparrow
Moth and Sparrow offers adorable free (for personal use) patterns for knit baby hats.  When I stumbled upon the image on Pinterest they were instantly added to my list of things to make to welcome baby. She offers patterns for A Fox, Raccoon, and an owl.


I couldn't resist turning the little owl pattern into a penguin hat.  I tilted and elongated the beak, and slightly altered the face shape.


The hats are easy to sew up, and don't take much time at all.  I left all of my raw edges unfinished....laziness mostly, but you really don't have to worry about knit fraying much.


If you're expecting a baby, or simply can't resist sewing up cute little things, then I highly recommend trying out this project.  I used scraps from my knit pile, but you could certainly cup up a soft old t-shirt or two to whip these up.


Monday, July 11, 2011

While I'm away....


Source: etsy.com via Tricia on Pinterest


You've probably been assuming that I have been away, but the truth is I've been spending most of my time getting ready for girl's camp for church, and a wedding. I'm leaving for girl's camp this morning, and later this week I'll be heading to the east coast for a wedding.  While I'm thrilled to get away, sadly I'll be leaving my little family behind, and missing out on my anniversary-sad.

Anyway, I figured that while I was gone I'd give you a bit of homework.  Why don't you all work on my "To Do List" for me, great idea right? Feel free to bust through my fabric stash, sew up a storm, and ship your finished projects to me.  Alright, so I don't expect that, but I thought that maybe some of the projects on my list could make their way to your list.  If you're bored, and are in need of some sewing inspiration, check out Pinterest, and my growing "To Make Board".

I'll be back soon-hopefully with a functioning camera.  I've got lots of projects to share.

Tricia

Tuesday, June 14, 2011

The Rocket Ship Quilt


I have finished my first quilt.  It was quite a feat, even though I dumbed it down about as much as possible.  I chose a simple design, and made the blocks quite large so that I wouldn't have to sew 120 of them.


The quilt is for Clark's new twin bed.  I wanted it to be an oversized quilt, and the finished dimensions are about 80x96.  Each quilt block is 16 inches square. I couldn't find a pattern for the size of quilt that I wanted, so I had to make up my own pattern, but it is directly influenced by Cluck Cluck Sew's Juice Box quilt.


I like the large size of the quilt blocks because I think that it really shows off the fabric.  The fabric is David Walker's Robot line, from Free Spirit Fabrics. I'd picked it up last year on a really good sale, and was excited to put it to use on this quilt.


After finishing this quilt I can't say that I'm eager to make another one.  My machine quilting skills leave much to be desired, but I assume that they would improve with practice.  I also don't know that I have the attention span for quilting.  It was a week and a half process of cutting, piecing, quilting, and binding.  I prefer to wrap up a project in a day or two.  Maybe I'll have to do a crib size quilt if I attempt another one.

I ended up doing a little bit of piecework on the back.  It isn't anything special, just a ten inch band of color to break up the solid cream that I used.

The best thing about the quilt is that Clark loves it.  I love that he's at the age where he likes what I make him.  Today he wore his spider man shirt, and when I was pulling it over his head he started talking about how I made it for him.  Something like a quilt is such a time consuming project, and it is by no means an inexpensive project, so it only becomes worth the effort when it is appreciated.

Quilters out there, I look up to you.  I don't know that I'll ever join the club, but I admire your focus and skill.

As you can tell the quilt really doesn't match Clark's bedroom.  I'll pop in later this week with some wall hanging projects that I've been working on to tie the room together.

Thanks for reading.

Wednesday, May 4, 2011

Minky and Chenille Cloth Diaper Burp Clothes


Yesterday I mentioned that I'd share some other little shower gift ideas.  Now I didn't get super creative with my gift giving, but I do always like to throw in something practical.  I know that I was a new mom I was amazed at how many burp clothes I went through.  Even though Clark didn't have any major spit up problems, I found them extremely useful, especially when nursing.  At the beginning of the nursing adventure I would have to slide one burp cloth down the side of my shirt that I wasn't nursing on, because a nursing pad didn't suffice.  

Hopefully I haven't made any of you feel too uncomfortable. The point is that burp clothes are a necessity for every new mama, reflux or not.


You can find cloth diapers in most any baby section.  I picked up a six pack for six dollars at our local wal-mart. I then gathered some scrap minky and chenille that my mom had left over from a baby quilt she made years ago.  The only scraps that she had left over were long thin strips.  It is difficult to use a scrap of fabric to is too thin, but this is really the perfect project for those remaining fabric scraps.

Most cloth diapers have a center section that is somewhat padded for extra absorbency.  I simply measured the width of the section, and cut my strips of fabric to the same dimensions.  I believe that these particular diapers were 4 1/2" wide by 19 1/2", but make sure to measure for yourself if you try this project out. I then used my overcast serger to finish off the raw edges.  If you don't have a serger you can cut your strips of fabric 1/2" larger in each dimension, and then press the raw edges under 1/4" on each side.  Once the raw edges were taken care of I pinned the material to the center of the diaper, and stitched them in place.


 The soft cuddle fabric is especially nice for little babies.  My sister in law has some similar burp clothes that she uses, and she says that they wash up great, and her babies have all loved using them. Another variation is to cut the fabric to the size of the whole cloth diaper.  I didn't have enough fabric to do that, and I like this just as well.  You don't have to use a cuddle fabric, you can stitch colorful ribbons, or a quilting cotton down the center for the same effect.

I bundled three burp clothes together with a piece of lace, and clipped a little pinwheel hair clip to the top for a little extra decoration.  Simple, quick, practical, yet pretty. I love that they coordinated with the Sweetie Pi onesie and skirt.

Sunday, April 17, 2011

Shirr Thing For Spring: Mini Series Day 1 : Shirring Basics and The Sun Dress


Do you ever learn a new sewing technique, and then wonder what in the world you can do with it?  I do, and I thought that it might be fun to do a mini series of sorts, applying one sewing technique to five different projects.  Shirring is a technique that I first attempted at the end of last summer.  It is a simple technique that can be applied in a number of different ways to create a number of simple projects. It involves sewing with elastic thread in your bobbin, and standard machine thread in your needle.  The elastic thread in the bobbin pulls the fabric creating a nice gathered, or smocked, look.  The more rows of shirring that you sew, the more gathered it becomes.

If you haven't ever heard of shirring, or have been afraid to attempt it you may want to reference the following links and videos.  If you have a basic understanding of it, and are interested in creating a simple sundress like the one featured, you can read my basic instructions for the dress below.

Shirring Basics 
Now there are several shirring tutorials available online, and that is how I first learned to shirr.  Rather than repeating all of the same information, I thought I'd refer you to  my favorite shirring resources for instruction.


Kathlene from Grosgrain, has several video tutorials that are extremely helpful.  She offers helpful tips on getting the elastic bobbin thread to scrunch up, and on adjusting the tension on a Brother sewing machine.   You can find her basic shirring video tutorial here, and her Brother machine shirring video  here. 


Disney, of Ruffles and Stuff, also provides a great photo tutorial on how to shirr.  You can find her technique tutorial here.


The Ruffle Strapped Sundress


When I was a little girl I had a little yellow sundress that I would have loved to wear year round.  It was shirred at the top, and always fit my thin frame perfectly.  Shirring is a great way to create a basic dress that can fit a number of different body types.  I recently made this shirred dress for my 5 year old niece.  She is extremely petite, and I knew that making a shirred dress was probably my best bet on getting a good fit, without access to her measurements.


To create the dress you will need to know two basic measurements, the width around the child's chest (though this doesn't have to be exact....thank you shirring), and the desired length of the dress.

I couldn't just take my nieces measurements, so I measured Clark, who is three years younger than her, but he happens to outweigh her by about three pounds. I figured that the discrepancy in size couldn't be too great.  Once I had a rough idea of the circumference of the chest, and an idea of the length of the dress (this should be determined by measuring just below the arm pit to the desired length, whether it be to the floor, mid calf, or to the knee).  

The basic dress is created by cutting out two rectangles that are sewn together at the side seams, with a narrow rolled hem at the top, and a  narrow hem at the bottom.  Knowing this, you can determine the exact size that your rectangles need to be.  Each piece (front and back) should be the width of the chest measurement (plus seam allowance times two), and the length of your dress measurement (plus about 1-1/2" for narrowed rolled hem, and hem).


You will cut out your two rectangles.  Sew them together at the sides and finish off raw edges.  You should have a basic tube that is 2x the circumference of the chest, the shirring will gather in the top for a proper fit.  Once your side seams are sewn, create a narrow rolled hem at the top of the dress by either using a narrow rolled hem presser foot, or by turning the fabric under 1/4" two times, pressing, and stitching down. For the bottom hem I finished off the raw edge, turned it in 1/4", stitched down, and then applied a pom pom trim around the base (the second row of stitching).


Now that your dress is hemmed and trimmed, you will want to begin shirring.  I began shirring about 1/4" from my narrow rolled hem stitching line.  You will want to make sure that you lock in your stitches when you start and stop stitching.  My shirred lines are about 1/2" apart, or the width of my presser foot. I sewed about 13 rows of shirring.  For this style of sundress, you will want to sew enough to reach  the bottom of the sternum.


I wanted to create a strap with a bit of width to it, so I decided to make a little ruffle strap.  To create the straps I cut two long pieces that were four times the desired width, and long enough to reach from the top of the sundress, over the shoulder, and to the back, plus about one inch length for attachment. I pressed the strips of fabric in half, and then folded the raw edges in toward the original pressed crease.  This creates a strap with encased raw edges.

Next create your ruffles.  You are going to want to cut your ruffles four and a half inches wide, and twice as long as your straps.  Fold your ruffle pieces in half and press.  Using a long gathering stitch, gather your ruffles along the raw edges.  Leave threads long, and adjust the ruffles to the length of the straps. I next attached the trim the edge of the ruffles, with the trim facing away from the raw edges of the ruffles.  Sandwich your ruffles between the open edge of your straps.  Pin in place.  Stitch 1/8" away from the edge of the strap, catching in the edge of the ruffle.  Topstitch along the folded edge of the strap. Your straps are now created.

To attach them to the dress I recommend trying it on your model, and positioning them so that the straps sit right in the dip of the shoulder.  Pin the straps to the front of your dress.  Stitch in place.  Try dress on again, and adjust straps so that they fit well, and won't slip off the shoulders. Stitch the straps in place in the back.  Another option is to attach them to the front, and then create a button closure for the back of the dress.  This will give you more flexibility to adjust it for growth, you can add multiple button holes for size adjustment.

Now that your sundress is finished, you can tighten up your shirring by using a steam iron, and steaming (while not pressing, just hovering) above the shirred lines.  The elastic thread will tighten, and so will your fabric.

Next, accessorize.

I know that this mini series has the potential to become a bit monotonous, but I thought that it would be a fun way to develop my shirring technique.  If you get bored, just hang in there, I'll have something new soon.

Tuesday, March 8, 2011

Fleece Backed Burp Clothes


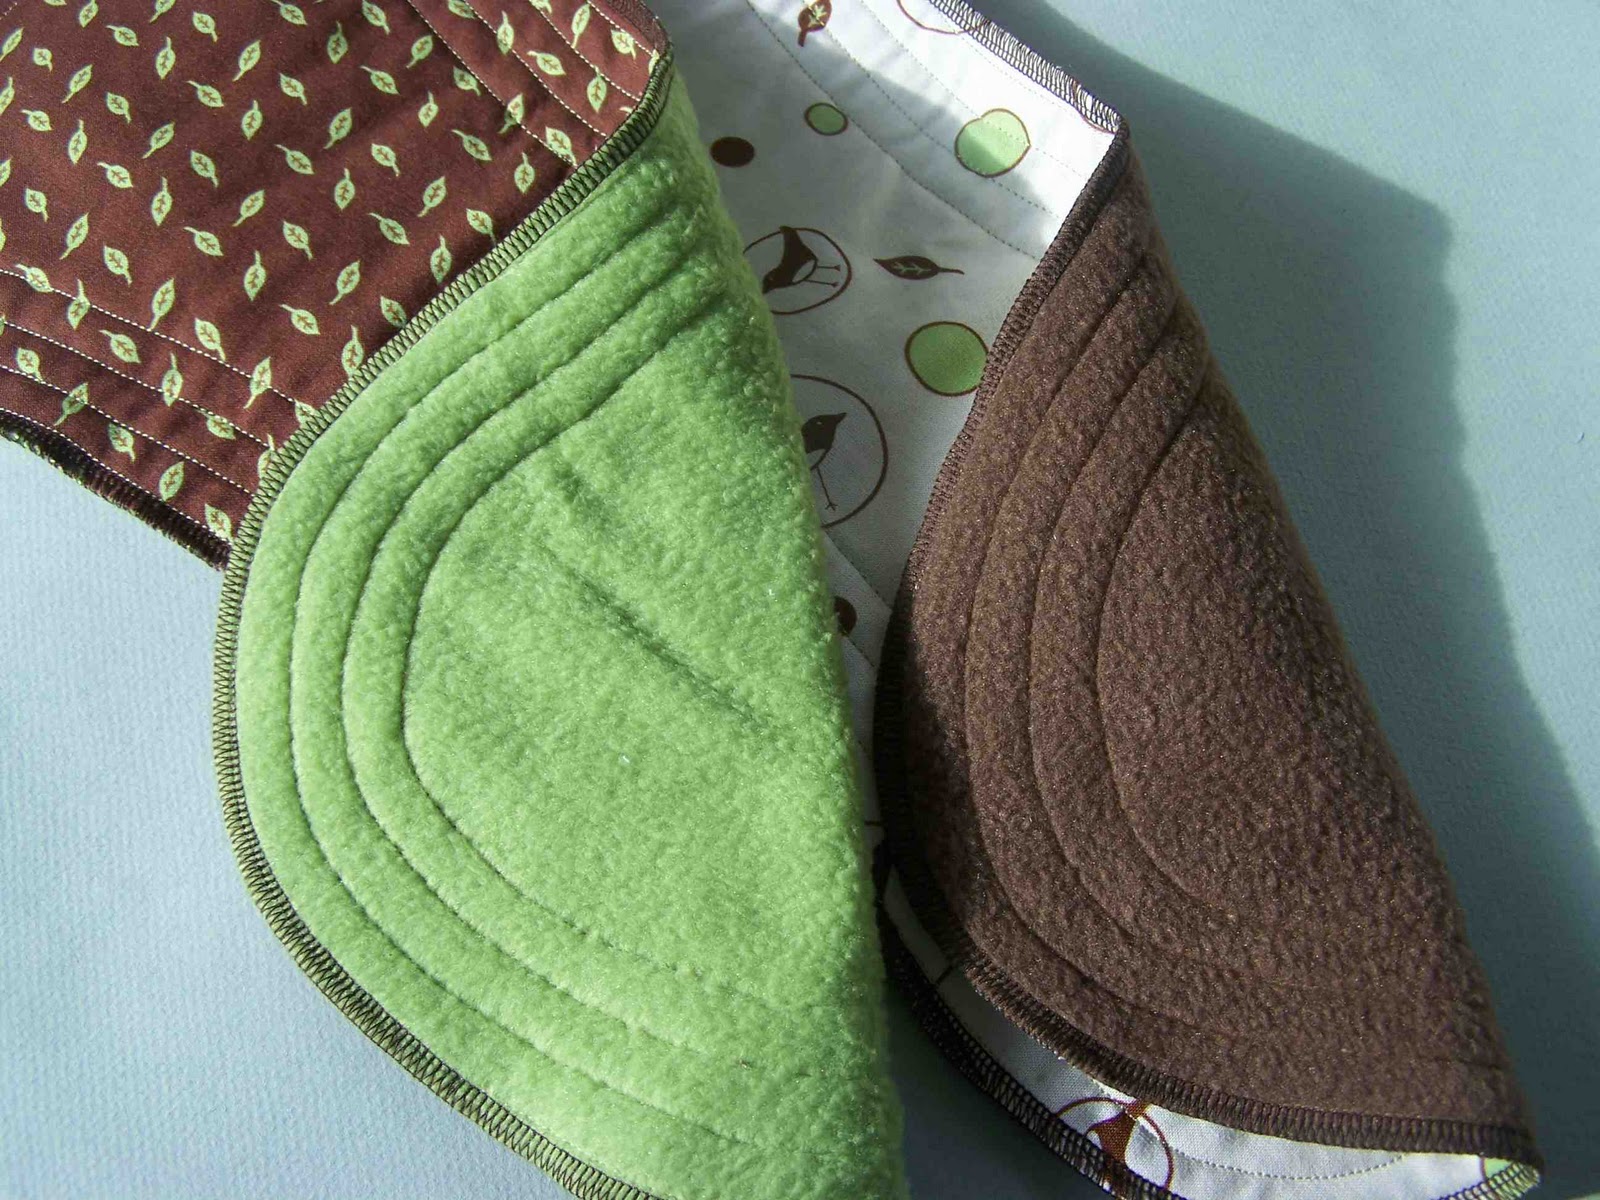
I made up a set of four burp clothes for my Sister- in-Law's baby shower last weekend.  Just recently I saw some simple burp clothes that were backed in fleece.  I'd never seen that before, but I love the added cushion that the fleece gives to the burp cloth.  I, myself, have rather boney shoulders.  I think that every newborn baby deserves a nice cushy shoulder to rest their head on.


To make these I used this basic tutorial from Oopsey Daisy to create the template for the burp cloth.  I then cut out one layer of cotton, and one layer of fleece.  I  placed them wrong sides together, basted the raw edges, and serged around the whole thing.

Now if you are a patient person, and like to crochet around burp clothes and receiving blankets, that could definitely be applied to this project.


I ended up quilting the burp clothes just for a little added reinforcement and detail.

Because you're working with two different materials, I'd recommend pre-washing all of your fabric on this project.


Wednesday, February 2, 2011

On The Mend: Adding Length to Long Sleeves


I believe that I've mentioned before that my arms are quite long.  As an adolescent I always had a difficult time finding long sleeve shirts that would reach my wrists.

I have a favorite knit shirt, it is actually the shirt that the Lazy Saturday shirt is based on. I love it.  The problem that I had with the shirt, was that there was a thin layer of sheer fabric, that was  cut on the bias, at the end of the sleeve.  Even though the fabric was bias cut, it didn't provide the needed stretch for my hand to pass through the opening.  After not so many wears, the fabric began to fray, and it was in need of repair.

To resolve the problem, I cut off the sheer fabric, as close to the seam as I could.  I then found some wide stretch lace (I found it here), cut it to the length of the sleeve opening, and serged the seam shut.

I then hand sewed the lace onto the sleeve opening.  It provides the needed length to the sleeve, and solves my problem of too short of sleeves.

Did anyone else wear lace trimmed leggings as a little girl?  I has some that looked just about like this.

I'm sure that this same process could be used on any long sleeved knit shirt.  I recommend the stretch lace, it is quite pretty, and you'll be seeing it again in some upcoming projects.

Thanks for reading, happy mending.