Search This Blog

Showing posts with label lace. Show all posts

Tuesday, September 23, 2014

Girl's Skater Dress with Lace Overlay


This may be my favorite project of the year.  My niece was having her birthday, and I thought she deserved a dress of her own.  So, I set out designing an age appropriate semi formal dress.  I had this beautiful lace that I bought from Fabric.com, and had intended to use for scarves, but it just wasn't the right weight for scarves, so it became a lovely lace overlay for a skater dress.

The pattern is self drafted, and I used a half circle skirt for the skirt of the dress. I've been hanging onto an oversized lavender zipper, and it was the perfect detail for the back of the dress.


Unfortunately, I didn't factor in enough seam allowance to account for the structure of the lace.  I ended up haven't to make the seam allowances quite a bit larger, which made the bodice quite a bit smaller.  Unfortunately, the dress didn't end up fitting my 10 year old niece, but fortunately, she has two younger sisters, and it fit her petite 8 year old sister perfectly.

I'm glad that someone gets to wear it, and I just might have to make myself a matching dress.  It's just too cute.

Tuesday, January 22, 2013

Painted Wood Bead and Glitter Necklace


 When it comes to accessorizing, I usually keep it pretty simple.  Mostly because I'm cheap and lazy. When my SIL got married at the beginning of the month, I thought maybe I should put myself together a bit.  I was wearing a pretty simple coral maxi dress (which I love), but I thought it could handle a chunky necklace. So I made a simple Wood Bead Necklace, similar to my wood bead bracelet.


I had picked up a variety of wood beads at the craft store a while back, so it I had everything on hand.  Using my acrylic paints for the colored beads, I mixed the perfect shade of coral, and painted the big beads.  For a little bit of shine, I busted out my gold glitter and Mod Podge, I mixed the glitter and medium together, and painted over the beads.  You can get pretty good coverage with the mix, but the mod podge will dull down the glitter a bit.  You can add a second coat for complete coverage.  After the first coats were dry, I added a thin layer of mod podge, and then sprinkled loose glitter over the top. What stuck, stuck, and I shook off any excess glitter.  

I then strung the beads on a thin length of lace, and it was done.  Made from everything that I had on hand.

Thanks to everyone that participated in the Craft Trend Post, I loved hearing your thoughts about fads, cozies, mustaches, toilet paper art.  It gave me a good laugh, and made me happy that I'm not the only one with some opinions.  

By the way, I don't HATE wreaths, I do like many of them, and would hand them.  I just don't like wreaths that have a bunch of thing glued on them, just for the sake of making a wreath.  I'm more of a traditionalist when it comes to my wreath and door decor. Sorry if anyone was offended, I knew that was the point that would be the most controversial.  Thanks again, you made me day.

Thursday, October 18, 2012

Top-Toberfest: Peplum Lace Yoke Top Tutorial


Welcome to day four of Top-toberfest.  Today I'm sharing a tutorial for a DIY Peplum shirt, with a lace yoke. I made the shirt from scratch, but you could easily refashion an existing shirt to make your own peplum.

One of the first clothing related tutorials that I wrote on this blog was for a cap sleeve top.  I used the same basic technique to create my pattern pieces for this top. You could use any style knit top pattern to do this, cap sleeves are just easier.


Monday, July 16, 2012

Tutorial: The Sheer Thing Skirt


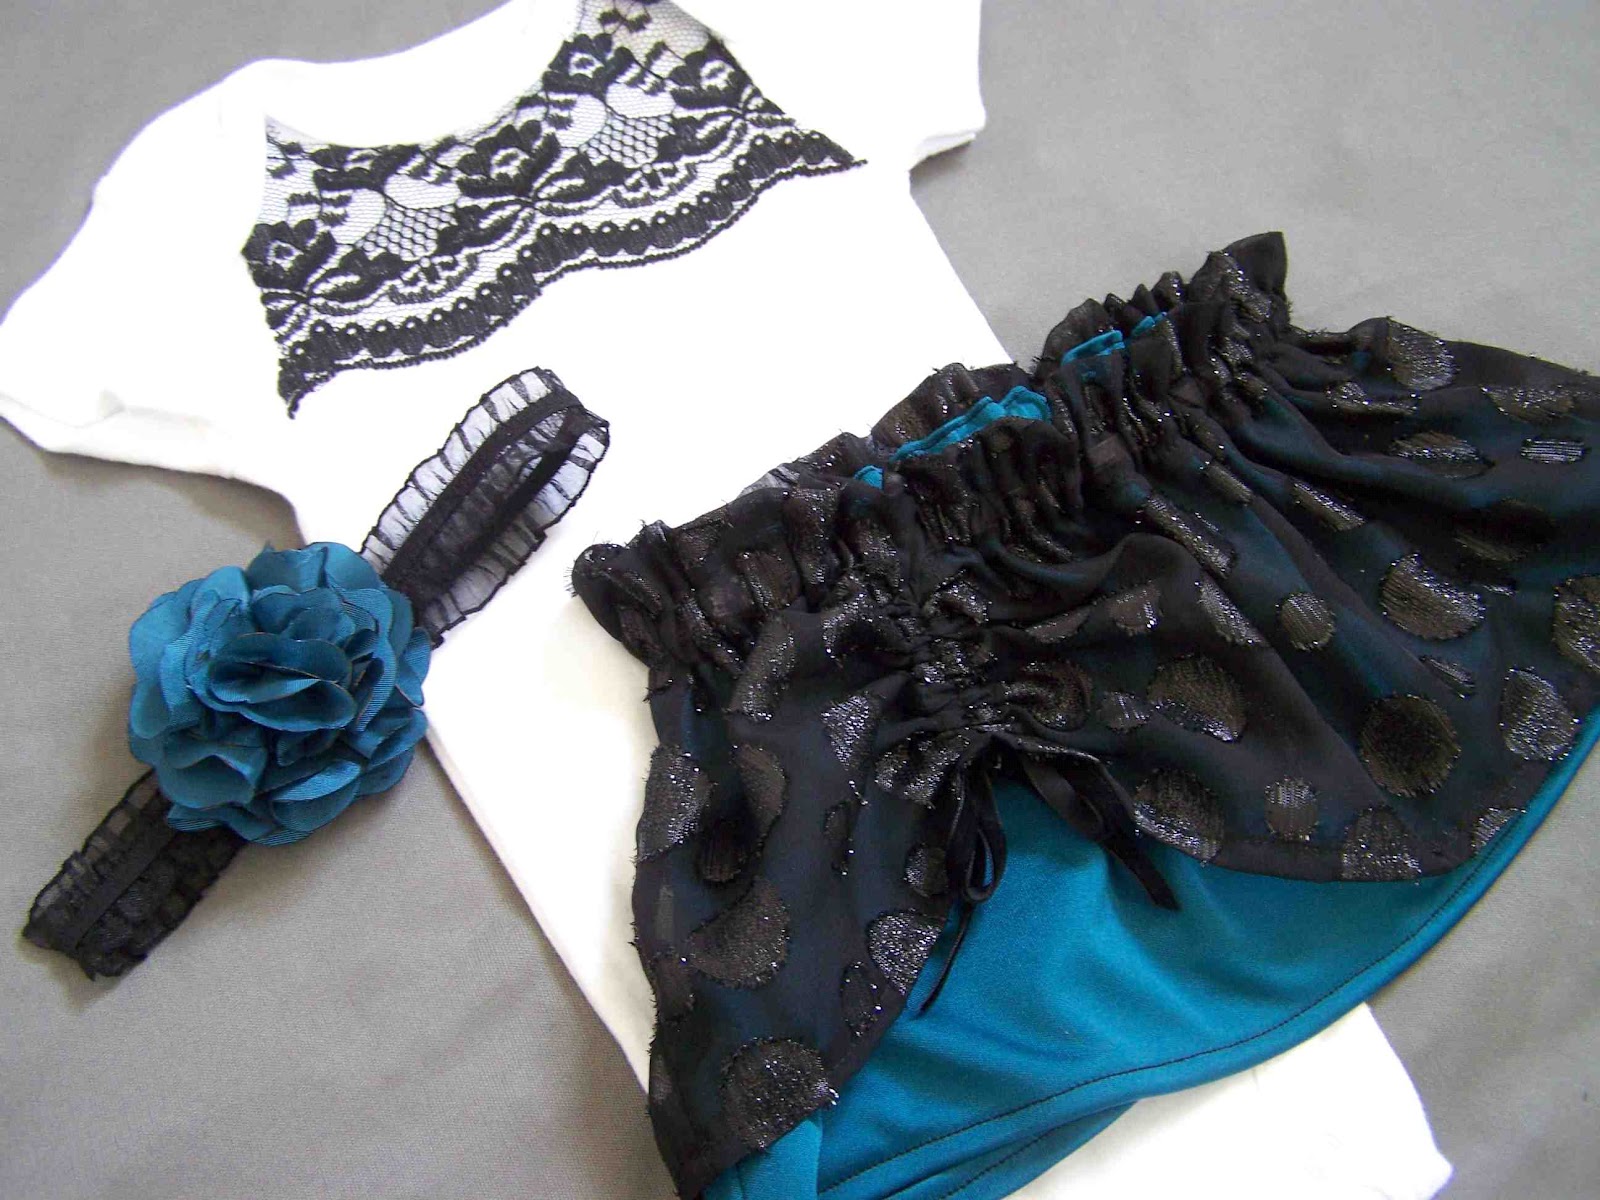
Yep, you read it right....skirt, not slip.  The color of the materials gives it a slip like look, but it's a basic sheer overlay skirt with a simple elastic waistband.  The same process that I used to make the Sheer Summer Skirt.  

This skirt requires very little materials, and a small chunk of time.

Materials:

 Elastic (1.5-3 inches wide)-You'll need as much as your waist is wide
3/4 yd Sheer Lace or Chiffon fabric (mine was 58" wide)
3/4 yd Skirt lining fabric (at least 44 inches wide).
Coordinating thread
Sharp Needles (if working for silk, satin, chiffon, or other light fabrics).


Cut your overlay material to 24".  Cut the width in half and remove selvage edges.  This will result in two rectangles (mine were 29"x24").

Cut your skirt lining to 23" long.  Fold in half, cut down the center, and remove selvage edges.  Two rectangles, (22x23").

If the width of the fabrics isn't quite the same as my dimensions it is okay.  I would just make sure that your fabrics are at least 44" wide when purchased.  If you want to overlay material to gather more than the lining, you will want to have it wider than the lining when you begin.**


Place the right sides of both your sheer fabric together, sew side seams and finish edges.  Repeat with lining fabrics.

Create a narrow hem for the skirt lining.  I serged the raw edges, turned it under 3/8", pressed, and stitched.  If you don't have a serger, turn the raw edge under twice to encase the raw edges.

My sheer overlay was a netted lace material that doesn't fray, so I left the bottom edge raw.  You could  serge or sew a narrow hem if needed.


Gather the sheer overlay material along the top edge.  Begin gathering row(s) 1/4" from side seams, and about 1/4" from the top edge of the skirt.  See my gathering tutorial for more information.

**If your materials are the same width, you won't need to gather the overlay.  Simply stay stitch the overlay and lining along the upper edge.


Gather your overlay skirt until it is the same width as your lining fabrics.  Position the overlay so that it sits on the outside of the skirt lining.  Match upper upper edges of the overlay and lining.  Match side seams.  Evenly distribute gathers, and pin along the length of the upper edge.

Stay stitch the lining and the overlay together just outside the gathering line.  Finish raw edges with an overcast serger or zig zag stitch.


Finish off the edges of your elastic using a serger or overcast zig zag stitch.


Match up the ends of your elastic, and stitch them together.


Open up the seam allowance, and press to either side.  Tack down the tail ends so that they lie flat.


Divide both the skirt and the elastic waistband into quarters.  Match up quarter marks, and pin the elastic waistband to the skirt, overlapping by 1/4" to 3/8".  You can further divide the skirt into eighths if you'd like more security when attaching the elastic waistband.


Using a zig zag, narrow zig zag, or three point zig zag stitch, attach the waistband to the skirt.  Stretch the elastic to match up with the skirt as you sew.


That's it.  A basic sheer overlay skirt for summer.  It really is very quick to make, and is nice and breezy for the warm weather.


Thanks for reading!


Wednesday, May 2, 2012

Tutorial: Embellished Lace Onesie


My sister is expecting a little baby girl in the summer.  Little girls are so much fun to sew for.  Even though I have two boys, I probably end up making more for girls than boys.  I whipped up a remixed buttercup skirt for the new baby, and decided that it needed a coordinating top.  I've had this black lace in my stash for quite some time.  You might remember it from my lace embellished cardigan refashion. It was just wide enough to add a fun lace accent around the neckline.


To start with, I cut out a piece of lightweight fusible web, that was the same size and shape as my lace.


 I then adhered the fusible web to the wrong side of the lace using a press cloth, and my iron.


After the fusible web was attached, I transferred the basic outline of the onesie shoulder seams, and neckline to the paper backing. The shape was then cut, and paper backing removed.


Position the lace piece under the envelope sleeves of the onesie, and as close to the neckline as possible.  You may even be able to slip the upper edge of the lace under the lip of the neckline.


The shoulder tabs of the lace were tucked underneath the envelope sleeves.  You will want to make sure that these extend as close the shoulder fold as possible, that way your lace edge won't peek through when the garment is worn. Adhere the lace to the onesie with your iron and press cloth.


 I used a narrow zig zag stitch to secure the lace.  I followed the contour of the lace closely. I should probably note that this will work best if your lace doesn't unravel or fray much.

That's it, a super quick lace embellished onesie. I'll share more details on the skirt later.

Thanks for reading.

Monday, January 2, 2012

Refashion: Sweater to Lace Embellished Cardigan


Lace Embellished Cardigan

With the new year, I hope to introduce a few on going series to the blog. One of the new series will be  Reduce,Reuse,Refashion.  It is a series that I'm starting with the hopes of sewing my way through the piles of discarded clothing that I've been stashing for far too long.


My first project starts with a all too tight knit top that I've had for five plus years. I really like the top, but it is less than flattering on more maternal  figure. To make this little sweater into something more wearable I made a few simple changes.


1- Slit the front of the top down the center.  
2-Attached a length of contrast lace to the bottom of the sweater. (This particular top had a ribbed section near the bottom,  I aligned my lace with the top of the ribbing). I used a three point zig zag stitch along top and bottom of the lace.
3-Serged the raw edges.
4-Turned the serged edges under (1/4"). 
5-Stitched down the turned under edge.
6-Added a few decorative buttons to one side of the cardigan (not functional...the top is still too tight to actually close, but looks great belted or over a tank).


This was a really quick and easy refashion. It turned something in the back of my closet into something that I actually want to wear.

Like I mentioned earlier, I'm hoping to have this be an ongoing (but regular) series throughout the year. If any of you have projects that you'd like to share as part of the series, let me know, and I'll consider them as a guest post.

Don't forget to enter the My Memories Giveaway.


Monday, November 21, 2011

Lace Leather Cuffs


In my last post I mentioned that I'd been sewing quite a bit for my craft booth, well I thought that I'd show you a bit of what I've been working on. I've had some of my leather coil bracelets for sell in the booth, and wanted to come up with a few different styles. I used the same basic technique that was used on the faux leather and lace belt to sew up these little girl lace cuffs.  


I also created a few more basic bands with some contrast stitching.  I love the bracelet in the front, the leather was so rich that I couldn't bare to cover it in lace or slice it up.


If you're looking for a really quick holiday gift project this is it. You can find my tutorial for leather cuff bracelets here, and my leather coil bracelet tutorial here.

Thanks for reading.


Wednesday, October 26, 2011

Lace Belt Tutorial


Last week I showed you how to make the lace embellished top or tank.  During the photo shoot I accessorized it with a lace, faux leather, and ribbon belt.  Although the belt is not a top in and of itself, I think that it can do a lot for a basic top.  Today I'll show you how I made my belt.


Materials: Faux Leather or vinyl, a yard or so of satin ribbon, around a yard of lace, leather punch, sewing machine, and fray check

To begin you will want to cut a strip of leather, and one of lace, that are as long as your waist plus six inches.  I cut my belt material to be about 1/2" wider than the width of my lace. Once your materials are cut you will want to center your length of lace over the belt material.  You can pin along the length to secure the two layers.  I then machine stitched down the length of the belt.  The first rows of stitching were about an eighth of an inch from the edge of the lace.  I then stitched around a quarter inch inside the initial rows. The placement of your machine stitching should be determined by the shape of your lace.  I recommend using a lace that doesn't have much of a scalloped edge to avoid the edges from pulling away from the material.

I used a regular sewing machine needle on  my project, but a leather needle or heavy duty machine needle would worker on thicker or hard to work with material.


Next fold over the ends of your belt by two inches.  Pin them in place. Stitch around the entire perimeter of the tab (see image below).


You will next want to mark where you would like the holes of the belt to be punched.  I put three holes each 1 inch apart, the first hole being 1/2" away from the edge of the belt ends. You only need two holes on each end, but adding a third allows you to adjust the belt width a bit more (great for when you are wearing the belt over multiple layers).


Now cut a length of ribbon that is long enough to tie either in a bow or a know.  Angle the edges  of the ribbon and apply fray check to prevent fraying.

That's it.  I can't wait to make more of these belts in different colors and widths.

I'll be linking here.

Thursday, October 20, 2011

Top-toberfest: Crocheted Lace Embellished Top


Source: modcloth.com via Tricia on Pinterest


I love all of the lace embellished tops that I've seen around lately.  Lace is so feminine, and dresses up any outfit.  I picked up a plain tank that was on clearance at Wal-mart, and purchased some crocheted lace at a little local gem of a fabric store.  The lace was only a dollar a yard! While I'm not one to sport a tank on its own, I love to layer them under cardigans or over a longer sleeved shirt.


Want to embellish your own tee or tank?  You can find the full tutorial below.