Search This Blog

Showing posts with label kids clothes. Show all posts

Tuesday, September 23, 2014

Girl's Skater Dress with Lace Overlay


This may be my favorite project of the year.  My niece was having her birthday, and I thought she deserved a dress of her own.  So, I set out designing an age appropriate semi formal dress.  I had this beautiful lace that I bought from Fabric.com, and had intended to use for scarves, but it just wasn't the right weight for scarves, so it became a lovely lace overlay for a skater dress.

The pattern is self drafted, and I used a half circle skirt for the skirt of the dress. I've been hanging onto an oversized lavender zipper, and it was the perfect detail for the back of the dress.


Unfortunately, I didn't factor in enough seam allowance to account for the structure of the lace.  I ended up haven't to make the seam allowances quite a bit larger, which made the bodice quite a bit smaller.  Unfortunately, the dress didn't end up fitting my 10 year old niece, but fortunately, she has two younger sisters, and it fit her petite 8 year old sister perfectly.

I'm glad that someone gets to wear it, and I just might have to make myself a matching dress.  It's just too cute.

Friday, August 22, 2014

Toddler Swimsuit


Summertime is fading, and to be honest, I'm pretty sad about it.  Normally I'm ready to welcome in cooler weather, but this year my oldest will be entering kindergarten.  It will be a new phase of life for our family.  Our schedules will never be the same.


In an attempt to make the most of the remaining summer, we hopped in the car a few weeks ago, and had a big summer road trip.  We started out camping at one of our favorite lakes, and ended up spending some time in the sand and sun in California.  With all of the swimming and sunshine, a second suit was in order for August.  


I had purchased this adorable swimsuit material about a year and a half ago, and finally put it to use.  I absolutely love the little lobsters.  The red athletic knit for the rash guard was purchased at Wal-mart of all places.  I used a combination of the knit and the swimsuit fabric for the hat.  My little Gus and an anything but little head, so having a nice knit on the sides provided the stretch that his head needed.

The bucket hat was made using Abby's (Sew Much Ado) free pattern.


Thursday, April 18, 2013

Faux Peter Pan Collar Embellished Onesie


I had a few of you ask about the shirt that went along with my niece's birthday outfit.  I did make embellish the shirt, but didn't sew it from scratch.  Embellishing is my favorite approach to a top.  

First I started with a 24 month size onesie.  They can be hard to come by, but I've picked some up at Ross Dress for Less, and this particular one my mom found for me.


This onesie (which I love for girls in skirts), has a super simple sparkly faux peter pan collar.  You only need a few basic supplies:

1-Scrap piece of knit fabric, mine was a piece of dance knit that I use for super hero cape appliques.  
2-Heat and Bond fusible web, sewable bond
3-Press Cloth
4-Iron/sewing machine
5-Buttons
6-Scrap Piece of paper, and a pencil

First off, you'll want to make a template.  Start by placing your scrap piece of paper over top of the onesie.  Feel your way around the neckline, tracing the basic shape.  Follow the neckline all of the way up to the top, extending about an inch underneath the envelope closure.

Once you have your basic neckline shape, fold the paper in half, at the center point of the neckline.  Sketch out your basic peter pan collar on one side, add a mini placket if you'd like, and cut.  With your template folded in half, it should be cut symmetrically.


Once you have your template, transfer the shape to the paper side of your fusible web.

Iron your fusible web to the back side of your knit material.


Once your fusible web has cooled, cut out your collar. 


Position your collar on the outside of the onesie, matching up center marks (look for the tag). Use a press cloth to prevent any foiled knits from melting, and adhere to the onesie according to manufacturers directions.

Make sure that you are adhere the collar under the envelope sleeve as well.


 Once adhered and cooled, stitch 1/8" away from the outside of the collar.  If you are using knits, you should not have to worry about finishing off edges.  A straight stitch with a ball point needle will do the trick.  Add a couple of matching buttons to the faux placket, and you are done.


Here is a look at the tips of the collar that hides under the envelope sleeve.  I like the collar to extend right up to the top of the shoulder, that way it doesn't peek out when the shirt is being worn.

Obviously, you could use this technique with any shirt, it doesn't have to be a bodysuit.  You could either extend the collar up to the shoulder seam, or create a narrow band to extend around the back of a crew neck top.

There you have it.  A super quick embellishment.  It adds just a bit of sparkle, and is still wearable.

Tuesday, November 27, 2012

Personalized T-Shirt and Cape

I hope that you've all enjoyed the past week, wether or not you were stuffing your face with holiday foods.  Things are going well around here.  In the time since my last craft fair I've been able to spend a little time catching up on projects. (I signed up for another fair this weekend, so the catching up didn't last long).

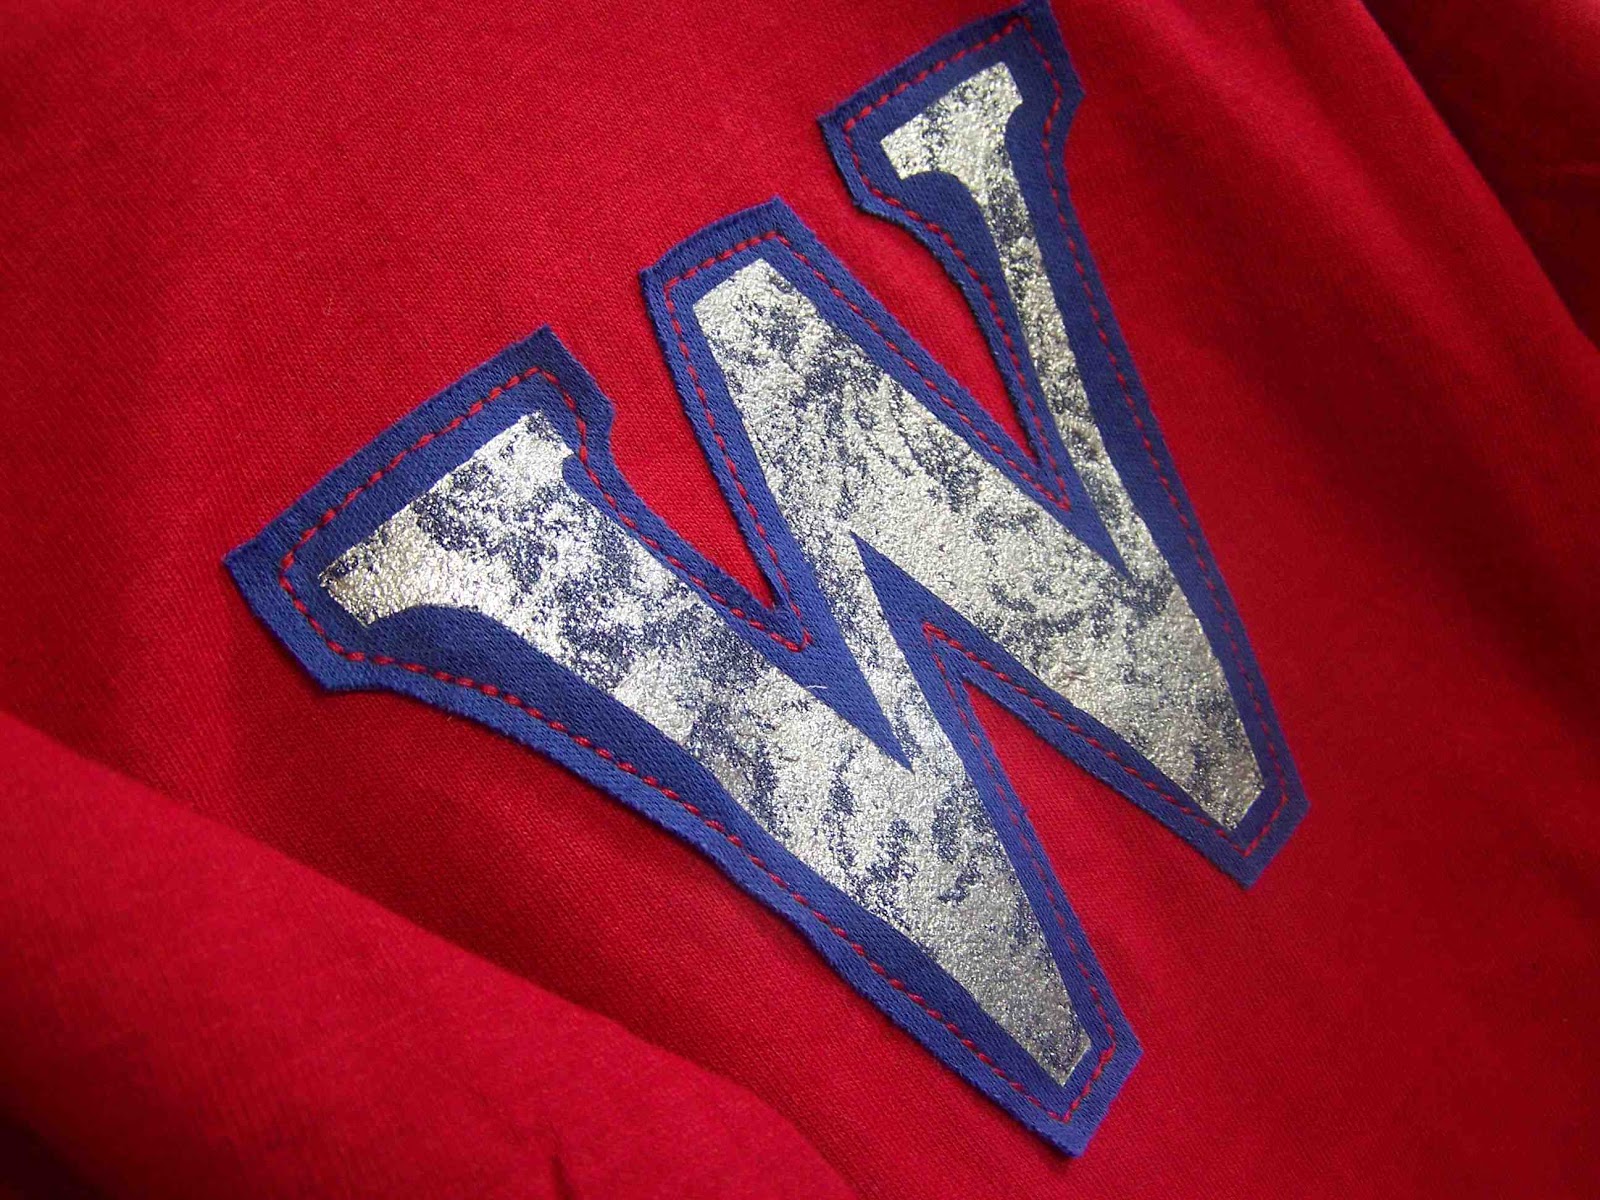
My cousin asked me to make a custom t-shirt for her youngest son.  Apparently, the only thing that he has on his Christmas list is a shirt with him first initial on it.  Isn't that awesome?  Clark's list grows daily, and I fear he'll be horribly disappointed on Christmas day, Wylie however, will probably be perfectly content with him awesome new "W" shirt.


I bought a basic long sleeve shirt at Wal-Mart, and turned to my trusty x-acto knife and freezer paper to make a stencil.  I stenciled a basic serif "W" onto some blue interlock knit.  Once the paint was dry I adhered wonder under to the wrong side of the knit, Trimmed the blue knit to leave a small border around the stencil, and appliqued the letter to the shirt.  Pretty simple.


I used my Super Hero Cape pattern to make him a matching cape.  Initially I wanted to design something more elaborate, but my cousin insisted that all he wanted was a W.  I actually love how both pieces turned out.  I think that the metallic paint, and shiny knit, do a great job of creating a bit more visual interest.

So, I'm totally fine with boys wearing metallics.  Am I alone in this?  Do you think it's okay?

Should you want to make a similar project, here are a few helpful tutorials to help you along the way:

Appliqueing with Knits
Sewing Straight Lines
Freezer Paper Stenciling
Super Hero Cape Pattern

Friday, October 19, 2012

Interactive Moster Tee By Stacey of Boy, Oh Boy, Oh Boy

I'm thrilled to have our Stacey of Boy, Oh Boy, Oh Boy, as our guest blogger today.  She's the mother of, you guessed it, three boys.  Her blog is filled to the brim with great boy projects, activities, and mother approved boy books. The best part about her projects is that they have the boy in mind.  Her projects are fun to view, and even more fun for the boy receiving them.  If you're the mother of a boy, be sure to stop by her blog.  She's very clever, and I'm so happy to have her sharing today's project.

Hi there! I'm Stacey and I blog over at Boy, Oh Boy, Oh Boy! I'm very excited to be here to share for Toptoberfest.  With three boys running around, most of my sewing falls into the boy category.  I've found that the secret to spicing up their wardrobes and convincing them to wear the "mommy made" clothing, is a variety of t-shirts.  And if the boys get to pick the themes, all the better.  Star Wars, vikings, ninjas, and personal jokes all end up in the laundry time and time again. 


Today I'm sharing my tutorial for an interactive monster t-shirt.  Post naming, I'm thinking I should have gone with "perpetually changing monster t-shirt" or something along those lines but while I've gotten the hang of sewing, clever t-shirt names allude me.  Regardless of what you call it, it's sure to be a hit with your little one.

Supplies:
t-shirt
wool felt scraps (I prefer 100% wool.  It tends to be more expensive but washes with much less pilling)
Velcro
Heat and Bond or other fusible interfacing
coordinating thread

Step 1:  Cut pieces from wool felt.  Before cutting the body, eye stems and horns, follow package directions to apply fusible interfacing.


Step 2:  Cut small squares of interfacing for the eyes and mouth pieces.  Iron on per package instructions.  When you are deciding on monster "accessories" keep in mind that you'll want at least two different color combinations of each facial feature in order to mix and match. The boys helped me to choose which colors and mouth features they wanted for their monsters. I find they are immeasurable more excited about a piece of clothing if they get to make choices during the project.


Step 3:  Iron the body, horns, and eye stems to your shirt per the interfacing package directions.


Step 4:  Sew around the edge of each piece in order to applique it to the shirt.  For the eye stems, I made three rows of stitching.


Step 5:  Cut a positive/negative piece of Velcro for each facial feature and each place where you want it to attach.  Sewing a rectangle around the outside edge, attach the all of the positive pieces to the monster body and the negative pieces to each "accessory".


That's it!  You are now able to mix and match to create a new monster each time you wear it.  One note:  if you have a clothing sensitive kinda kid (like my middle one) you may want to be sure they wear an undershirt underneath or place a piece of fusible-cut away stabilizer behind the shirt when you sew on the Velcro pieces.


Here's just three of our monstrous creations.  My oldest two thought this was such a great idea, I've been commissioned to sew two more.  Next time around we'll play with the body shape.  Personally, I've always been partial to the "Monsters Inc." monster type.


One word of warning, the line between the monster's facial features and one's own, may begin to become confused.


Here's hoping your little one has a better monster face than mine.  Maybe he thought I meant he was supposed to make the face he makes when he sees a scary monster.

Thanks for having us, Tricia.  The boys and I would get a huge kick out of seeing your monster shirts, so please feel free to stop on over and share if you decide to make one.  Have a great day!


Wasn't that great!  What little boy wouldn't love getting dressed in the morning, when it involved creating a one of a kind monster face.  Love it!  Thanks Stacey for sharing your great project.

Thursday, July 5, 2012

Worn/Stained Clothing Up-cycle


Having two boys in a row has been nice to our pocket book.  We haven't had to build a wardrobe for Miles completely from scratch.  Aside from a few onesies with mustard yellow stains, most of Clark's baby clothes are still in great condition.  Unfortunately the clothes that Clark is growing out of, haven't faired as well.  Boys get bigger, and clothes wear out sooner.  I was about ready to chuck a pair of too short, holey kneed pants, when I had this revolutionary idea.  Turn the pants into shorts.  I know, it's brilliant.  Who ever thought of such a thing (please sense sarcasm).  

I grew up wearing cut off jeans during the summer.  I can't say that I was ever thrilled to wear cut-offs, but I did it none the less.  As a mother I like my kids to look somewhat presentable when we are out in public, but when Clark is digging holes in the back yard, and looking for dinosaur bones, cut-offs are quite fitting. 


So, I took that old pair of pants and cut them off. (Rotary cutters are great for that)


Then, in an effort to control the ridiculous amount of fraying that occurs with cut-offs, I stitched a few rows of contrast stitching along the bottom of the shorts.  They'll still fray, but only up until the stitching lines.  I used a lengthened triple stitch; it makes the stitching a bit more visible.

Clark really wanted red stitching, but the only red stitching was along the bottom.  It looked a bit out of place.


 I had a fantastic art teacher in college that had several one-liners that he'd often repeat to us when discussing our artwork.  One of his famous phrases was "If it looks out of place, add more of it".  

So I added more of it.  I added some contrast stitching on the coin pocket...


...and along the back pocket...


 ...and I couldn't forget the tag.  

They look better, still like cut-offs, but a bit better.

My favorite part about this project was Clark's reaction.  He was absolutely amazed that I'd turned a pair of pants into shorts.  He's asked me more than once how I did it.  I tell him that it is just one of my many mom super powers.


Along with the pair of holey jeans, we had a stained shirt that I figured couldn't be passed down.  I was about to chuck it as well.  I know, it sounds horrible, but I'm feeling overwhelmed with STUFF lately.  Anyway, I didn't throw it away, I cut it apart.

I've always loved the banded stripes on this shirt.  It reminds me of clothes that I wore as a little girl.  So, I saved the stripes.


I added some fusible web to the back of the knit fabric, and adhered it to a onesie.

I then stitched around the outside edges with my sewing machine.  I used a basic straight stitch as the knit won't fray.  It's now a super simple striped onesie. I love it, and I love the fact that I was able to reuse something that even I thought was junk.

So, what are your mom super powers, and your favorite ways to salvage damaged clothing?  I'd love to hear.