Search This Blog

Showing posts with label cap sleeve shirt. Show all posts

Tuesday, August 2, 2011

Sewing: Maternity Wear for Summer

I don't know why it's worked out this way, but with both of my pregnancies I've spent my third trimester in the hottest months of the year.  It is difficult to find maternity clothes that are attractive, but it's especially difficult to find maternity clothes that will keep you cool while covered.

I recently converted a pair of old Gap dress pants into these knee length maternity shorts.  I chopped them off, hemmed them up, and added a knit waistband following this tutorial from Grosgrain.


I also made a lightweight knit top that I love.  It has ruching on the sides, and has short sleeves.  I found the slub rayon knit at fabric.com, and only spent a couple of dollars on it.  The shirt is my own design, well actually a combination of a couple of different shirts that I own.  If I had more fabric, I'd sew up a few more to help me make it through the next eight weeks.

It is nice to have some lighter weight options for the summer heat.

Thursday, July 7, 2011

The Pretty Blouse

A couple of weeks ago I made myself a new top from the free Pretty Blouse pattern.  It is a cute little peasant style top that I thought would accommodate my growing belly. It can be found on the Sew Mama Sew website, and is made available by Amanda of  The Modern Marigold.


I used a poplin fabric that I purchased from fabric.com.  The fabric itself has a vintage linen feel to it, but paired with the piping along the front yoke, and the trim around the neck, I feel like I'm wearing my mother's maternity top-which isn't all bad.


The top is light and airy, perfect for summer. I also added a keyhole opening with button closure to the back, but I failed to get a decent shot, so you can just use your imagination.

I apologize for the lack of quality photos.  I've put off writing this post because I've been hoping to have my husband help me with the photos, but unfortunately I'm still dealing with camera issues, and these will just have to do.

So whether you're pregnant or not, the pretty blouse is a great summer top to add to your wardrobe.

Thanks for reading.  I have lots of new projects to share with you....just trying to resolve my technical issues.

Tuesday, April 19, 2011

Shirr Thing for Spring: Day Three-Shirred Cap Sleeve Top


Lazy Saturday Shirt
 For day three of my shirring mini-series, I wanted to share a modified version of a previous top.  Last August I made my first attempt at shirring, by creating the Lazy Saturday T-shirt. I love that shirt, but it needed to be tweaked.  For one, I had to lower the shirring lines, they were a bit too high to be flattering.  I also wanted to crop the sleeves, after all it will be summer soon (I'm hoping), and sadly that trim that adds so much to the top did not stretch, making it a bit uncomfortable now that my arms are filling out a bit.

A cap sleeve is a great option for summer.  It provides needed coverage, but still keeps you cool.  I've had the fortune/misfortune of having the biggest months of my pregnancy  be in the late summer.  When I was pregnant with Clark it seemed impossible to keep cool during July, August, and September.  I'm hoping that this time around this cap sleeve top, along with a few other pieces, will allow me to keep cool while being covered.

For details on how to create the shirred rows below the bust you can see my original Lazy Saturday post.  I did lower the shirred lines to about 7 1/2" below the neckline. Each row is about 10 1/2" long prior to resulting gather.  I shirred four rows, each 1/2" apart.

 I created this shirt from scratch, but I think that adding some rows of shirring below the bust of a loose fitting t-shirt, and maybe some at the small of the back, would be a great way to add shape to a shapeless article of clothing.

To create the shirt I created my own pattern using an existing cap sleeve top.  I added about 1 1/2" to the center fold. Starting with the original measurements  at the center of the bust I tapered out to 1 1/2" at the  hem. I also added about the same measurement to the side seams, tapering out from about the same place.


 Sorry that I don't have any photos of the shirt being modeled, it has been ugly and gray outside, and I can't ever seem to get a decent modeled shot indoors.

Thanks for reading.  Does anyone know of any great sources of stretch trims?  I just ordered a few more decorative elastics, but I'm interested to know what is available out there.

Monday, March 21, 2011

All Tied Up Maternity Shirt


Last week my energy was spent creating this ultra marine maternity top.  I am quite pleased with the way it turned out, and I think that I'll like it even more once my belly is a bit rounder.  I'm still "don't dare to ask" stage of baby bump development.


I drafted the pattern for this top, by altering my basic cap sleeve top pattern.  I ended up adding about 3 1/2" to the length of the shirt.  I also made it so that the sides of the shirt gradually tapered out from the bust line to the hem; I ended up with about an inch and a half added to the sides at the base of the hem. 

To allow for a big round belly, I created an inverted pleat that runs down the center front of the top.  When drafting the pattern for the pleat, I added 3 1/2" to the center fold of the shirt.  This resulted in about seven extra inches for belly growth.  I also added some extra long ties that were attached under the bust.
  
 I wanted the ties to be extra long, because I wanted them to wrap entirely around my body.  Every pregnant woman still wants to feel like she has some sort of shape.  I also wanted the ties to tie in the front.  There is nothing more uncomfortable than a big knot or bow in your back.


 I used a rolled hem on all of the raw edges of the shirt.  I decided to use black thread for contrast, and I am quite pleased with the results.  I still have some things to learn about serging a rolled hem, but all in all I am fairly pleased.

To secure the inverted pleat I stitched the pleat in place along the bust line.  I ended up making about ten rows of stitching, each row was about 3/8" apart (see top photo).  I also added six black covered buttons along the stitched pleat.  I thought that it brought the whole shirt together. The tricky thing about sewing shank buttons onto a stretch fabric like this, especially along the bust line, is that your buttons tend to shift a bit as they conform to the shape of your body.  If you look at the photos with the shirt on the hanger, the buttons look like they are attached straight, but if you look at the modeled photos, the buttons  get further apart as the bust gets fuller.

For this top I used an interlock knit that I picked up at Joann's.  It should be a great top to carry me through the next six months, and help me beat the summer heat.

Thanks for reading.

Sunday, October 17, 2010

Men's to Women's Dress Shirt Refashion


Welcome to Top-toberfest: Day One.  To kick off the celebration I thought that I'd share a tutorial for my recent refashion of a men's dress shirt.  I picked this shirt up at Old Navy a few months ago for ninety-seven cents.  I have been holding onto it hoping to turn it into something great.  I must admit that I am quite pleased with the transformation.

Image Source: Gap Online

While browsing through Gap online I found a few cute tops for inspiration.  These particular shirts don't button all of the way down, but I don't mind that mine does one bit.  I had intended on adding a ruffle, but decided to hold off for a little while.  I kind of like the clean simplicity of the pleats, but looking at these images does make me want to frouf it up a bit.  The neckline and sleeve are hybrids between the two shirts.  All in all I love how my shirt turned out.

The refashioning was a bit involved, but not too complicated.  I ended up removing the collar, adding some back and front pleats, altering the sleeves, and taking in the sides.  I kept the original hem and placket on the shirt.

For the tutorial read more below. To link up your tops in the Top-toberfest Show and Tell click here.

Monday, September 13, 2010

Modified Pintuck Top


I mentioned after making the sunburst top that I had lots of ideas running through my head of how I could modify a simple pintuck.  This shirt is the realization of some of those thoughts.  The top didn't turn out exactly like I'd hoped (namely the shape of the bib), but I really liked playing with this technique.  

The shirt itself is a basic cap sleeve t-shirt (see tutorial here), I then added a panel of modified pintuck fabric, along with a ruffle border and a few simple buttons.  If I were to do it again I would bring in the bib so that it starts closer to the neckline.  I might also add a faux placket for the buttons. Enough of that though, I was intending on this post being more about the technique and less about the shirt itself. 


To create the puckered pintucks I made 1/8" pintucks about 1 inch apart. 


Then I stitched perpendicular to the pintucks in alternating directions. Alternating directions will tack down the pintuck one way, and press it up the other.  It is a super simple and fun way to modify a basic pintuck.  My rows were about 1/2" apart.  If you look closely (which you shouldn't, but now you will) my rows aren't exactly even.  I was lacking patience and consequently perfection wasn't achieved (but it rarely is).  I think that it would be fun to create the rows of pintucks closer together.  I think that this technique could be really sweet on a little girl's dress.  

Check out these great link party spots.


Thursday, September 9, 2010

Cap Sleeve Top Tutorial


Embellished Cap Sleeve Top

Ruffled Petal Shirt

Sunburst Pintuck Top


Handstitched Cap Sleeve Top


Do we remember these little numbers? They were all made using the same basic pattern.  I made modifications to each, but the basic shirt is the same. Today I'm going to give you a tutorial on how to make your own cap sleeve T-shirt using an existing shirt.  If you don't have an existing shirt, then I have included measurements for a size Small/Medium shirt.  You can draw out your own pattern and adjust the measurements as needed.  It is always a good idea to find a shirt that you like for comparison (on fit).

This is a two piece shirt.  There is a front piece and a back piece, making this a great sewing project for those who are afraid to sew clothing or make their own patterns.  If you are afraid to sew with knits then check out these previous posts on selecting and sewing knits.

The cap sleeve shirt that I used for my pattern is a layering t-shirt.  DownEast Basics sells some, but this one happens to be by Apricot. This one I purchased when I was pregnant with my son (it is maternity), I've continued wearing it because I love the length of it.  You can tell that it has seen better days, this was my motivation to try to make one of my own.

If this is the first time you are making your own pattern, then visit this link for some additional information on making patterns from existing clothing.

For the tutorial click Read More below.

Wednesday, September 8, 2010

Hand Stitched Cap Sleeve Top

Recognize the bracelet?  Find the tutorial here.

You are probably wondering how many more cap sleeve shirts I am going to be making, well the answer is-a couple.  This shirt was made so that I could make a tutorial for y'all, but you won't see that until tomorrow.  I keep trying to talk myself into just making a solid and unembellished T-shirt, but there are too many techniques that I want to try.  

I am so inspired by that uber talented Cheri from I am Momma Hear Me Roar.  She does some really adorable handstitching on shirts, hats, backpacks, ect.  I thought that some fairly subtle handstitching would be a nice touch to this top. 


I'm starting to feel the change of seasons here in Idaho.  We are waking up to crisp cool mornings and I know that it will only be a matter of weeks before I'm sporting a sweater everyday.  I thought I'd "autumnize" this warm weather top by playing with a more autumnal color pallet.  I know that the moss green trim probably isn't everyone's favorite color, but I kind of love it. I thought that the muted teal and red thread were a nice compliment to the green and brown fabric.

As far as the actual stitching goes it was all a bit of an experiment.  I was pretty lucky because the brown knit that I was working with is quite heavy and was a nice material to stitch into.  I created the pattern as I went and just kind of eye-balled it.  Nothing is perfect, but I kind of like it that way.  I made sure that I secured the thread with small knots before starting a new section of the pattern.  I hope that by doing so I can keep the thread from shifting and bunching up the fabric.  After I completed the handstitching, I used a fusible interfacing to attempt to secure the stitch work.  If anyone has helpful tips and tricks to stitching on knits I'd love some suggestions.


So what do you think,  hit or miss?  I definitely need to perfect the hand stitching technique, but it was a fun little experiment.  Hop back over tomorrow for a tutorial on how to make this super easy (and extremely versatile) cap sleeve top.  


Check out these great link parties that I'm participating in today.  Don't forget to stop by and check out all of the great Stashbusting September projects at T-shirt Diaries, and link up if you are participating.


Monday, September 6, 2010

~M~'s Shirred Flutter Sleeve Top


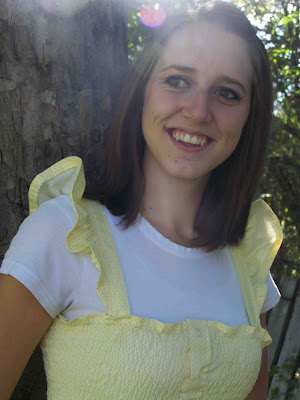
You may remember this yellow button up shirt that I have had stashed away.  It was a men's shirt that I found at Old Navy in the clearance section, only 97 cents.  I finally pulled it out of my stash and put it to good use.  I wasn't sure what I wanted to do with it.  I had thought that I might make a shirt like this with it, but I soon found Disney's tutorial for her shirred shared dress/top, and knew that  I had to make it.  I of course tried to make it my own with a little flutter sleeve.  

I don't have a little girl so I thought that I'd make the top for myself, but the Medium shirt I had on hand just wasn't long enough for my torso, but I knew that it would be adorable on my lil' sister-in-law Emily. She's such a lovely girl, and I was so excited when she agreed to not only take the shirt off my hands, but be my model.  

This was my second attempt at shirring and I think that it went a bit better than the first.  I love how sweet and innocent the top is.  


If you want to make this top for yourself you can visit Ruffles and Stuff for a full tutorial on how to make the bodice.  If you are interested in making the gathered  flutter sleeve then read more below.

Monday, August 16, 2010

Petals, Ruffles, and Lace: My Super Girly T-Shirt


Here it is, my version of the Petal T-shirt from Ruffles and Stuff.  I love Disney's colorful take on the shirt, but I chose to go monochromatic on this one.  I made the shirt along with the embellishment, but you could easily add the petals, ruffles, or lace to an existing shirt if you choose.  I used the same pattern that I made for my cap sleeve T-shirt from last week.  I did make a couple of modifications, and will probably make a couple of more before I do a tutorial on the shirt itself.  

Petal T-shirt from Ruffles and Stuff
Want to make a Petal T-shirt of your own?  Visit Disney's blog for a complete tutorial.  I added a couple of my own touches, but the process is basically the same.


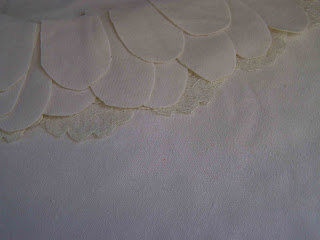
I originally considered doing all of the petals out of lace (which I think would still look great), but I ended up just adding a base layer of lace petals.  I cut the lace into petals by following the natural arc of the scalloped lace.  


I then arranged my petals from the same fabric as my shirt.  I had two layers of fabric petals, with the bottom layer being slightly larger than the top petals, and slightly smaller than the lace petals.


After I had an arrangement of petals that I liked I stitched about 1/4" from the edge of the neckline. 


Then I lifted up the top layer and stitched down the middle layer of petals. You could choose to attach the petals one layer at a time, but I didn't want to have to reposition all of the petals once I found a layout that I liked.  
                                   

Once I had stitched around the edge of the petals I had a feeling that I was going to be repositioning my petals every time I wore the shirt.  I decided to stitch down the center of the petals on the top layer.  I helped anchor down the top layer, and prevented many of the middle layer of petals from moving every which way.  I have a feeling that if the petals weren't made from knit that they wouldn't have moved quite so much.

Next I added my ruffle.  I had intended on putting a ruffle on this shirt, but it happened.  I made a double layered ruffle by cutting two strips of fabric.  One layer is 1" wide, and the other is 3/4" wide.  I stacked them on top of each other and using a long stitch I gathered them.  I then pulled my top thread and ended up with this cute little ruffle. I pinned the ruffle in place and stitched down the center of my ruffle anchoring it at each end with back stitching.  

I'm not positive, but to me it looks like Disney added petals all of the way around her T-shirt.  I just added the petals in the front and ended them at the shoulder seam.  
I'm sitting down in this picture, my posture really isn't that poor.  


I like the way that the shirt turned out.  It is much girlier than I typically wear.  I might just look like I'm wearing a clown costume.  What do you think?  Is the ruffle too much?

It feels great to check a project off of my list.  Unfortunately, probably added more to my list than has been checked off.

Want to know how I made the belt?  Click here.