Search This Blog

Showing posts with label accessories. Show all posts

Thursday, June 26, 2014

Fabric Wallet and Smart Phone Case


I think that I mentioned in the last post that I'd been working on a lot of custom project for family and friends, well here's a glimpse of one of those little projects.

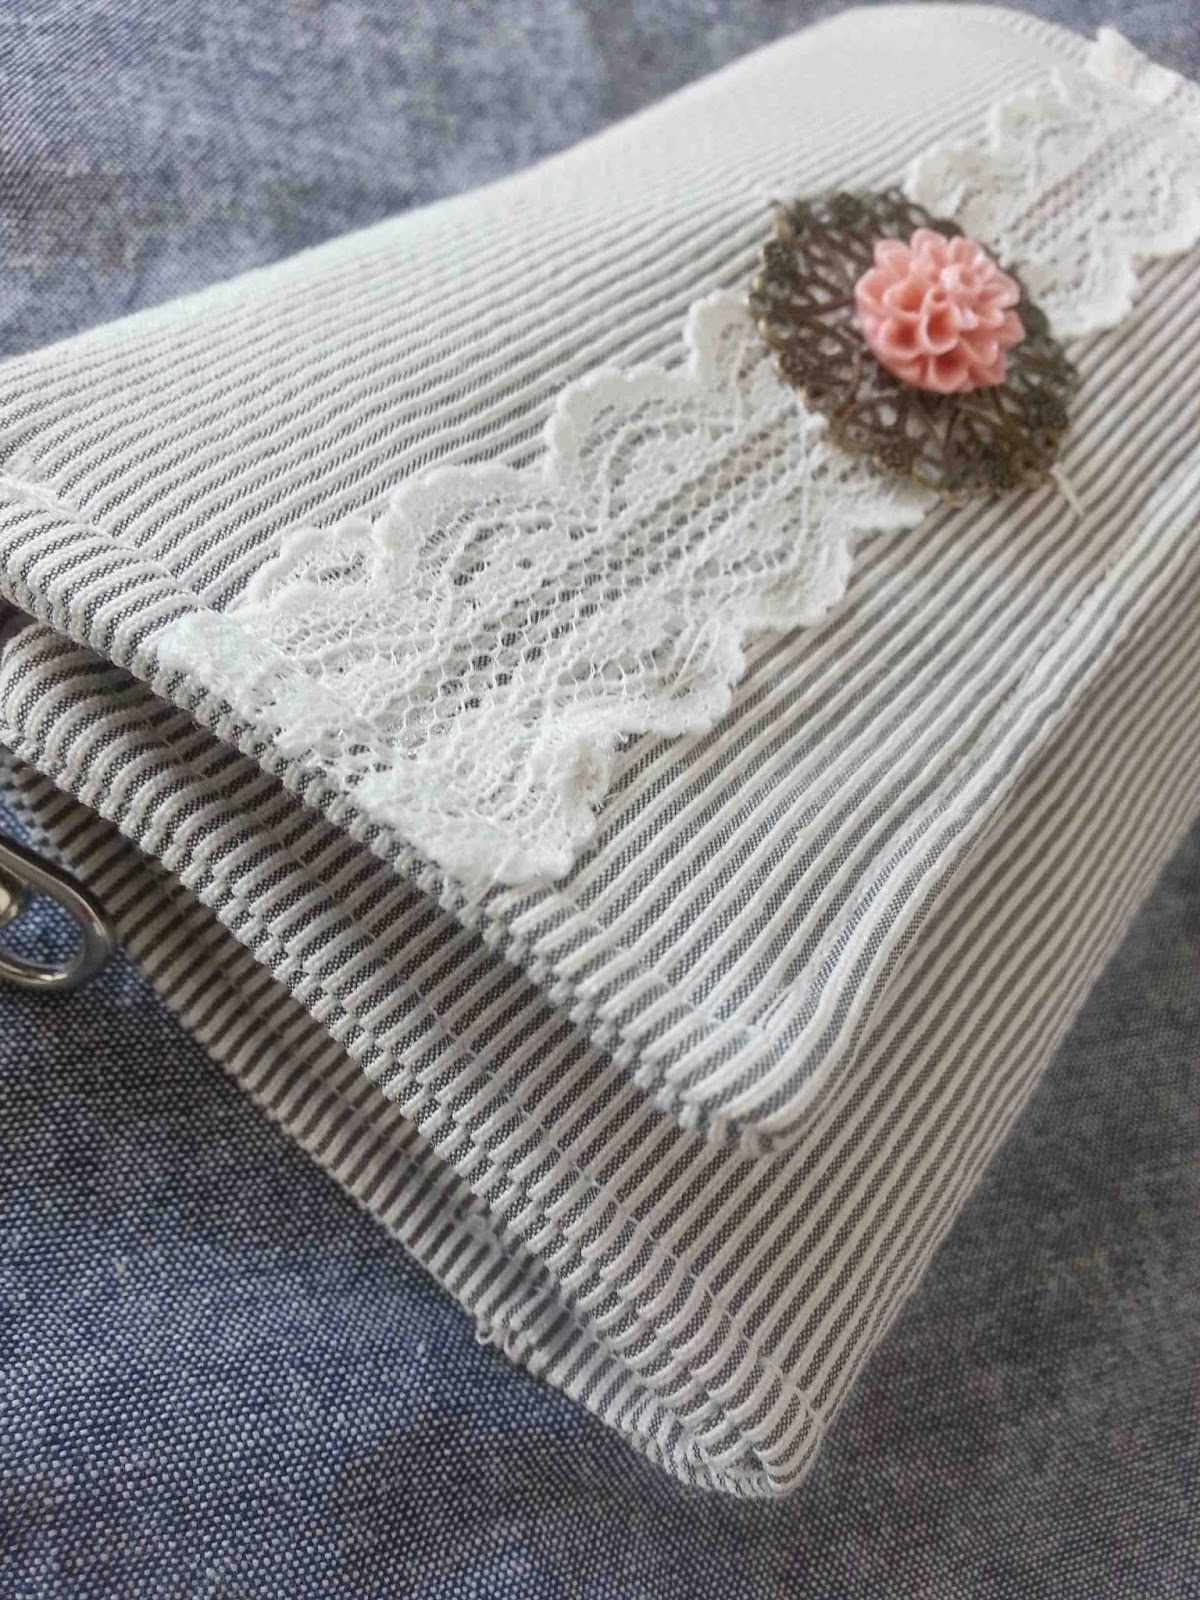
My sweet Mother In Law asked if I'd make her a case/wallet for her new iphone. I've made some basic leather sleeve style cases for ipods, ipads, ect, but I'd never made an official case/wallet hybrid.  So this was a bit of an intimidating project for me.  I knew that to get this project right there would have to be a lot of prep work: measurements, patterns, proper order and assembly, and then hope and pray that I remembered to add all of the seam allowances, and then of course hope that the phone fit in the wallet.


When I finally got over my trepidation, and sat down to make the case, it wasn't that bad. I ended up making a tri-fold wallet.  I added a side zipper pocket for coins, and a small pocket for lip gloss.


 In the middle there is a leather sleeve for the phone, but the phone also fits in on the side pocket, under the cards.

I also added a little leather wristlet, so that she can carry it on her wrists on all of her adventures.  I lace and flower were afterthoughts, the pink zipper felt out of place, so I added more of it.

It's not perfect, and there are things that I'd do differently next time, but all in all I'm pretty happy with the finished product.

Wednesday, March 26, 2014

Wide Elastic and Leather Belt


A local fabric store that I loved, for it's random collection of fabrics and notions, recently went out of business.  I tried stocking up on anything and everything that I thought I might want before they closed.  I'd been eyeing this wide (3 inch) striped elastic.  I loved the look, but didn't have the right skirt in mind. Then it hit me, it would make a perfect elastic belt.  


I dug through my leather scraps, and found some silver d rings, rivets, and a fastener.  With all of my materials gathered, it was just a matter of assembly.


Using my leather sewing needle, I stitched the leather to the ends of the elastic.


Then I punched some holes in some leather strips, added rivets, and attached the hardware to the belt.


 The belt is the perfect width for finishing off a maxi skirt.  

Wednesday, February 26, 2014

Lucky Necklace


I'm not one to get overly festive when it comes to holidays, but I must admit,  I can't wait for St. Patrick's Day. Perhaps it's the corned beef that is calling to me.

To show my St. Patty spirit, I made myself a lucky necklace.  


Chain, jump rings, closure, charms, pliers,  three minutes, and I was done.


A little lucky necklace that I can wear any day of the year.  I am lucky. I never win a giveaway or raffle, but I have been blessed with everything that I need.

Charms purchased here.

Thursday, February 20, 2014

DIY Adjustable Elastic Suspenders


Recently my husband told me that I needed to have a baby girl so that I would stop accessorizing our boys.  I don't really think that there is anything wrong with accessorizing boys,  it is just a bit more limited.

I love suspenders, and couldn't resist making a pair for Clark out of this striped elastic that I found. I made them adjustable, and I made them large, that way he can wear them for a long time to come.


Do you want to make your own? Tutorial below the jump.

Friday, February 7, 2014

Free Pattern and Tutorial: Baby Dribble Bib Bandana


Accessories for little boys are limited, and after three boys, I am feeling the need to accessorize. Pair that with the fact that he's constantly dribbling down his chin, and this is a perfectly satisfying quick sew.


You've probably seen bandana dribble bibs before, but I happen to think mine are the cutest (yep, I said it).  These little bandanas cowl at the neck, and have a fun closure that looks like it's tied.  So adorable. No matter which way the bandana shifts, it still looks cute.


Want to make some?  I've got a tutorial and free pattern for you today! Don't want to make your own?  I just listed a second set of baby bandana bibs in my etsy shop, get them while you can.

Materials
1/3 yard exterior fabric (I used a soft cotton flannel from Riley Blake's Sasparilla line)
1/3 yard lining (I used a sweatshirt fleece, but a knit, terry cloth, or flannel would all work)
Coordinating thread
Seam Ripper
Iron
Button Hole presser foot (optional)
Printable Bandana bib pattern (Personal/Non-commercial use only)

Cut out your pattern pieces, and tape together matching up triangles.

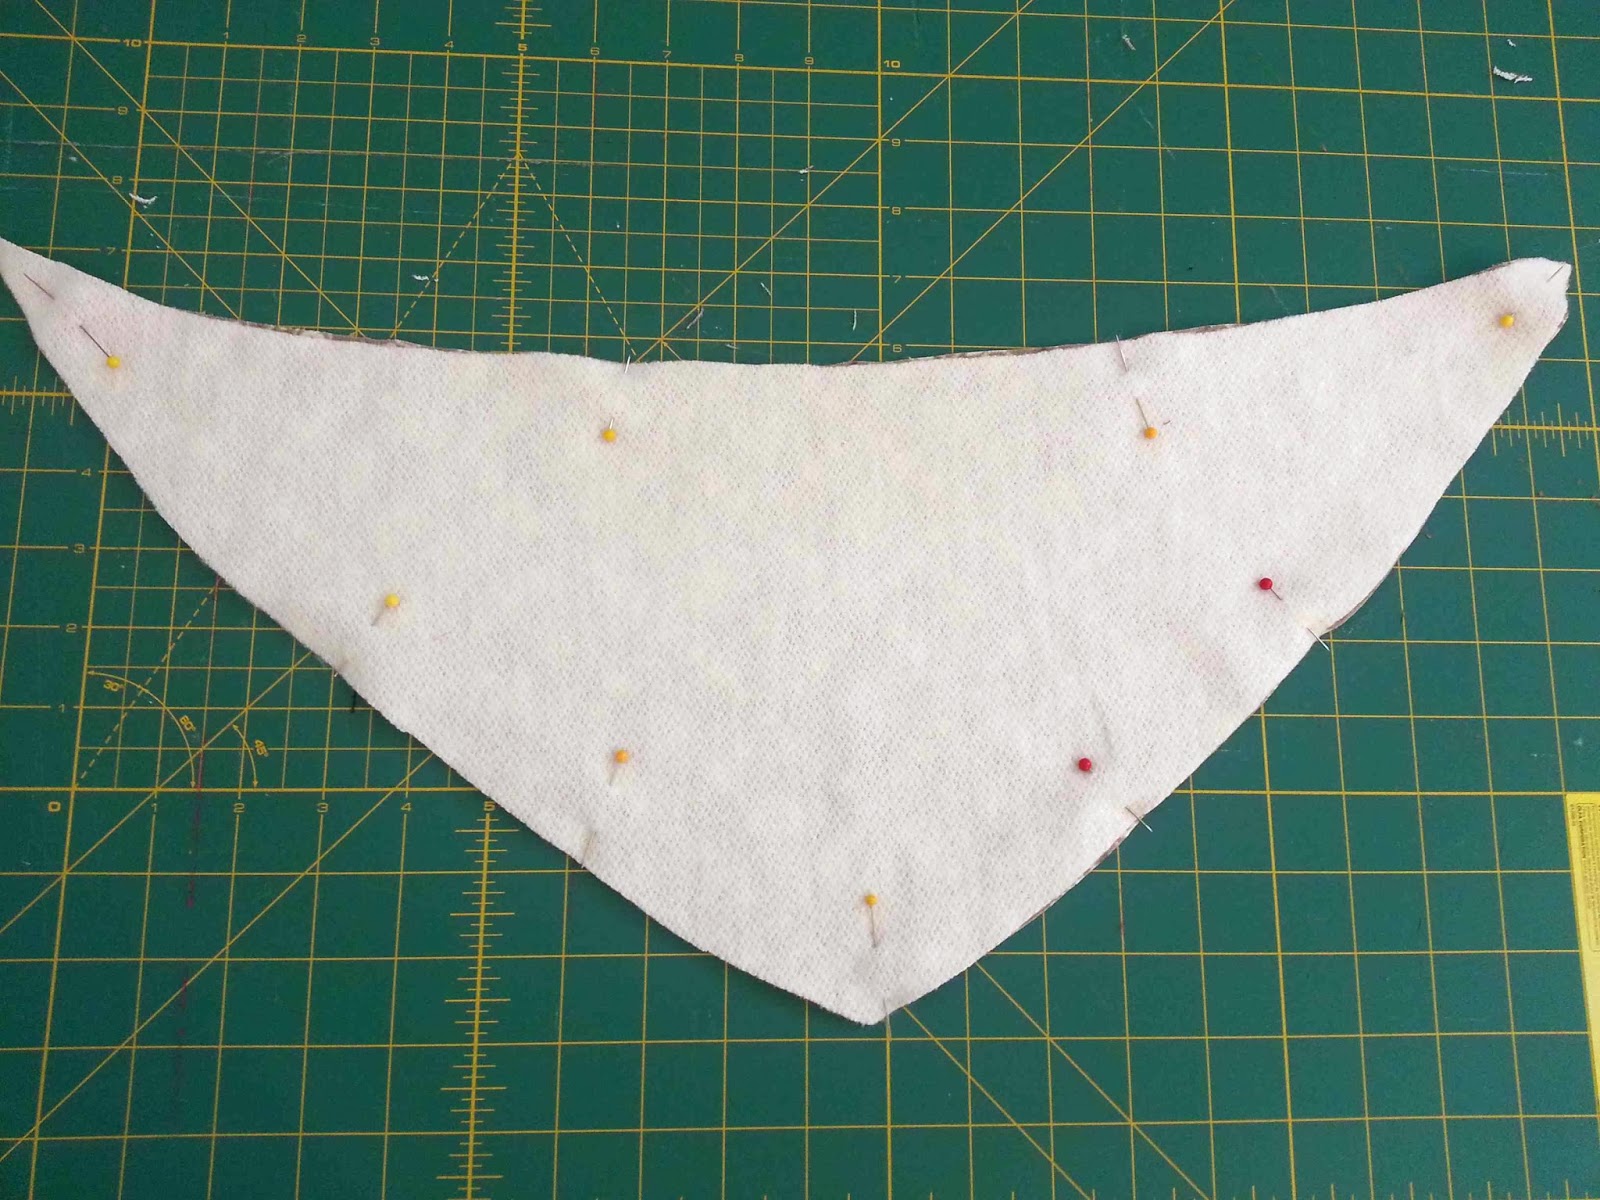
Fold your fabric in half, and align the pattern with the fold to cut out your bandana pieces.  Repeat with lining fabric.


Place your exterior and lining pieces right sides together, and pin in place.  Mark the area to be left open (see pattern) with  a marking pencil, or different colored pins.


Sew around your bandana, starting and stopping your seams according to the pattern markings. The pattern allows for 3/8" seam allowance.  You should be left with an un-sewn area for turning your bandana right side out.

Clip the three corners of your bandana, making sure not to clip through your seam line.  This will reduce the seam allowance bulk, and make for sharper points on the finished bandana.


Reach into the un-sewn portion of the bandana, and pull the material right side out.  Make sure that your points are nice and sharp at the corners.


Press with a hot iron, making sure that the open edges of the bandana are turned inward.


Topstitch around your bandana, 1/4" from the edge. This should secure your un-sewn area.


On one tie end of the bandana, fold the tie in half.  Measure four inches from the tip of the tie and mark.


 Adjust your button holing foot to allow for a 5/8" button.  Attach the button hole foot to your machine, and adjust machine settings. (Read more about sewing button holes)


 Line up your button hole foot with the 4" mark, sew your button hole.


Ah, a thing of beauty.


Use your seam ripper to open up the button hole.


Your finished bandana should look like this.  The tie end opposite the button hole will be pulled through the button hole to secure the bandana.

So cute, right?  If you're button hole is too large, the tie could slip too far, and make the bandana too tight.


 Tie around your favorite little cow poke, and catch those rascally dribbles.  They'll keep your dear ones dry, and make them absolutely irresistible.

Buy your own set of red and grey bandana bibs in my etsy shop (SOLD OUT).  Check out my Dribble Bib-danas for sale in my Etsy shop!

Monday, July 22, 2013

Tutorial: DIY Fold Over Elastic Hair Ties


Fold Over Elastic (FOE) hair ties are everywhere.  You can find them on Etsy, Forever 21, American Eagle, and even Walmart.  They are cute, colorful, won't damage your hair, or leave a crease in your hair when removed.  Unfortunately, they are also horribly overpriced. 

I've slowly been packing up my hospital bag in preparation for this little baby.  The idea of being able to pull my hair up during labor, and let it down afterwards for some photos is super appealing (even though I'm going to be a hot sweaty mess). So, I made up several sets of these elastic, and gave some to my expectant sister in law as well.

Do you want to make some for yourself, and the whole neighborhood?  All you need is some fold over elastic, which you can find at most craft stores. I purchased mine from The Ribbon Retreat.  I was able to pick up several fun colors and prints for much less than at Joann's. You will also need some craft scissors, and a lighter or candle for heat sealing the ends.


So pretty.


Measure out 9.5 inches of elastic, and clip.

You can tie a couple of different kinds of knots, a simple overhand knot will work, and will allow for a little bow like ends...

...or you can tie a side knot.  This is the knot that I see most frequently. Whichever knot you choose, you'll want to keep the ends about an inch long. After you've tied the initial knot, give the tail ends a tug to tighten the knot, and then pull on the loop end to tighten it even more.  Your knot should be quite secure after tugging.


Angle off the tail ends with your  scissors.


Place the tail ends near the flame of a lighter or candle to heat seal the ends.  Sticking them IN the flame is not necessary, or the best idea.  You'll burn the elastic, rather than seal the ends.


Nice and sealed to prevent fraying.


Now gather up your favorite color combinations, and put them together for easy gift giving, and a pretty presentation.  My Sister In Law received a pretty set along with a bottle of dry shampoo, because new mamas don't have time for showers or curling irons.

Thanks for reading.  Love this idea? Don't forget to pin it.

Friday, June 21, 2013

Free Pattern Friday: Crocheted Apple Hat by Micah Makes

Follow my blog with Bloglovin


I love a free pattern, and an easy one at that.  I've been in a bit of a crocheting mood, so I couldn't resist trying out the adorable Crocheted Apple Hat Pattern by Micah Makes.  


It worked up so quickly, and the addition of a simple stem, and leaf really make this hat.  I think it will make an adorable photo prop for a little babe.

You can find the free crochet apple hat pattern on Micah's website, along with several other free patterns.

Wednesday, June 19, 2013

Simple Scrap Headbands


There is something so rewarding about making a project for materials that you have on hand.  Don't get me wrong, I love to go out and purchase pretty fabric for a particular project, but making something out of what you thought was nothing, is pretty rewarding.


I had some small scraps of felt that I've been holding on to.  I don't know why, you can buy a sheet of acrylic felt for 33 cents, but I held on to the smallest of pieces. Thankfully, I did, because I turned them into some cute little bow headbands for some friends.


Aren't they sweet?  I think so. The bows themselves are completely assembled with a glue gun, making them quick and easy.    You can use my leather bow tutorial for reference.  These bows are narrower in the center than the original template. But the basics are the same.


 I also made up a few three inch pinwheel headbands, another great scrap buster. You can find the tutorial for these bad boys on The Mother Huddle.  I love this project.  So simple, so charming, and so perfect for summer.


Friday, May 31, 2013

Pattern Mixed Scarf...your thoughts please


Pattern mixing is a big trend right now, stripes and florals, polka dots and plaid, leopard and stripes. I am a bit on the fence when it comes to pattern mixing.  I think that it can be done well, but that it can also be a bit overwhelming if done incorrectly.  What are your thoughts?  

I was sewing through some of my chiffon, trying to get a head start on all of the craft fair craziness that is bound to be even crazier this year with the addition of another baby.  I had a few short pieces of material and decided to combine them for a mixed pattern scarf.  

I love the polka dots, but am not quite sold on the houndstooth/polka dot combo.


  As I've been piecing these together, I've thought that it could be fun to offer a few different combinations for the mixed pattern lovers out there. Do you have a favorite mixed pattern combo?

Shirred Scarf tutorial