So recently I have been really inspired by all of the freezer paper stenciling that has been going on in blog land. I have seen great results with both paint (yet to try) and bleach. I decided that
bleach would be a great and inexpensive way to start. I found some different
instructions online and gave it a go. Here is what I did, I'll share all of my little learning moments along the way.
What you'll need:
T-shirt (I used an old top that I use for yard work or pajamas-nothing precious), a spray bottle with a fine mist (perfume or maybe an old hairspray bottle),
freezer paper, a design to transfer, and some vinegar.
Now first mistake that I made was in using a cleaning spray bottle instead of a perfume bottle. It didn't have a fine mist resulting in large drops of bleach and it became hard to really control the area that I was bleaching.
Step 1: Find an image that you want to transfer or draw one out yourself. I found this great image on
craftmanspace.com. (I am going back there for more great patterns...there is a really great art nouveau pattern I am loving). I liked the simple image that wouldn't take me forever to cut out. Remember that you are working with positive and negative shapes here. You could go all out with your design, but I am so glad that I did something simple on this project (since it was a bit of a flop).
Step 2: Transfer your image to the paper side of your freezer paper, and cut out your shapes that you want bleached using an x-acto knife.
Step 3: Adhere a piece of freezer paper to the inside of your t-shirt (behind your image transfer area) using your iron (this will prevent the bleach from seeping into the other side of your T, and back up into your image area from behind). I don't have an exact time frame for you on the ironing, just long enough that the freezer paper is stuck on there. Now adhere your freezer paper stencil to the front of your t-shirt using your iron.
Second mistake: I didn't attach a piece of freezer paper to the inside of the T, which meant that I had the same bleach spot on the back as on the front, and the bleach did sop up through the fabric and into the image area.
Step 4: Mix your bleach bottle. Like I said use a fine mist bleach bottle. I have read different ratios for mixing the bleach, but I used 60% water, 40% bleach and it worked fine.
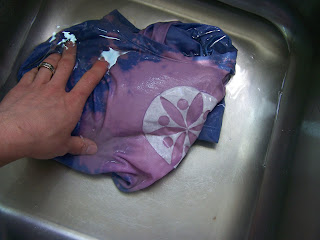
Step 5: Prep your vinegar bath and open your windows. Before you go outside and start spraying away partially fill your kitchen sink with water. I added about a cup and a half of white vinegar (there is nothing special about this amount, I just wanted to be safe). You create a vinegar bath because it is going to set your bleach.
Step 6: Take your project outside and bleach your T. This is kind of obvious, but spray only the areas that you want to be bleached. If there is a border around your image you will probably want to spray around the perimeter so that the border is apparent (unless of course you want a few lost and found edges...those are always fun).
Bleaching action is pretty immediate (we all already knew this from past experiences right?). I waited about 30 seconds and then took my sprayed project back inside to the vinegar bath.
Step 7: Soak your T in the vinegar bath (stencil and all). I soaked it for about 3 minutes and then poured a tiny bit of pure vinegar onto the shirt to make sure. Rinse your t-shirt in water.
Step 8: Remove your stencil. This should peel right off.
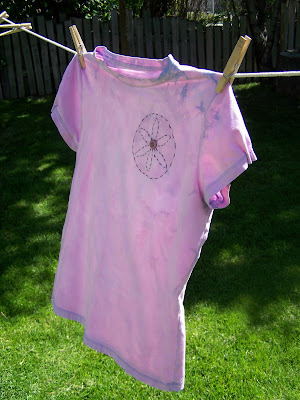
Step 9: Hang your shirt out to dry. I did this merely because it was so stinky and I didn't want it inside the house. You could also throw it in a separate load of wash at this stage, but I let mine do some airdrying first.
I wasn't 100% pleased with the way that my T-shirt turned out so I made a few more alterations-see them
here.
Step 10: Wash and Wear.
Although this project didn't turn out quite as I'd hoped, I will be trying it again. I think that there are so many possibilities. Give it a try. It is simple and inexpensive.


