Search This Blog

Showing posts with label bow. Show all posts

Wednesday, January 8, 2014

Satin Bow and Box Pleat Skirt


Another Christmas project, but this time not for my boys.  I have a sweet neighbor girl that babysits for us occasionally.  The only thing on her Christmas list this year was a skirt.  She loves skirts. I was so happy when her mom asked for help in making her a skirt. I got to use up some purple satin from my stash, and sew for a sweet girl.

This was kind of a last minute project, so I didn't write up a tutorial, though I'd love to make this skirt again, so you might see one in the future.


The skirt hits just below the knee, features two front box pleats, a satin bow on the waistband, and a double channel elastic casing on the back.  I love doing a partial elastic waistband, it leaves the front flat and clean, but is still easy to slip on, and makes for a perfect fit.


I loved the way the satin gathered when making the waistband.


A sweet skirt for a sweet girl.

Wednesday, June 19, 2013

Simple Scrap Headbands


There is something so rewarding about making a project for materials that you have on hand.  Don't get me wrong, I love to go out and purchase pretty fabric for a particular project, but making something out of what you thought was nothing, is pretty rewarding.


I had some small scraps of felt that I've been holding on to.  I don't know why, you can buy a sheet of acrylic felt for 33 cents, but I held on to the smallest of pieces. Thankfully, I did, because I turned them into some cute little bow headbands for some friends.


Aren't they sweet?  I think so. The bows themselves are completely assembled with a glue gun, making them quick and easy.    You can use my leather bow tutorial for reference.  These bows are narrower in the center than the original template. But the basics are the same.


 I also made up a few three inch pinwheel headbands, another great scrap buster. You can find the tutorial for these bad boys on The Mother Huddle.  I love this project.  So simple, so charming, and so perfect for summer.


Friday, November 2, 2012

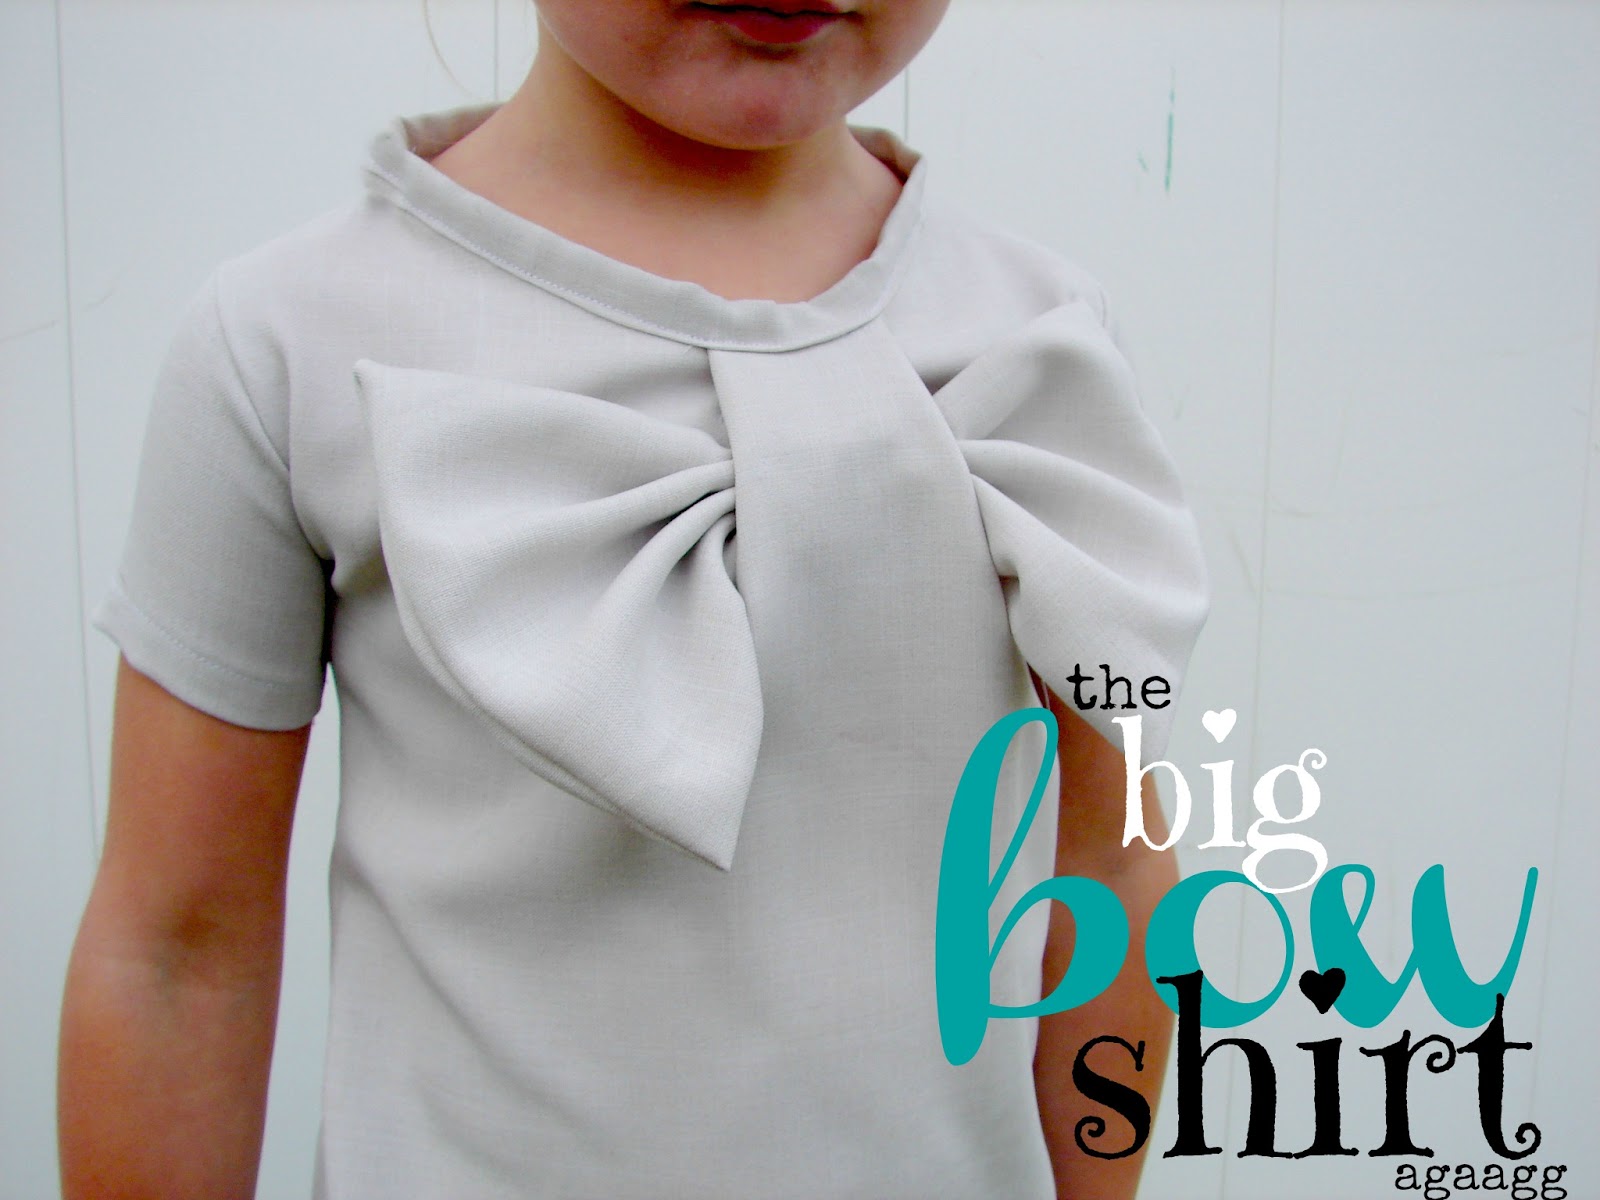
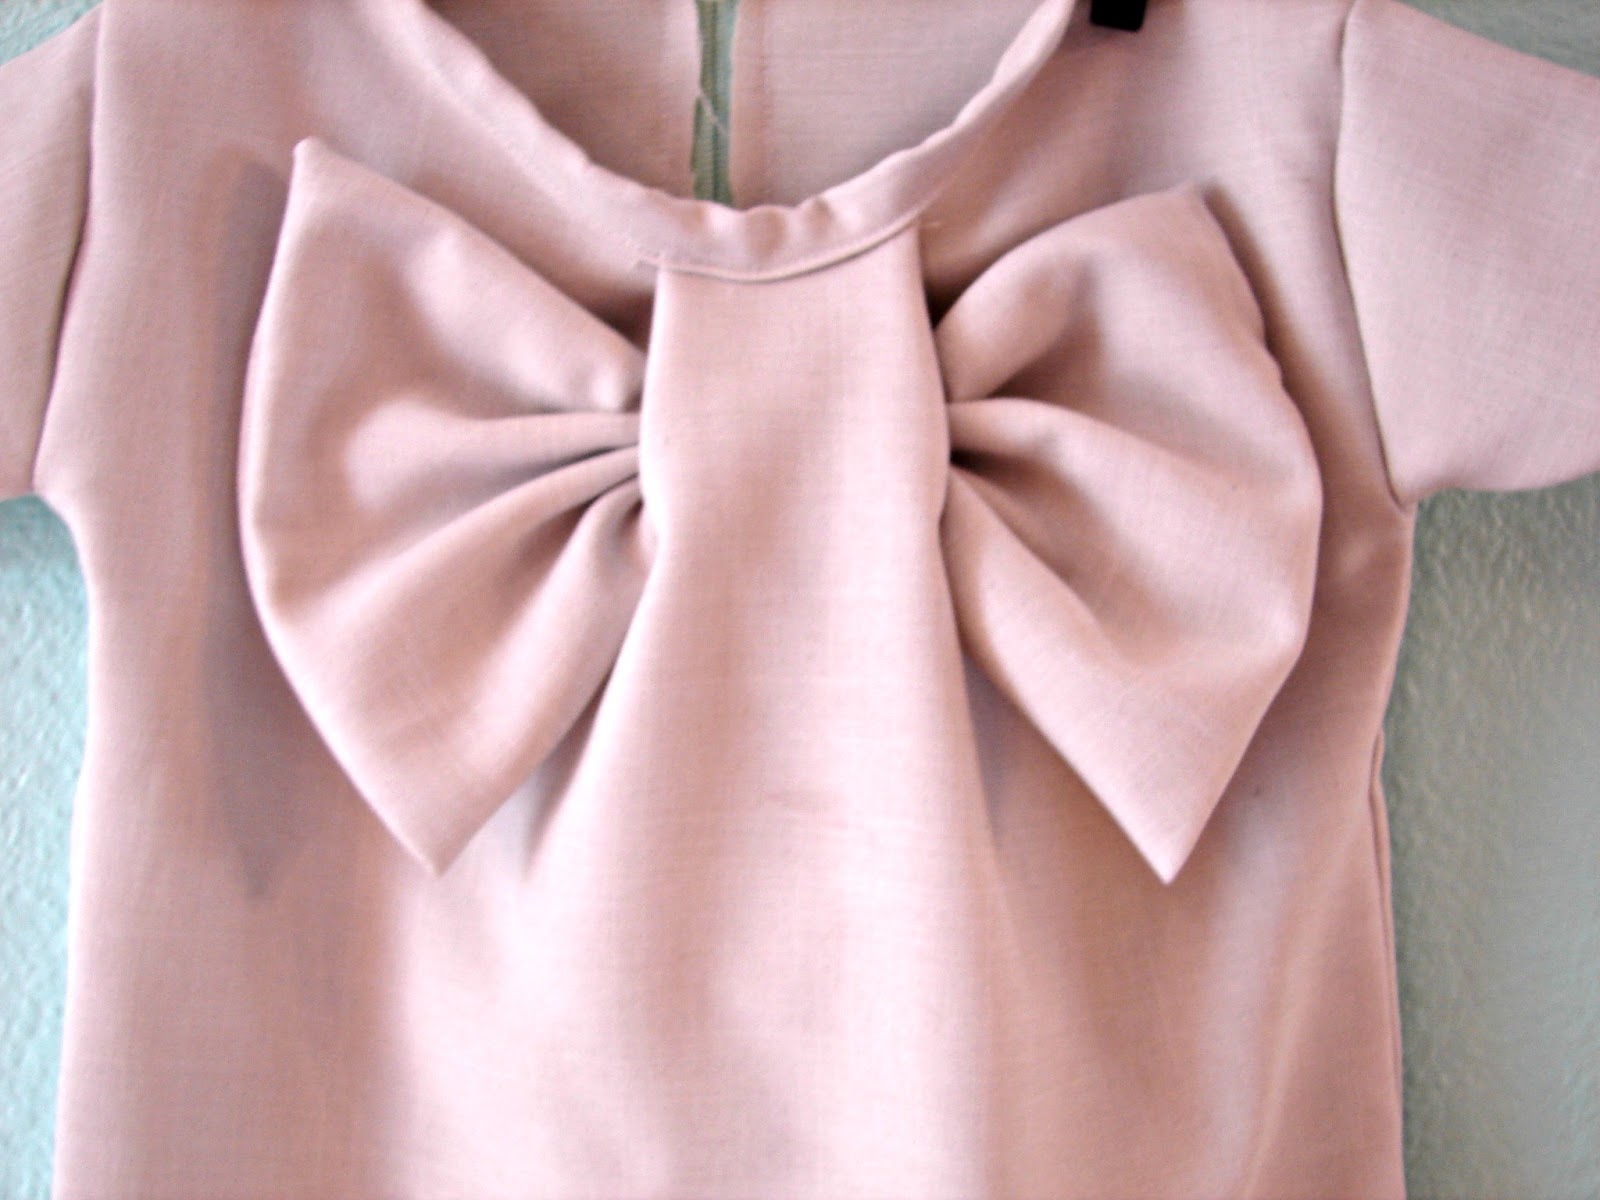
The Big Bow Shirt Tutorial with Kim of A Girl And A Glue Gun

Today we have Kimbo of A Girl And A Glue Gun, she's wrapping up Top-toberfest for us, with an adorable Big Bow Top. I'm sure you all know Kim(bo), from her fun blog.  You've probably seen her in many a craft competition as well.  Who didn't love her winning look from Project Run and Play? Want to know a secret, okay, it's not a secret.  Kim(bo) and I went to school together.  Yep, pretty awesome.  I can drop her name whenever I want to seem like a credible blogger.  She was TA in one of my beginning drawing classes in high school, so more than likely, there are  a few poorly executed figure drawings of her stashed under my bed in my  parent's house.  I should probably clean those out some time. You don't care about that, but you are going to be excited what she's sharing with us. So here she is.

so excited to be here! nothing puts the fire under by bum like a good guest post....so i knew i wanted to try something that i just wouldn't do without proper motivation....

and i have loved this dress from the moment  i saw it on pinterest. something about big bows screams at me.

so i thought i would try to figure it out....and make my own

 I started the shirt like every other made-from-scratch- outfit...
got a shirt that fits and copied it.


 here's the tricky part. the top piece is going to be WAY bigger than the bottom. you cut the back piece to size...and the front piece matches up at the bottom and the sides but the top is drastically oversized. here's a picture of the front piece on the bottom (you may have to squint to see it)


and here's the front piece on top (are you still squinting?)


 you will take the top shoulder pieces and sew them together as normal...this will cause a lot of excess fabric in the chestal area. (i added a little reinforcement around the collar)


 after the collar is reinforced..and the shoulders are sewn...i added sleeves...


 and sewed down the sides and hemmed the bottom (not the collar yet!) you can see all the droopy fabric.

(man...my camera must be dirty. these are all blurry...)
but you take your shirt..and pinch all the excess fabric in the middle and put pins as markers on each side. (these were about 4 inches apart)


 then you get all fancy and add button holes...ignore the mistake that i made on the left....i was just trying to show you that everyone makes mistakes....

 i took a rectangle of fabric and made a decent sized bow...


 then i shoved that sucker in one buttonhole and out the next.


 causes all that excess of fabric to go to the middle...


 but you smoosh it down and pin to the top


 i made some bias tape and ran it the length of the collar


sew it around and realized that it makes it so the collar doesn't fit over my daughter's head. suck.

head to joanns to buy a zipper.


 i snipped right down the back...


 and sewed the zipper right on top. good thing exposed zippers are in style!


i made another scalloped skirt. i'm obsessed. i just can't help myself.....

and i would add a couple little stitches at the corners of the bow to keep it up when your kid is wearing it..
i didn't yet cause i wanted to show you that you could add whatever color in there for a nice pop!
there you have it..a nice big bow. to make any kid feel like a gift!

you can come hang out with me on my blog HERE anytime!

Kimbo
Thanks so much Kim for being a part of Toptoberfest.  I loved that dress when I saw it on Pinterest, thanks for being clever enough to show us all how to do it.  It makes an adorable top.

Wednesday, October 24, 2012

Bow Top Tutorial with Emily of Replicate Then Deviate

I love today's project, and today's guest blogger. Emily from Replicate Then Deviate is about the sweetest blogger out there.  She always takes the time to comment, and is a trooper about participating in sew alongs and challenges.  I'm lucky enough to get to bump in Emily now and again around town, as we live in the same city.  I was thrilled when I ran into her last month at Joann's, too bad it was at the exact moment I was yelling for Clark to quit hiding from me...she pretended not to notice though.

Today she's sharing a sweet bow top tutorial.  I want this shirt for me. 

Hello! I'm Emily and I blog at Replicate then Deviate. I'm super excited to be participating in Top-tober Fest. What a fun series! I'm a big fan of Tricia's blog and even got to meet her. She is fantastic!

I made this bow top for Ansley. I used a really soft jersey knit (leftover from these leggings) and used an existing shirt (that I thought was a bigger fit on her- she's totally in a growth spurt right now)to pattern the body of the shirt. I lengthened the sleeves (the "pattern" shirt was short sleeved) and eliminated the puffs at the shoulder. I also cut a lower wide/soft v neck (more v shaped than curved but doesn't ever come to a point). I also tried out some knit stay tape (purchased from this shop) on the bottom hemline (after reading about it here) and am really happy with how the bottom hem turned out not stretched out at all and with no skipped stitches or anything crazy. :) The hardest part was ironing it on the curly knit. :) Anyway, I started with my top like this (note the neckline is not finished yet):


(not pictured- I cut a strip of fabric 3.5 inches wide times the length of the fabric (about 58 inches. I clipped (with my wonder clips, not scissors) the strip together hot dog style right sides together and sewed down one end and the length of the strip with a narrow width zigzag stitch. Clipped (with scissors) corners and seam allowance to about 1/8 inch. Turned right side out. Ironed. Folded raw edges in a sewed close to the edge.) I clipped the center of the long tube with the sewn edge lined up with the raw edge of the center of the back neckline on the outside of the shirt. Continue clipping or pinning until almost the center (but leave a small gap for the half square knot that goes under the bow (about an inch or two). Sew with a narrow width zigzag stitch.


(not pictured- press the long strip up with seam allowances facing down (towards the bottom of the shirt) Topstitch all the way around the shirt. When you get to the front gap between the long ties, fold the shirt fabric down the so you can topstitch that raw edge down (probably not the correct term) when you're top stitching all the way around the neck opening of the shirt.


Tie the bow and you're done! I'm still thinking about whether or not I should tack the bow down. Ansley loves trying to tie it but some days I just don't want to re-tie it a bunch of times.


After finishing Ansley's and not having enough pink knit leftover for myself, I wondered what this top would look like in a non knit. I was thinking about something lightweight and had a bolt of chiffon that I bought before Joann's moved to my side of town. Tricia posted her Easy as Pie Tank with some great tips for chiffon but I still had a crazy time getting everything to line up properly and not be wavy. I wished I had remembered about this post with more chiffon tips b/c they would've helped. ha. Anyway I used the Colette Sorbetto Top pattern (minus the pleat, which they have a tutorial for but I forgot about it until now when I googled for the pattern link), with a lengthened sleeve based on this sleeve pattern. The side seams and the top seam are french seams (wahoo) and I tried really hard to get a decent bottom hem but it's totally wavy after unpicking it like five times, finding that this method finally worked. I also probably should've ironed the fabric but I was really scared of melting it. Thank goodness the chiffon is so flowy, it kind of hides some of the flaws. I really didn't like it when I was making it and nearly gave up several times. This one is wearable and looks pretty cute in pictures and I almost want to make another but not for a while. :)


I tried three times to get an even strip of fabric for the tie. (hint- don't fold the chiffon in quarters to save time unless you want a really wavy "rectangle"). I finally just eyeballed a tiny discoloration in the fabric and ended up with a strip about 4.5 inches wide by about 58 inches (width of fabric). I do kind of wish the tie was longer but I was done fighting with the chiffon. If I make another shirt with knit or a lightweight cotton I will probably double the length (sew two pieces of width of fabric strips together). After sewing it on the shirt, I didn't like how it stuck out like a reverse collar (like this) so I folded it down (folding the collar part approximately in half) and sewed it down from about 3 inches behind the top of shoulder seam on both sides of the shirt (ie sewn only in the back, starting in the back). You could also try bunching it in the center like this top.


Thank you again for having me Tricia!!


Thanks again Emily.  Be sure to stop by her blog, Replicate Then Deviate, and if you like her project let her know.  Comments are always welcome on this blog.

Monday, October 22, 2012

Frances Collar Tutorial by Katie of Blue Eyed Freckle

Katie's blog, Blue Eyed Freckle, was one of the first sewing blogs that I fell in love with.  She has a very individual style, which can be a hard thing to develop.  She has great refashion ideas, backdrop ideas, and not to mention a fantastic etsy shop where she sells headbands.  The first project I found of hers was the "I Wanna Be a Girl Scout" T-shirt revamp, featuring a fantastic collar, so I'm thrilled that she's sharing a faux collar project with us today!  

Hi everyone! I am Katie Kortman of blue-eyed freckle (blogger and esty-er). I am a mother of 2 (soon to be 3) and wife to a medical student and so.... I like to make it instead of buy it whenever possible. I don't usually do straight copies of the things I see and like, but rather use them as inspiration. Today's top is inspired by the collar of this dress I saw on thumbeline. I love a removable collar, but sometimes its easier to just make a faux one. So if you are ready to jazz up your daughter's shirt in just a few simple steps, keep reading!

Materials Needed:
cotton shirt
material for the collar (1/4 to 1/3 yd should be more than enough)
some pretty, sew-able ribbon (I used velvet)
*optional: more scraps of fabric to make a bow
THIS PATTERN (I made it for sizes 12-24 months and 2T-4T but can easily be adapted)


1. print the pattern and cut 4 pieces. Sew right sides together and make 2 collar pieces. Leave the top (straight) part open (don't sew).

2. turn the two collar pieces right side out and pin them to your shirt. Fold the unsewn part of the collar under, or inward so that it is closed shut as you top stitch the collar pieces to your shirt.

3. Cut 4 pieces of ribbon and top stitch on both long sides of the ribbon, making sure to tuck in the raw edges on the ends.

So quick and now you are finished! A little work make a big impact in this case.  Now, if you want to add a little something more take a look below:
For my older daughter's shirt, I decided it needed something more. So, I added a bow. You can follow my tutorial here if you are unsure how to make one. To apply it to the shirt, I just got out a hand needle and thread and tacked it in several places to ensure it won't get all wonky after being washed (which tends to happen). 

Here are a few more shirt-making or re-making tutorials from my blog. Happy Toptober!
Thanks again Katie. Great project.  Look at those beautiful girls in their tops.  

Thursday, May 5, 2011

Brown Bow and Pearl Baby Booties

Included in the bag of baby shower gifts for my cousin's family, was a pair of sweet and simple faux leather baby booties.  I added a small bow with pearl to the straps of the baby booties. The edges of the upper shoe are pinked for a bit of added detail.

They perfectly match a sweet little dress that I made for their little girl.  Unfortunately, you are going to have to wait to see the coordinating dress, I'm saving it for something special later on in the month.

The booties are a twist from the Reversible Mary Jane Pattern from Sweet Pea Patterns.  Obviously these booties aren't reversible, but I think that they are just as sweet.


One added touch that I really like is stitching the sizing to the insole.  I wish that I had tags and labels for everything that I make, but I'm just not to that point.  Having the size of the shoe will make it so much easier for the new mama.  Thanks to my Brother PC-420 I was able to make it work.

Thanks for reading.