Search This Blog

Showing posts with label upcycled. Show all posts

Monday, June 3, 2013

Baby Hat and Pants from a T-shirt


I spent last week tackling my upcycle clothing pile, which was getting too big.


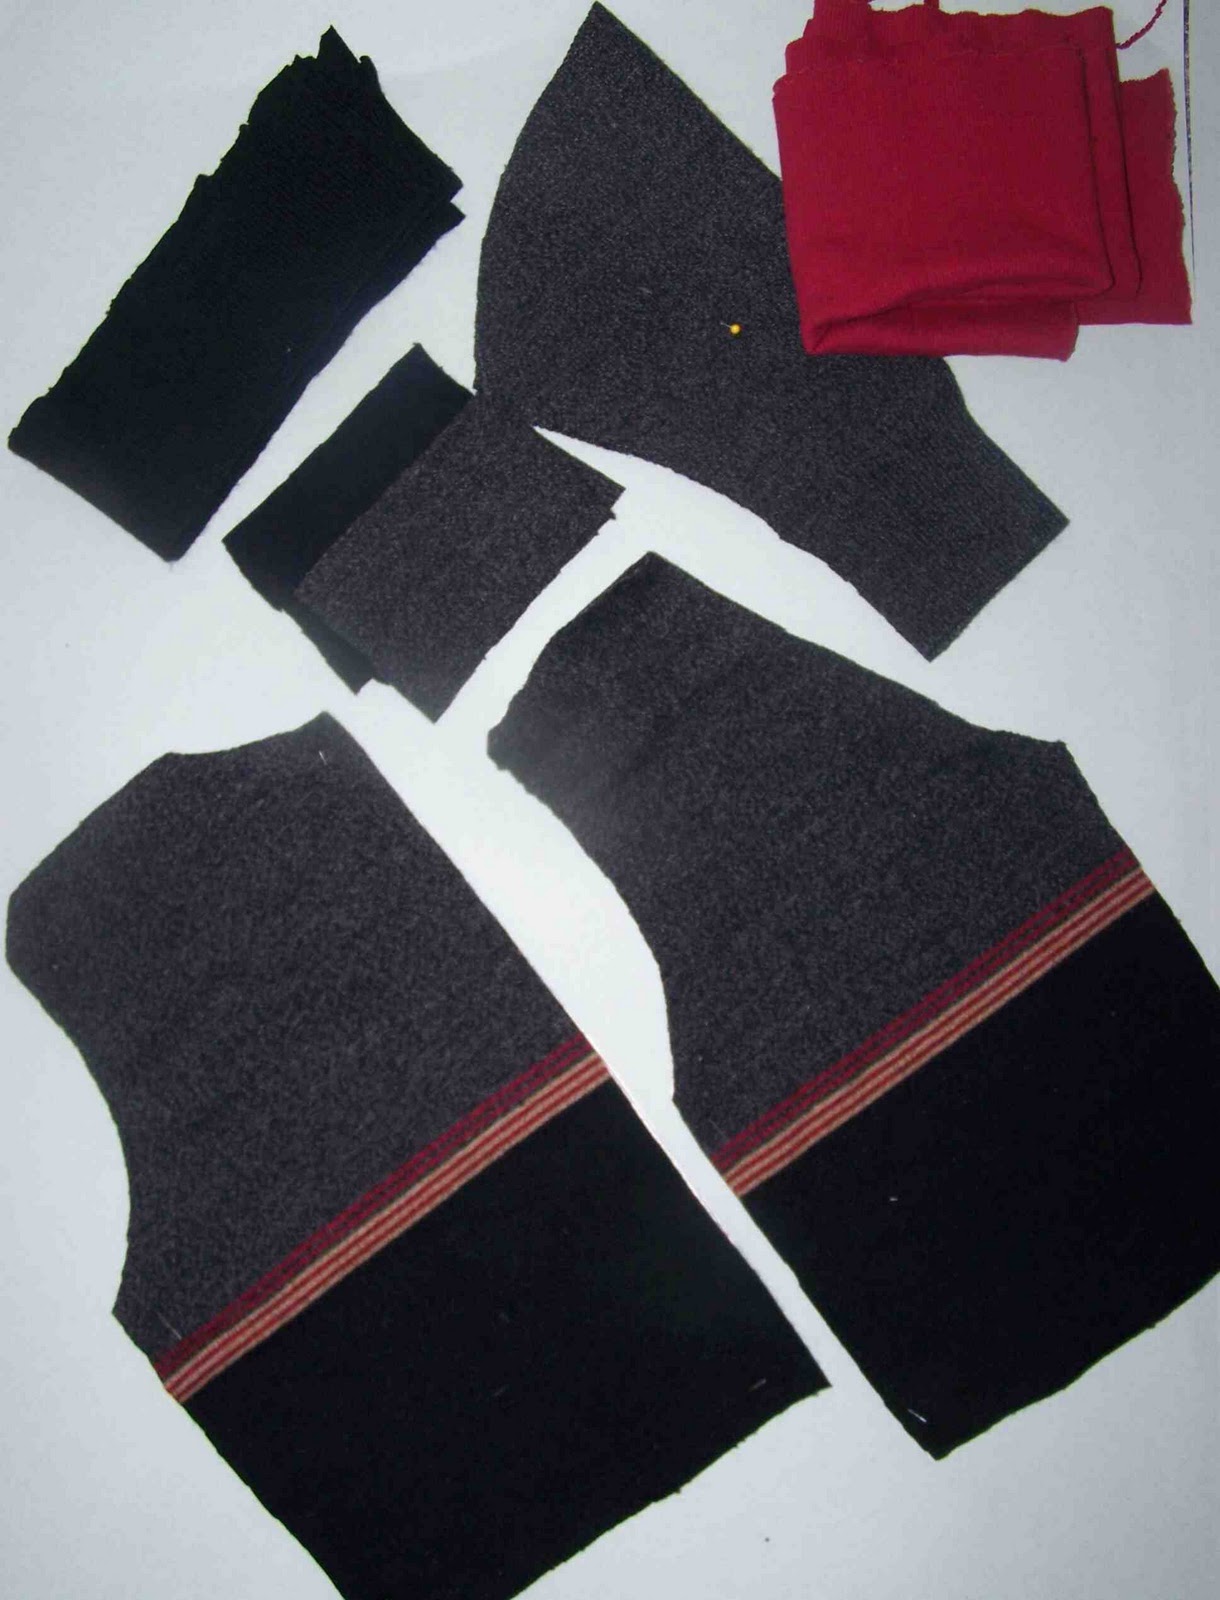
I selected about eight pieces of clothing that needed to be turned into something new, and worked my magic.  One of those articles of clothing was a gray turtleneck that was never worn, but was in great condition.  It became a new pair of baby pants, which happen to be one of my favorite little things for baby boys, and an adorable top knot hat with a Mom Tattoo Applique (another of my favorite things).


For the hat, I printed off Prudent Baby's Top Knot Hat Pattern.  I aligned the original hem of the turtle neck, with the hem line on the pattern.  Cut out the hat, leaving the side seams of the turtle neck intact for the baby pants.


I followed her instructions, minus the cuff on the hat, and the hat was finished in no time flat.  Then, just to dress it up a bit, I added a small  Mom Heart Tattoo Applique.  I love it so much more than I ever did the turtle neck.

 As I mentioned, I preserved the side seams of the shirt, and cut out my infant pants using the existing hem as well.  I added a faux fly, crotch and leg seams, and the casing, and these were done in minutes also.  So easy.  I'm thinking that I need to make at least one more pair of these.  Do you want a tutorial?


Then, just for good measure, I whipped up a Mom Tattoo appliqued body suit to complete the look.

You can find my PDF file applique template here.

Thanks for reading, and I have more upcycled goodness to come.  It was a productive week.


Monday, February 28, 2011

Band T-shirt to Baby Onesie


I've mentioned it more than a few times, but my Sister-in-law is expecting a little girl.  It's their first, so they get to stock up on baby clothes.  My Brother-in-law is quite adamant that he doesn't want his little girl decked out in pink ruffles.  While he was sorting through some of his old t-shirts, he recommended that my Sister-in-law turn one of his favorite band t-shirts into a onesie for their little girl. Neither of us had ever made a onesie before, so it was a bit of an adventure, but we ended up with this.


We think it's pretty cute.  We created a pattern based on a little gap onesie that they already had.  My Sister-in-law is going to make her a matching headband.  I'm sure it's something that her daddy will be happy to dress her in, the only ruffle in sight is a slightly gathered sleeve.

 Thanks for reading.

Wednesday, January 19, 2011

Upcycled Knit Mittens Tutorial


I had a bit of sweater knit left over after my Men's Sweater to Toddler Cardigan refashion.  I am a bit of a fabric scrap hoarder, and had hopes that I could put the remaining bits and pieces to good use. 

I think that I found the perfect project for small scraps of knit: mittens.  It seems that you can never have enough pairs of mittens. Like socks, it seems like they are frequently separated from their other half.  


Read more to learn how to make your own pair of sweater knit mitts.

Monday, January 10, 2011

Men's Sweater to Toddler Cardigan Refashion


So you may have seen a button similar to this image on my sidebar.  It is lovely little thing courtesy of A Beautiful Mess.  Rachel and Elsie are starting a weekly segment called Project ReStyle. So what is Project ReStyle?  You can read their full post here,  but to use their own words, it is "Project Restyle is a just-for-fun creative group focused on ReStyling damaged, unwanted or unusable goods into fresh, beautiful pieces." I love restyling pieces, and I have a heap of unwanted goods that need to be turned into something beautiful. 

You can join in on the fun.  While I'm not sure that I'll be doing restyled projects on a weekly basis, I am going to make an effort to work through that pile that I mentioned earlier.


This men's sweater has been sitting in our basement for some time.  My husband doesn't seem to remember it, and I surely didn't want him wearing it, so I decided to turn it into something sweet for my lil' man.


I'm very fond of cardigans, but Clark didn't have any.  I thought that this sweater could make a decent little cardigan for him.


 I used the same pattern that I created for the Argyle Pull Over that I made in the fall.  I simply modified the pattern pieces, and utilized the built in beauties of the sweater.  I cut the sleeves so that the cuffs were put to their intended use.  I also cut off and saved  the original waistband. It was sewn to the bottom of the bodice pieces, once the seams were sewn.


 I didn't have any ribbed sweater knit, so I just used standard  ribbed knit (unfortunately I didn't have any black or charcoal).

The buttons were plucked off of one of my brother's old suits.  The smartest thing that I did with this cardigan was sew the buttons to the ribbed knit.  No button holes.  I seriously almost attempted sewing button holes through 4 layers of ribbing.  I'm sure that I saved myself lots of button hole frustration, and sweater buttoning frustration for that matter.

I sure do love a little boy in a cardigan. I'm pretty pleased with how the sweater turned out.  In my opinion it was a successful refashion, and it didn't cost me a dime.

One of my goals for this year  is to sew my way through my stash of fabric and old clothing.  You need to get after me if I start showing pictures of new fabrics.  I certainly have enough material to keep me busy for the next few months.

I'll be linking here.

Friday, September 17, 2010

Upcycled Hats from T-shirts


Cheri's Upcycled T-shirt hats seem to be spreading through blogland like wildfire.  Her versions are so cute and I absolutely love all of the little details that she added. When I saw her post I knew that I had to try it out.


So here is my attempt at making the upcycled t-shirt hat.  I think that it turned out fairly well. I wanted to make it to go along with his new raglan sleeve shirt.  I didn't zig zag all of the edges like Cheri, and I don't miss it all that much. I used knit ribbing instead of t-shirt "tape".  It seemed to adjust to the curves well.


I was really pleased that Clark left his hat on as long as he did.  Normally they are ripped off and thrown to the ground in three seconds flat.  Yesterday he wore it the entire time we were in the post office.


After making Clark's hat I started wishing that I had one of my very own.  So I repurposed a couple of shirts and made one for myself.  I used this covered button tutorial from No Big Dill.  For my hat I cut down on the length of the ear flaps (I could have cut them down much more).  My hat strips were about 21" long and the domed piece was 4 1/2" tall, and the middle section was about 21/2" tall.  Visit Cheri at I am Momma Hear Me Roar for her full tutorial.

Check out these great link parties.

Thursday, September 2, 2010

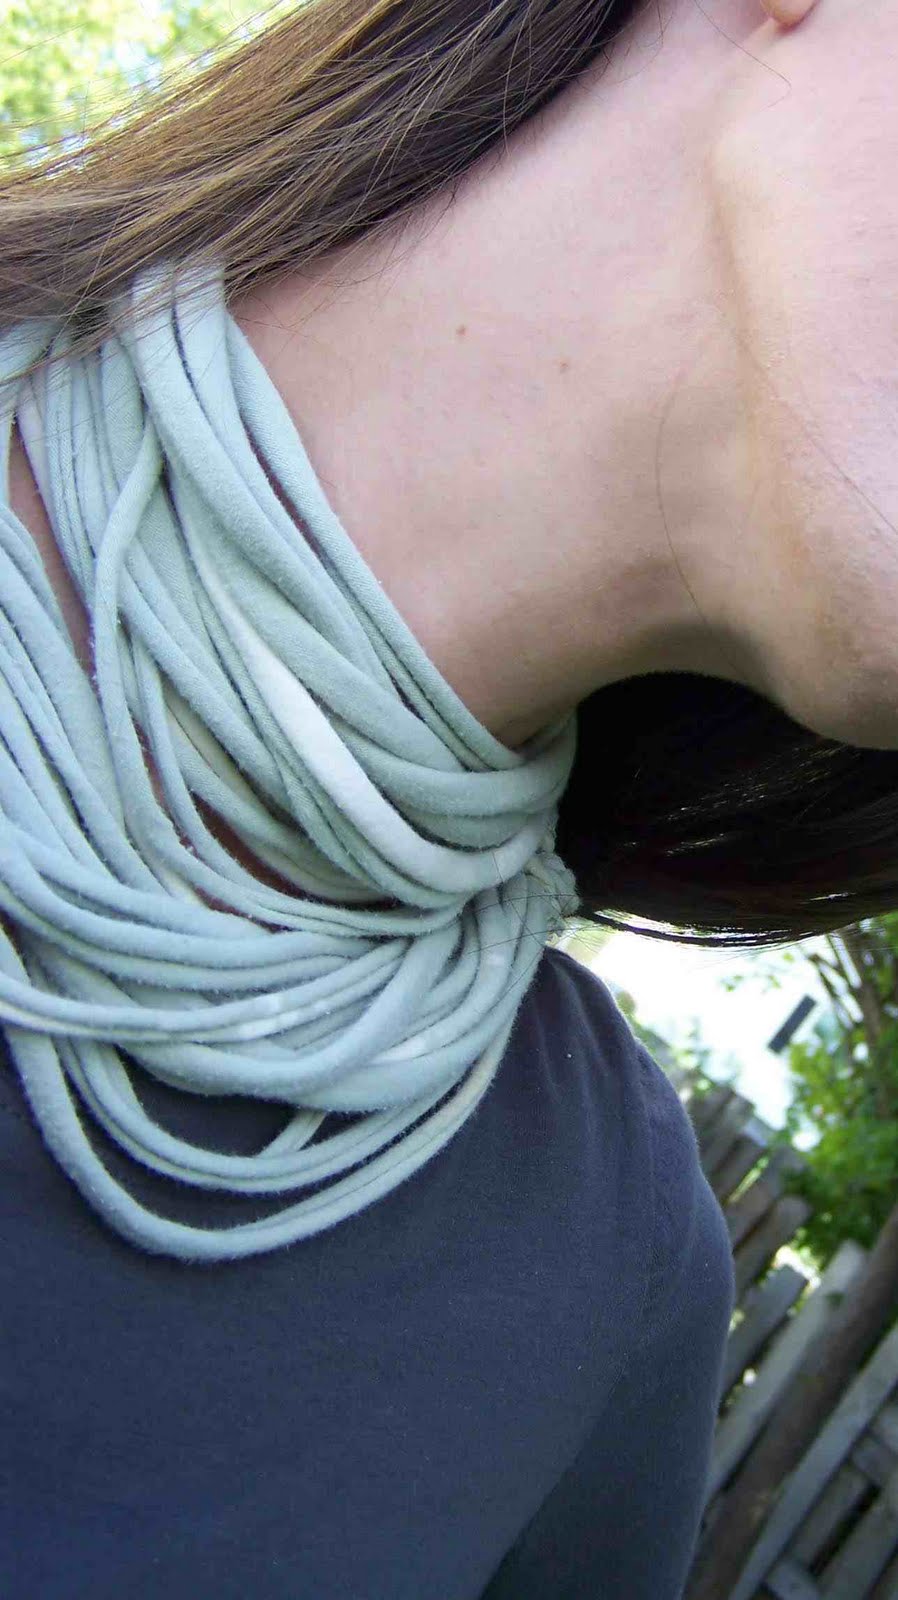
How To Make A Jersey Necklace From A T-shirt

Repurposed T-shirt Necklace/Scarf


Well we are three days into September and I am working hard to put my stash to work.  Today I'm going to show you how to make a simple scarf/necklush from an old T-shirt.  Now I know that there are more beautiful jersey scarves out there, but I was amazed at how simple this was.  It is such a quick project and can certainly be dressed up.  The rest of my stash pile of old t-shirts might very well become jersey necklaces.

I think that this is my first step in preparing for fall.  This super soft knit fabric is sure to keep my neck warm.


Want to make one for yourself?  It is super simple.  Click Read More for the full tutorial.