Search This Blog

Showing posts with label collar. Show all posts

Monday, October 22, 2012

Frances Collar Tutorial by Katie of Blue Eyed Freckle

Katie's blog, Blue Eyed Freckle, was one of the first sewing blogs that I fell in love with.  She has a very individual style, which can be a hard thing to develop.  She has great refashion ideas, backdrop ideas, and not to mention a fantastic etsy shop where she sells headbands.  The first project I found of hers was the "I Wanna Be a Girl Scout" T-shirt revamp, featuring a fantastic collar, so I'm thrilled that she's sharing a faux collar project with us today!  

Hi everyone! I am Katie Kortman of blue-eyed freckle (blogger and esty-er). I am a mother of 2 (soon to be 3) and wife to a medical student and so.... I like to make it instead of buy it whenever possible. I don't usually do straight copies of the things I see and like, but rather use them as inspiration. Today's top is inspired by the collar of this dress I saw on thumbeline. I love a removable collar, but sometimes its easier to just make a faux one. So if you are ready to jazz up your daughter's shirt in just a few simple steps, keep reading!

Materials Needed:
cotton shirt
material for the collar (1/4 to 1/3 yd should be more than enough)
some pretty, sew-able ribbon (I used velvet)
*optional: more scraps of fabric to make a bow
THIS PATTERN (I made it for sizes 12-24 months and 2T-4T but can easily be adapted)


1. print the pattern and cut 4 pieces. Sew right sides together and make 2 collar pieces. Leave the top (straight) part open (don't sew).

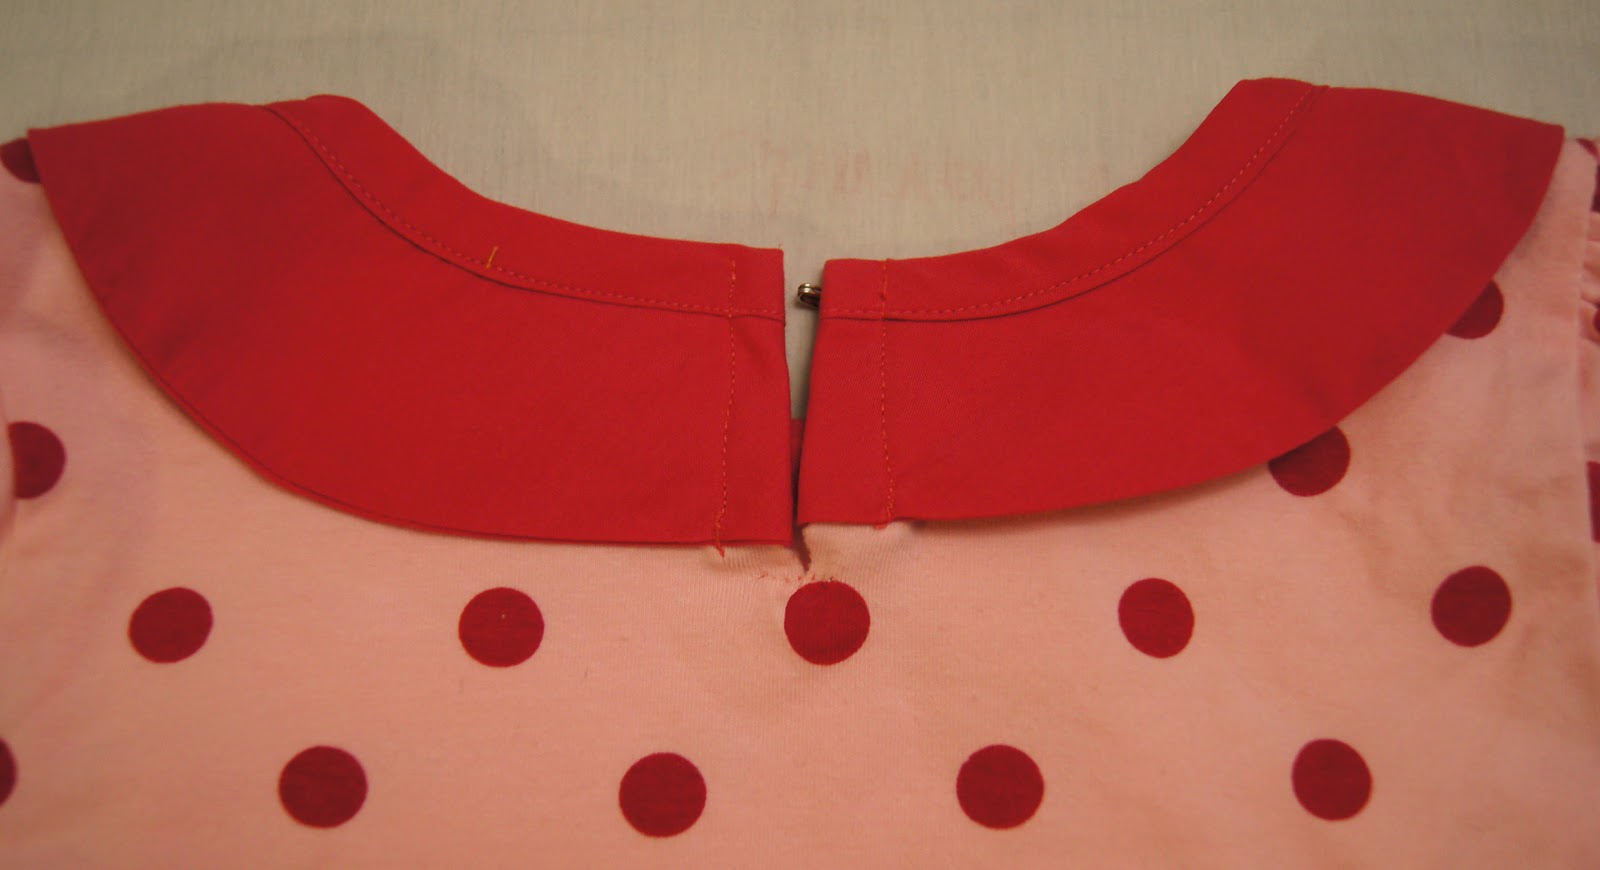
2. turn the two collar pieces right side out and pin them to your shirt. Fold the unsewn part of the collar under, or inward so that it is closed shut as you top stitch the collar pieces to your shirt.

3. Cut 4 pieces of ribbon and top stitch on both long sides of the ribbon, making sure to tuck in the raw edges on the ends.

So quick and now you are finished! A little work make a big impact in this case.  Now, if you want to add a little something more take a look below:
For my older daughter's shirt, I decided it needed something more. So, I added a bow. You can follow my tutorial here if you are unsure how to make one. To apply it to the shirt, I just got out a hand needle and thread and tacked it in several places to ensure it won't get all wonky after being washed (which tends to happen). 

Here are a few more shirt-making or re-making tutorials from my blog. Happy Toptober!

Thanks again Katie. Great project.  Look at those beautiful girls in their tops.  

Tuesday, October 25, 2011

Top-Toberfest: Peter Pan Collar Tutorial with Erin of Sutton Grace

It surprises me how many people I know that have craft blogs. I know people from high school, people from college, and people from church.

Our guest poster today is someone that I know through family, but didn't meet in person until after I'd found her blog.  I'm pretty lucky to share a sister in law with her, and was thrilled when I got to meet her in person this past summer.  Erin, of Sutton Grace, is not only extremely talented, but she's a doll as well.  She has a Top-toberfest tutorial that I  am eager to try out.  It is for a Peter Pan Collar embellished top.  Hold onto your socks because this is too cute. Make sure to stop by her blog, she has adorable projects waiting for you to explore.

Hi! My name is Erin and I blog at Sutton Grace. I am so excited to be guest blogging for Tricia. She is one of the few people I first "met" via blogging and have met in real life. She is just as sweet and kind as she appears on her blog! I am not a very fashionable or trendy girl. I am a stay at home mom (of four!) and a t-shirt and jeans or a t-shirt and a skirt is my daily uniform. But sometimes I get bored with plain old tees! I have embellished t-shirts with all sorts of different ruffles and I love them but I was craving something a little different... enter the peter pan collar!


I loved it so much I added peter pan collars to matching store bought dresses for my daughters. How cute are they?


Peter Pan Collar Tutorial supplies: scoop neck t-shirt (I got mine at Wal-mart for $4) or dress. coordinating fabric about a 1/4 to 2/3 of a yard depending on the size of collar you are making. matching or contrasting bias tape- make your own or use store bought basic sewing supplies 1- Trace the curve of the back neckline. 2- Place a piece of paper inside the shirt and trace the curve of the front neckline. 3- Draw a second line 2.5" from the original lines. 4- Cut on the lines leaving a few inches of excess paper on each end.


5- Find the center of the front piece. Fold in half draw and cut the center curve (I just free handed it). 6- You now have one back pattern piece and two front pattern pieces.


7- Find the center front and center back of your shirt and pin the pattern pieces to the shirt leaving the excess paper extending passed the shoulders. 8- Fold the excess paper of the back pattern piece over the front piece so it lines up with the neckline (doesn't make the shirt buckle & fold and there is no gap between the paper and the shirt). Pin the paper together (do not pin the paper to the shirt).


9- Remove all the pins except the two holding the front and back pattern pieces together at the shoulder seam. Tape and trim the pattern. Remove pins. Now you have one pattern piece.


10- Pin and cut out your pattern piece on fabric that is folded on the bias. Cutting fabric on the bias helps it to lay flat around curves. (I forgot to take a picture of this step that is why the fabric is different in this picture!)

11- With your two fabric pieces right side together sew along the bottom edge. Clip the seam around the curves. Turn right side out and press.


12- Find the center front of your shirt. Start at the center and pin the collar to the shirt. Baste.


13- Sandwich the bias tape around the raw edge with the longer side of the tape on the inside of the collar. Pin and sew.


Finished!

I did the collars on my daughters dresses the exact same way except one thing. To make it easier to get the dresses over their heads I cut a slit on the center back, reinforced the bottom of the slit with a few stitches, folded and sewed the collar around the slit and added a hook and eye.


Thank you Tricia for having me be part of Toptoberfest!


Thanks Erin for the great tutorial.  I love this project, and am so glad that you were willing to share it with us.


Sunday, February 6, 2011

Vintage Lace Collar From a Doily: a Tutorial


I've seen quite a few vintage lace collars floating around Etsy.  I think that they are lovely (see this, this, and this).  I don't typically decorate my home with crocheted doilies and lace, but I love the idea of decorating oneself with  it.  

I've had an old ecru doily in my stash of things to be repurposed, and I finally got around to transforming it into something new. . . a lovely little collar.  Want to make one yourself?  Here's how...


Start with an unwanted doily, mine was about 10 inches in diameter.


Cut up one side of the doily to the center. I ended up rounding off these two sides, because I thought that it looked better with the scalloped edges.


Cut a hole that is large enough for your neck.  You are most likely going to be wearing it at the base of your neck, so measure at the widest point. Once you've cut an initial round, you can adjust it as needed.


Finish off your raw edges.  Initially I had thought to use a thin double fold bias tape for this step, but then my sewing machine quit on me, and I was then forced to use the rolled hem function on my overcast serger.  It worked quite nicely, I only wish that my thread was a better match.

If you wanted you could hand stitch the rolled hem so that it is turned to the underside of the collar. You could also sew a thin velvet ribbon along the rolled hem to make it a bit more polished (I'm going to have to wait for my replacement machine to show up before I tackle that).


To finish it up I attached a "pearl" from a broken bracelet.  The collar is fastened by slipping the pearl through one of the holes in the lace.  


 That's it.  A super simple and easy way to turn a household doily into a lace collar.