
Our guest poster today is someone that I know through family, but didn't meet in person until after I'd found her blog. I'm pretty lucky to share a sister in law with her, and was thrilled when I got to meet her in person this past summer. Erin, of Sutton Grace, is not only extremely talented, but she's a doll as well. She has a Top-toberfest tutorial that I am eager to try out. It is for a Peter Pan Collar embellished top. Hold onto your socks because this is too cute. Make sure to stop by her blog, she has adorable projects waiting for you to explore.
Hi! My name is Erin and I blog at Sutton Grace. I am so excited to be guest blogging for Tricia. She is one of the few people I first "met" via blogging and have met in real life. She is just as sweet and kind as she appears on her blog! I am not a very fashionable or trendy girl. I am a stay at home mom (of four!) and a t-shirt and jeans or a t-shirt and a skirt is my daily uniform. But sometimes I get bored with plain old tees! I have embellished t-shirts with all sorts of different ruffles and I love them but I was craving something a little different... enter the peter pan collar!

I loved it so much I added peter pan collars to matching store bought dresses for my daughters. How cute are they?

Peter Pan Collar Tutorial supplies: scoop neck t-shirt (I got mine at Wal-mart for $4) or dress. coordinating fabric about a 1/4 to 2/3 of a yard depending on the size of collar you are making. matching or contrasting bias tape- make your own or use store bought basic sewing supplies 1- Trace the curve of the back neckline. 2- Place a piece of paper inside the shirt and trace the curve of the front neckline. 3- Draw a second line 2.5" from the original lines. 4- Cut on the lines leaving a few inches of excess paper on each end.

5- Find the center of the front piece. Fold in half draw and cut the center curve (I just free handed it). 6- You now have one back pattern piece and two front pattern pieces.

7- Find the center front and center back of your shirt and pin the pattern pieces to the shirt leaving the excess paper extending passed the shoulders. 8- Fold the excess paper of the back pattern piece over the front piece so it lines up with the neckline (doesn't make the shirt buckle & fold and there is no gap between the paper and the shirt). Pin the paper together (do not pin the paper to the shirt).

9- Remove all the pins except the two holding the front and back pattern pieces together at the shoulder seam. Tape and trim the pattern. Remove pins. Now you have one pattern piece.

10- Pin and cut out your pattern piece on fabric that is folded on the bias. Cutting fabric on the bias helps it to lay flat around curves. (I forgot to take a picture of this step that is why the fabric is different in this picture!)

11- With your two fabric pieces right side together sew along the bottom edge. Clip the seam around the curves. Turn right side out and press.

12- Find the center front of your shirt. Start at the center and pin the collar to the shirt. Baste.

13- Sandwich the bias tape around the raw edge with the longer side of the tape on the inside of the collar. Pin and sew.

Finished!

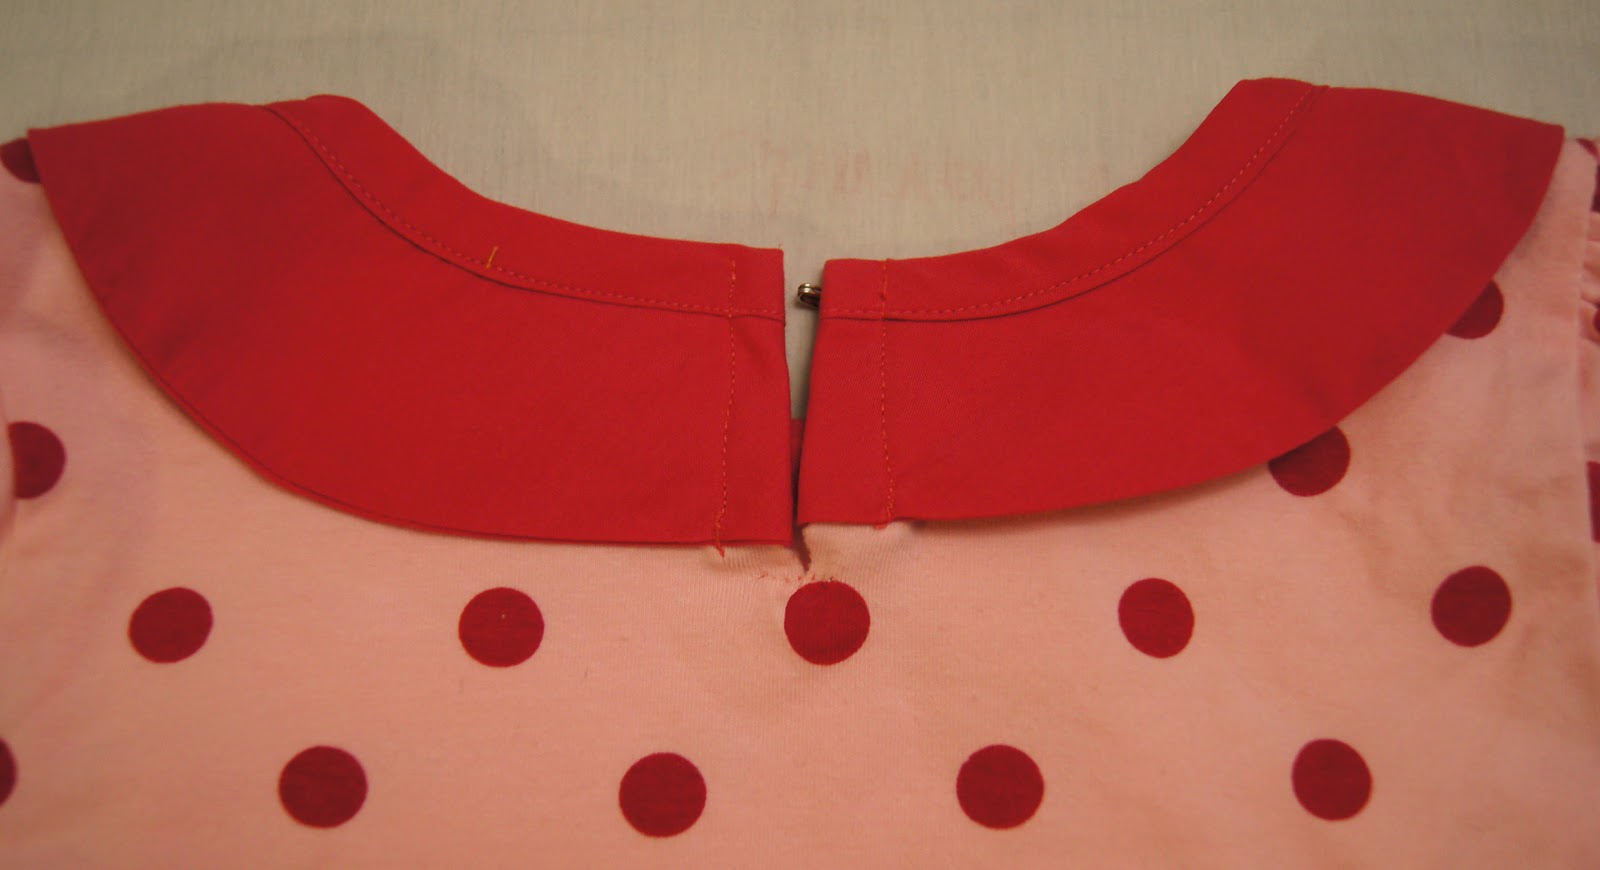
I did the collars on my daughters dresses the exact same way except one thing. To make it easier to get the dresses over their heads I cut a slit on the center back, reinforced the bottom of the slit with a few stitches, folded and sewed the collar around the slit and added a hook and eye.
Thanks Erin for the great tutorial. I love this project, and am so glad that you were willing to share it with us.
23 comments:
Wow....You make this look sooo easy !
The shape of your collar is perfect! Love the way it dresses up a plain tee and it looks extra cute on your girls' dresses.
Hi Tricia (I am also Erin & Kate's sister-in-law) - great blog! It's fun to see so many crafting ideas.
Erin - love the Peter Pan collars, especially on the little girl dresses. They look fairly easy to do, especially with this detailed tutorial!
What a great idea. Thanks for the tutorial Erin. I can't wait to try this, you make it look so simple.
What a fun way to dress up a plain tshirt! I have a pile of shirts in need of some sprucing and this will be perfect.
Another wonderful and simple idea.... you are making me think I might be able to handle some of these projects! Thank you so much for the great ideas! ps I am a new follower!
Jaime from crafty scrappy happy
I was searching a pattern to make one and checking Craftgossip I saw that you just showed us how to actually MAKE one ourselves. Right place, right moment, right blogger. :)
Thank you very much for sharing!!
Ana
Furthermore, these bodies may expand (by insertion of additional lipids), seo article writing and under excessive expansion may undergo spontaneous splitting which preserves the same size and composition of lipids in the two progenies forumlinkbuilding.com reviews.
I love the patterned material collar- definitely going to give it a whirl with some left over material of mine :-)
Samara
thesecretlifeofsamara.tumblr.com
Very cute! I can't wait to give it a try.
i am your 1000 follower! i couldn't leave it at 999! I am loving Peter Pan collars right now!
What a great idea! Love it! I have a few plain t-shirts that need a little love, maybe I'll try this :)
I love the idea! You're very creative and talented!
Tshirtloot is the newest and best place on the internet for customized t-shirts! If you don't believe this claim to fame just try it for yourself and experience some of the greatness!we pride ourselves on t-shirt printing the highest quality custom t-shirts in the industry, and we're not afraid to show it!
Design a Tshirt
Love the fabric you used for the collar-where did you find it?!
Oh wow! Looks so much nicer just by adding a collar !
Hello! I made a sweatshirt refashion and cut a way too big neckline... where the front matches the back DUH bad move. Now, I'd like to fix it somehow but need help.. How would I go about doing that?
Thank you!
so cute. really dresses up a t-shirt
questions: did you cut the neck t-shirt binding off? OR did you just sew collar under the bias neck of t-shirt and then put the "new" bias tape that matched collar over existing t-shirt binding?
Perfectly explained.loved it.I had never tried it before,but now I think I am a pro.Thank you very much.
Hi, great Peter Pan collar pattern, I have just cut my first collar out but just using it as a front piece on a crepe vest top. It will have a pleated front, cap sleeves and a Peter Pan collar. All of which have been mashed from 3 different patterns. My question is did you use a 1/4" or 3/8 seam around the lower edge.
Hi Nice Post Love to hear that a collar ca make a difference.
Have a look at these too Pillows
Wow....You make this look sooo easy !
pillow crochet pattern
cheap teacher supplies
etsy linen pillow covers
Amazing post. Content was spot on. Thanks for sharing.
Post a Comment