Search This Blog

Showing posts with label peter pan collar. Show all posts

Thursday, April 18, 2013

Faux Peter Pan Collar Embellished Onesie


I had a few of you ask about the shirt that went along with my niece's birthday outfit.  I did make embellish the shirt, but didn't sew it from scratch.  Embellishing is my favorite approach to a top.  

First I started with a 24 month size onesie.  They can be hard to come by, but I've picked some up at Ross Dress for Less, and this particular one my mom found for me.


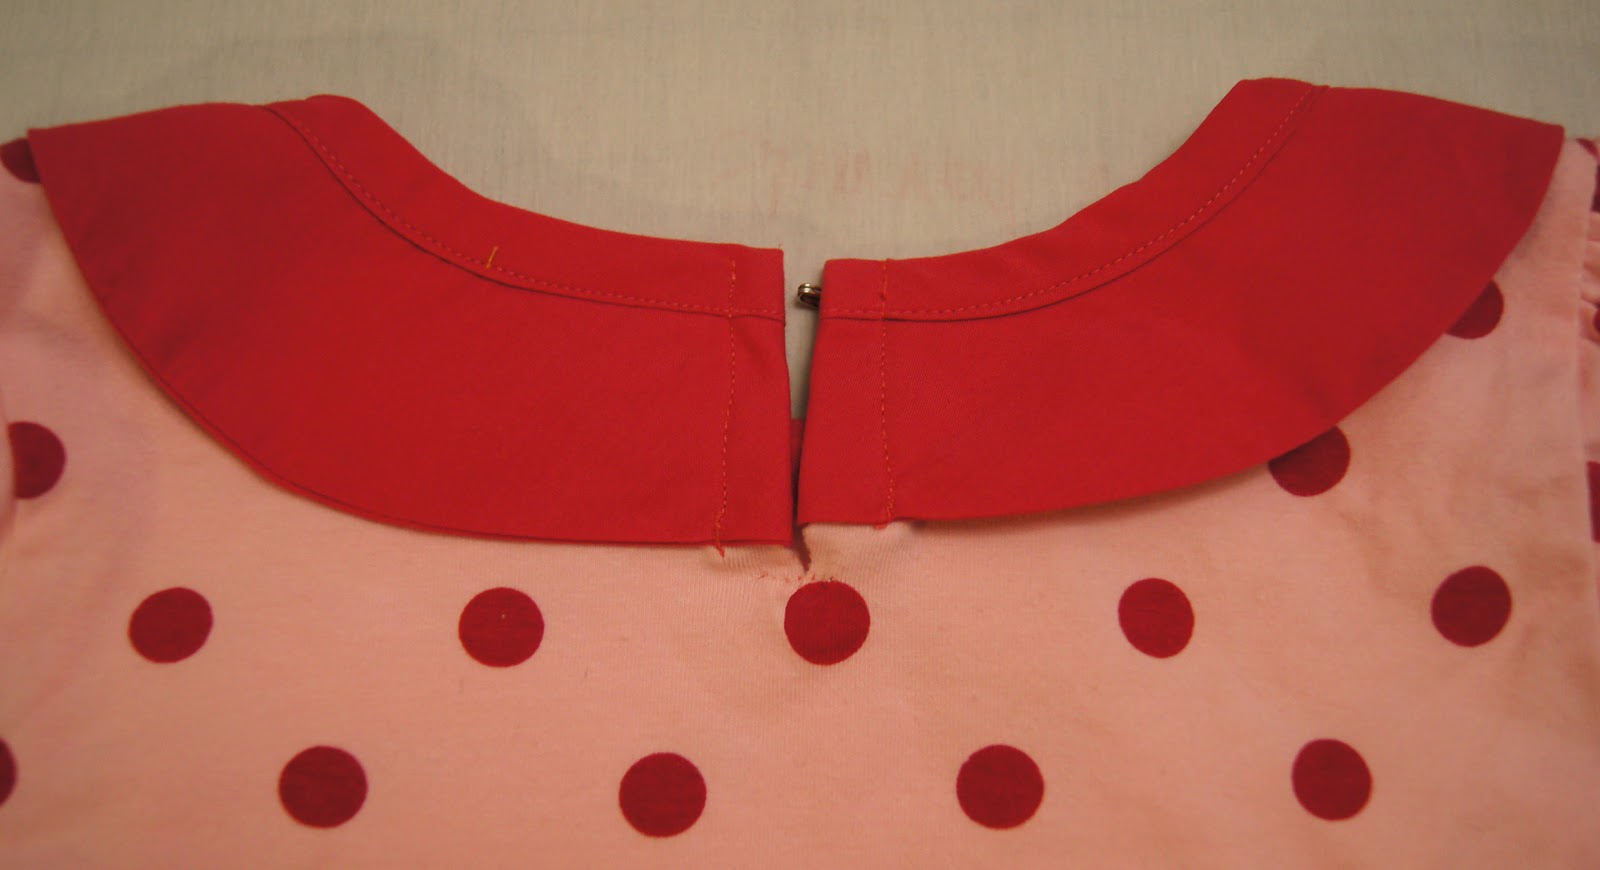
This onesie (which I love for girls in skirts), has a super simple sparkly faux peter pan collar.  You only need a few basic supplies:

1-Scrap piece of knit fabric, mine was a piece of dance knit that I use for super hero cape appliques.  
2-Heat and Bond fusible web, sewable bond
3-Press Cloth
4-Iron/sewing machine
5-Buttons
6-Scrap Piece of paper, and a pencil

First off, you'll want to make a template.  Start by placing your scrap piece of paper over top of the onesie.  Feel your way around the neckline, tracing the basic shape.  Follow the neckline all of the way up to the top, extending about an inch underneath the envelope closure.

Once you have your basic neckline shape, fold the paper in half, at the center point of the neckline.  Sketch out your basic peter pan collar on one side, add a mini placket if you'd like, and cut.  With your template folded in half, it should be cut symmetrically.


Once you have your template, transfer the shape to the paper side of your fusible web.

Iron your fusible web to the back side of your knit material.


Once your fusible web has cooled, cut out your collar. 


Position your collar on the outside of the onesie, matching up center marks (look for the tag). Use a press cloth to prevent any foiled knits from melting, and adhere to the onesie according to manufacturers directions.

Make sure that you are adhere the collar under the envelope sleeve as well.


 Once adhered and cooled, stitch 1/8" away from the outside of the collar.  If you are using knits, you should not have to worry about finishing off edges.  A straight stitch with a ball point needle will do the trick.  Add a couple of matching buttons to the faux placket, and you are done.


Here is a look at the tips of the collar that hides under the envelope sleeve.  I like the collar to extend right up to the top of the shoulder, that way it doesn't peek out when the shirt is being worn.

Obviously, you could use this technique with any shirt, it doesn't have to be a bodysuit.  You could either extend the collar up to the shoulder seam, or create a narrow band to extend around the back of a crew neck top.

There you have it.  A super quick embellishment.  It adds just a bit of sparkle, and is still wearable.

Tuesday, October 25, 2011

Top-Toberfest: Peter Pan Collar Tutorial with Erin of Sutton Grace

It surprises me how many people I know that have craft blogs. I know people from high school, people from college, and people from church.

Our guest poster today is someone that I know through family, but didn't meet in person until after I'd found her blog.  I'm pretty lucky to share a sister in law with her, and was thrilled when I got to meet her in person this past summer.  Erin, of Sutton Grace, is not only extremely talented, but she's a doll as well.  She has a Top-toberfest tutorial that I  am eager to try out.  It is for a Peter Pan Collar embellished top.  Hold onto your socks because this is too cute. Make sure to stop by her blog, she has adorable projects waiting for you to explore.

Hi! My name is Erin and I blog at Sutton Grace. I am so excited to be guest blogging for Tricia. She is one of the few people I first "met" via blogging and have met in real life. She is just as sweet and kind as she appears on her blog! I am not a very fashionable or trendy girl. I am a stay at home mom (of four!) and a t-shirt and jeans or a t-shirt and a skirt is my daily uniform. But sometimes I get bored with plain old tees! I have embellished t-shirts with all sorts of different ruffles and I love them but I was craving something a little different... enter the peter pan collar!


I loved it so much I added peter pan collars to matching store bought dresses for my daughters. How cute are they?


Peter Pan Collar Tutorial supplies: scoop neck t-shirt (I got mine at Wal-mart for $4) or dress. coordinating fabric about a 1/4 to 2/3 of a yard depending on the size of collar you are making. matching or contrasting bias tape- make your own or use store bought basic sewing supplies 1- Trace the curve of the back neckline. 2- Place a piece of paper inside the shirt and trace the curve of the front neckline. 3- Draw a second line 2.5" from the original lines. 4- Cut on the lines leaving a few inches of excess paper on each end.


5- Find the center of the front piece. Fold in half draw and cut the center curve (I just free handed it). 6- You now have one back pattern piece and two front pattern pieces.


7- Find the center front and center back of your shirt and pin the pattern pieces to the shirt leaving the excess paper extending passed the shoulders. 8- Fold the excess paper of the back pattern piece over the front piece so it lines up with the neckline (doesn't make the shirt buckle & fold and there is no gap between the paper and the shirt). Pin the paper together (do not pin the paper to the shirt).


9- Remove all the pins except the two holding the front and back pattern pieces together at the shoulder seam. Tape and trim the pattern. Remove pins. Now you have one pattern piece.


10- Pin and cut out your pattern piece on fabric that is folded on the bias. Cutting fabric on the bias helps it to lay flat around curves. (I forgot to take a picture of this step that is why the fabric is different in this picture!)

11- With your two fabric pieces right side together sew along the bottom edge. Clip the seam around the curves. Turn right side out and press.


12- Find the center front of your shirt. Start at the center and pin the collar to the shirt. Baste.


13- Sandwich the bias tape around the raw edge with the longer side of the tape on the inside of the collar. Pin and sew.


Finished!

I did the collars on my daughters dresses the exact same way except one thing. To make it easier to get the dresses over their heads I cut a slit on the center back, reinforced the bottom of the slit with a few stitches, folded and sewed the collar around the slit and added a hook and eye.


Thank you Tricia for having me be part of Toptoberfest!


Thanks Erin for the great tutorial.  I love this project, and am so glad that you were willing to share it with us.