Search This Blog

Showing posts with label baby girl. Show all posts

Monday, June 24, 2013

Tutorial: Bib Onesie


I love baby onesie.  They are so practical for little babies, and they can be awfully cute as well.  A plain white onesie on a baby is plenty cute, but add a little lace, and a few well attached buttons, and it's irresistible.

This little bib onesie was made to accompany a box pleat baby skirt.  and wasn't difficult to make.

You'll need:

Baby bodysuit
Scrap of fabric ( I used a knit)
Fusible sewable web (I used wonder under)
1 yard or so of trim
18 inches of matching piping
3 small buttons
Coordinating thread

3-6 Month Bib Template for Carter's Bodysuit


First, you'll want to make a template.  This can be done by placing a piece of paper over top of the onesie, and carefully transferring the shape of the neckline to the paper.  You'll also want to feel out where the shoulder seam, and envelope neckline are, so that you can shape the bib to fit nicely under the overlapped pieces.  Decide how far down you want the bib the extend, and how wide you want it to be.  Extend the upper tabs of the bib up, to extend up beyond the shoulder fold by about an inch.  These little tabs will slide in between the neckline, and fold to the other side.

 At this point I fold my paper in half, and cut out the shape of my bib, making it symmetrical. 


Apply a layer of fusible web to the wrong side of the main bib fabric.  Cut out the bib.


Turn the bib piece over, and position four lengths of lace trim on the bib front. I left about an inch and a  quarter in the middle of the bib for button placement.  Pin the trim in place, and stitch down to the bib.


Attach piping.  To do so, you can align the raw edges of the piping with the raw edges of the bib piece.  Stitch close to the piping stitching line.  If needed, you can use a zipper foot to work around the bulk of the piping. For a more detailed look at attaching piping, visit my piped pocket infant skirt tutorial.

Turn the raw edge of the bib/piping under so that it is hidden beneath the bib.  Position the bib on the onesie, and using a hot iron, adhere to the bodysuit.


You will tuck the tabs inside the envelope neckline, and press.  While you're at it, trim that obnoxious thread on the trim of the bib. Stitch along the piping/bib seam, the neck tabs, and around the neckline, to secure the bib to the shirt.  I recommend using a ballpoint needle to do this.


Once your bib is securely attached, position your three buttons, and using a needle and thread, or your sewing machine, attach the buttons to the onesie. You're done. (Learn how to attach buttons with your sewing machine).


Next, add an adorable box pleat baby skirt to go with it.  


Monday, September 3, 2012

Sweet Pea Dress: Stars And Stripes Edition


I'm making progress on my projects in progress, sadly not as much progress as I'd like.  Today I did manage to sew together a little Sweet Pea Dress with Diaper Cover.  I stenciled and cut out the fabric for this dress way back in April.  I thought I'd have it all put together, and ready to give away to my niece in July.  that didn't happen, and she'll probably outgrow it by next year.  So, I'll tuck it away in my box of finished projects, and hope one day that I can manage to make a little girl to wear it.


I only wish that I'd thought to make some white ruffled stripes on the diaper cover.  Oh well, maybe a striped star bumper sticker.

Thursday, June 28, 2012

Tutorial With Pattern: Chevron Pintucked Sundress


I've been in a bit of a creative funk lately.  I just haven't had the energy or much of a desire to sew, partly due to a project that was more trouble than it ever should have been.


When I get in a rut like that, the best thing to do is make something that isn't on my to-do list at all.  Something that doesn't have a deadline, and is just for me.  Since I don't have any girls of my own, dresses are especially fun to make, and this little pin-tucked sundress has recharged my lil' sewing battery.

If you missed my pintuck tutorial earlier this week, and you're not familiar with the technique, you'll want to check it out before getting started.

Materials:
1 package Double Fold Bias Tape-any width will work
3/4 yard main fabric
10 inches of secondary fabric (for underskirt) 

Thursday, May 3, 2012

Bustled Buttercup Skirt-a mini tutorial


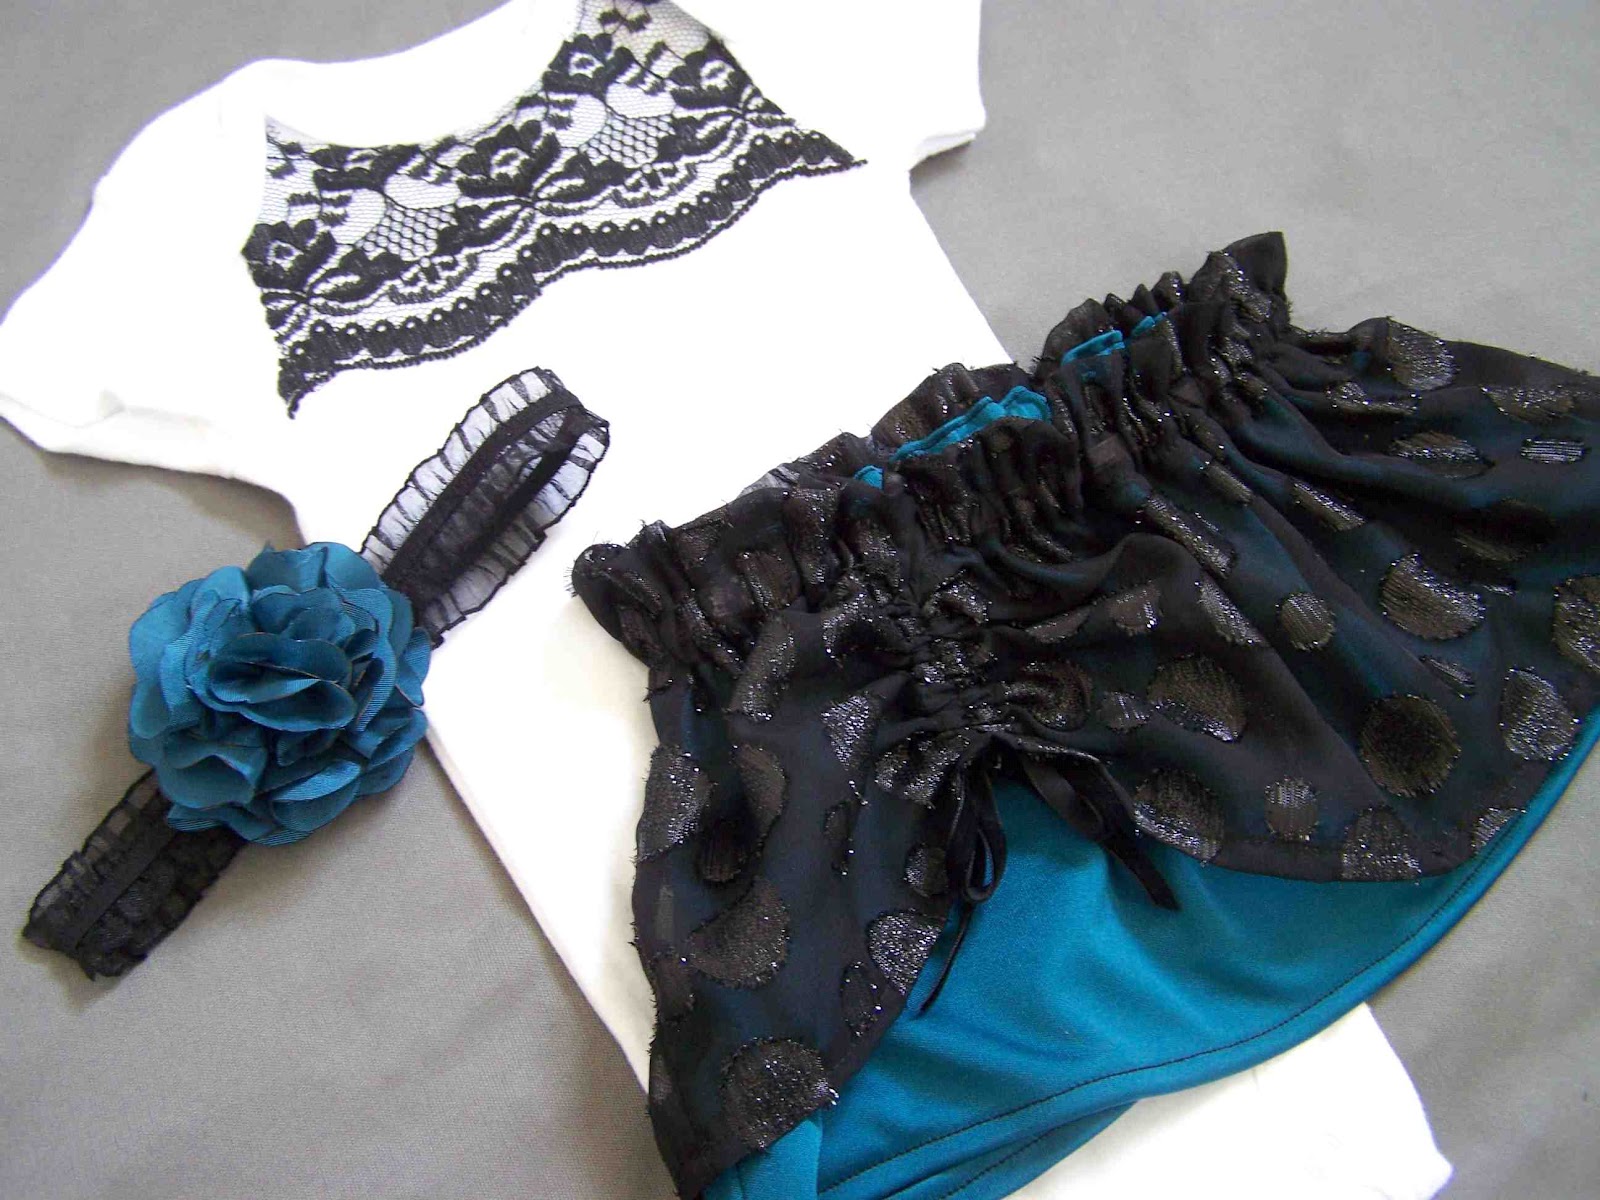
To go along with the lace appliqued onesie, I made a little buttercup skirt with a side front bustle.  I don't think that bustle is the correct term for it, but it's the only term that my little mind can come up with at the moment.

My husband thinks that the outfit looks a bit like a saloon girl outfit.  It might be fitting, considering that this little girl has a sister that wants to name her Sparkle.

Anyway, back to the skirt. To create the bustle all you will need is 5 inches of coordinating bias tape.  I used an extra wide double fold bias tape, because I had it on hand. You will also need about 18 inches of 1/4 inch wide ribbon, a safety pin, and fray check for the ribbon ends.


After sewing the side seams, and hemming the bottom, place the bias tape along the hem edge. I divided my front skirt panel in thirds, and placed my bias tape on the 1/3 mark, closest to the right side seam.

 Stitch near the side edges.  Sew up the center of the bias tape, stopping 3/8" away from the top edge of the tape.

Thread your ribbon up one side of the bias tape...


...and down the other.


 Pull on ribbon tails to gather the bustle of the skirt.  Tie the ends in a knot or bow. Apply fray check to the raw ends of the ribbon.

Continue to follow the original buttercup skirt tutorial to finish assembly.


The little bustle shows a bit more of the skirt lining, and is an easy way to remix the pattern.  


Wednesday, May 2, 2012

Tutorial: Embellished Lace Onesie


My sister is expecting a little baby girl in the summer.  Little girls are so much fun to sew for.  Even though I have two boys, I probably end up making more for girls than boys.  I whipped up a remixed buttercup skirt for the new baby, and decided that it needed a coordinating top.  I've had this black lace in my stash for quite some time.  You might remember it from my lace embellished cardigan refashion. It was just wide enough to add a fun lace accent around the neckline.


To start with, I cut out a piece of lightweight fusible web, that was the same size and shape as my lace.


 I then adhered the fusible web to the wrong side of the lace using a press cloth, and my iron.


After the fusible web was attached, I transferred the basic outline of the onesie shoulder seams, and neckline to the paper backing. The shape was then cut, and paper backing removed.


Position the lace piece under the envelope sleeves of the onesie, and as close to the neckline as possible.  You may even be able to slip the upper edge of the lace under the lip of the neckline.


The shoulder tabs of the lace were tucked underneath the envelope sleeves.  You will want to make sure that these extend as close the shoulder fold as possible, that way your lace edge won't peek through when the garment is worn. Adhere the lace to the onesie with your iron and press cloth.


 I used a narrow zig zag stitch to secure the lace.  I followed the contour of the lace closely. I should probably note that this will work best if your lace doesn't unravel or fray much.

That's it, a super quick lace embellished onesie. I'll share more details on the skirt later.

Thanks for reading.

Monday, April 30, 2012

Tutorial: The Box Pleat Baby Skirt


This past week I'd hoped to participate in the KCWC with Elsie Marley, but unfortunately life didn't allow it.  I did manage to make a few articles of kids clothing, but none of them were for my children.  There's a new baby girl that was born to a member of our congregation.  She is the firstborn, so I'm sure that she needs some new clothing.  I've had this scrap piece of corduroy sitting in my drawer for about 15 months.  I love the print, and thought that it would make an awful cute baby skirt.  I didn't have enough material to make the piped pocket skirt, so that Box Pleat Baby Skirt was born.

Baby skirts are really easy to make, take up very little time, and require very small amounts of material. They are great beginner projects.  

Want to make one?  Here we go....

Wednesday, May 4, 2011

Minky and Chenille Cloth Diaper Burp Clothes


Yesterday I mentioned that I'd share some other little shower gift ideas.  Now I didn't get super creative with my gift giving, but I do always like to throw in something practical.  I know that I was a new mom I was amazed at how many burp clothes I went through.  Even though Clark didn't have any major spit up problems, I found them extremely useful, especially when nursing.  At the beginning of the nursing adventure I would have to slide one burp cloth down the side of my shirt that I wasn't nursing on, because a nursing pad didn't suffice.  

Hopefully I haven't made any of you feel too uncomfortable. The point is that burp clothes are a necessity for every new mama, reflux or not.


You can find cloth diapers in most any baby section.  I picked up a six pack for six dollars at our local wal-mart. I then gathered some scrap minky and chenille that my mom had left over from a baby quilt she made years ago.  The only scraps that she had left over were long thin strips.  It is difficult to use a scrap of fabric to is too thin, but this is really the perfect project for those remaining fabric scraps.

Most cloth diapers have a center section that is somewhat padded for extra absorbency.  I simply measured the width of the section, and cut my strips of fabric to the same dimensions.  I believe that these particular diapers were 4 1/2" wide by 19 1/2", but make sure to measure for yourself if you try this project out. I then used my overcast serger to finish off the raw edges.  If you don't have a serger you can cut your strips of fabric 1/2" larger in each dimension, and then press the raw edges under 1/4" on each side.  Once the raw edges were taken care of I pinned the material to the center of the diaper, and stitched them in place.


 The soft cuddle fabric is especially nice for little babies.  My sister in law has some similar burp clothes that she uses, and she says that they wash up great, and her babies have all loved using them. Another variation is to cut the fabric to the size of the whole cloth diaper.  I didn't have enough fabric to do that, and I like this just as well.  You don't have to use a cuddle fabric, you can stitch colorful ribbons, or a quilting cotton down the center for the same effect.

I bundled three burp clothes together with a piece of lace, and clipped a little pinwheel hair clip to the top for a little extra decoration.  Simple, quick, practical, yet pretty. I love that they coordinated with the Sweetie Pi onesie and skirt.

Tuesday, May 3, 2011

Sweetie Pi Baby Onesie and Piped Skirt


One of my favorite sections of Etsy to browse is the section labeled "Geekery".  It's not that I am necessarily drawn to anything from the section, but I love to see what others add.

I recently attended a baby shower for my cousin's wife and baby.  My cousin just graduated from college with a degree in mathematics.  I thought that it would be a bit fun to make a onesie that was just for dad. Who knows if Mama will actually let the little girl sport the onesie, but I had fun coming up with the onesie, and finding my own little spot in the world of Geekery.

The ones itself is freezer paper stenciled.  If you happen to have a math geek in your family, and want to make a similar onesie, just email me, and I'll send you the file. Obviously the reference to mathematics comes from the Pi symbol.  I had originally planned on stenciling on "Daddy's Sweetie Pi", but I thought I'd make it as simple as possible.


I wanted to make a skirt to go along with the onesie.  I came up with this little number.  It has actual pockets with piping around the edges, and several buttons set inside.  I used the same white pom pom trim that I used on this shirred sundress.

One of the things that I really like about the skirt is the fact that the front is flat, and the elastic gathers the skirt between the pockets.


I can't wait to try out this skirt again.  I still have some gray corduroy left, so I may do a gray and yellow version a bit later.  Anyone interested in a tutorial? 

Thanks for reading.  I'll be sharing a few other simple baby shower gifts a little later.

Happy sewing!