

I've been working on a little project to share with you, and it involves sewing a blind hem. Now EVERY time I sew a blind hem, I pull out my machine manual, and try to interpret their horrible diagrams. A blind hem is really quite simple, but for some reason prepping my materials is always a little bit of a mystery to me.
Well, I did some research, and worked out a few kinks that I frequently run into, and I think that I finally understand how it works.
 |
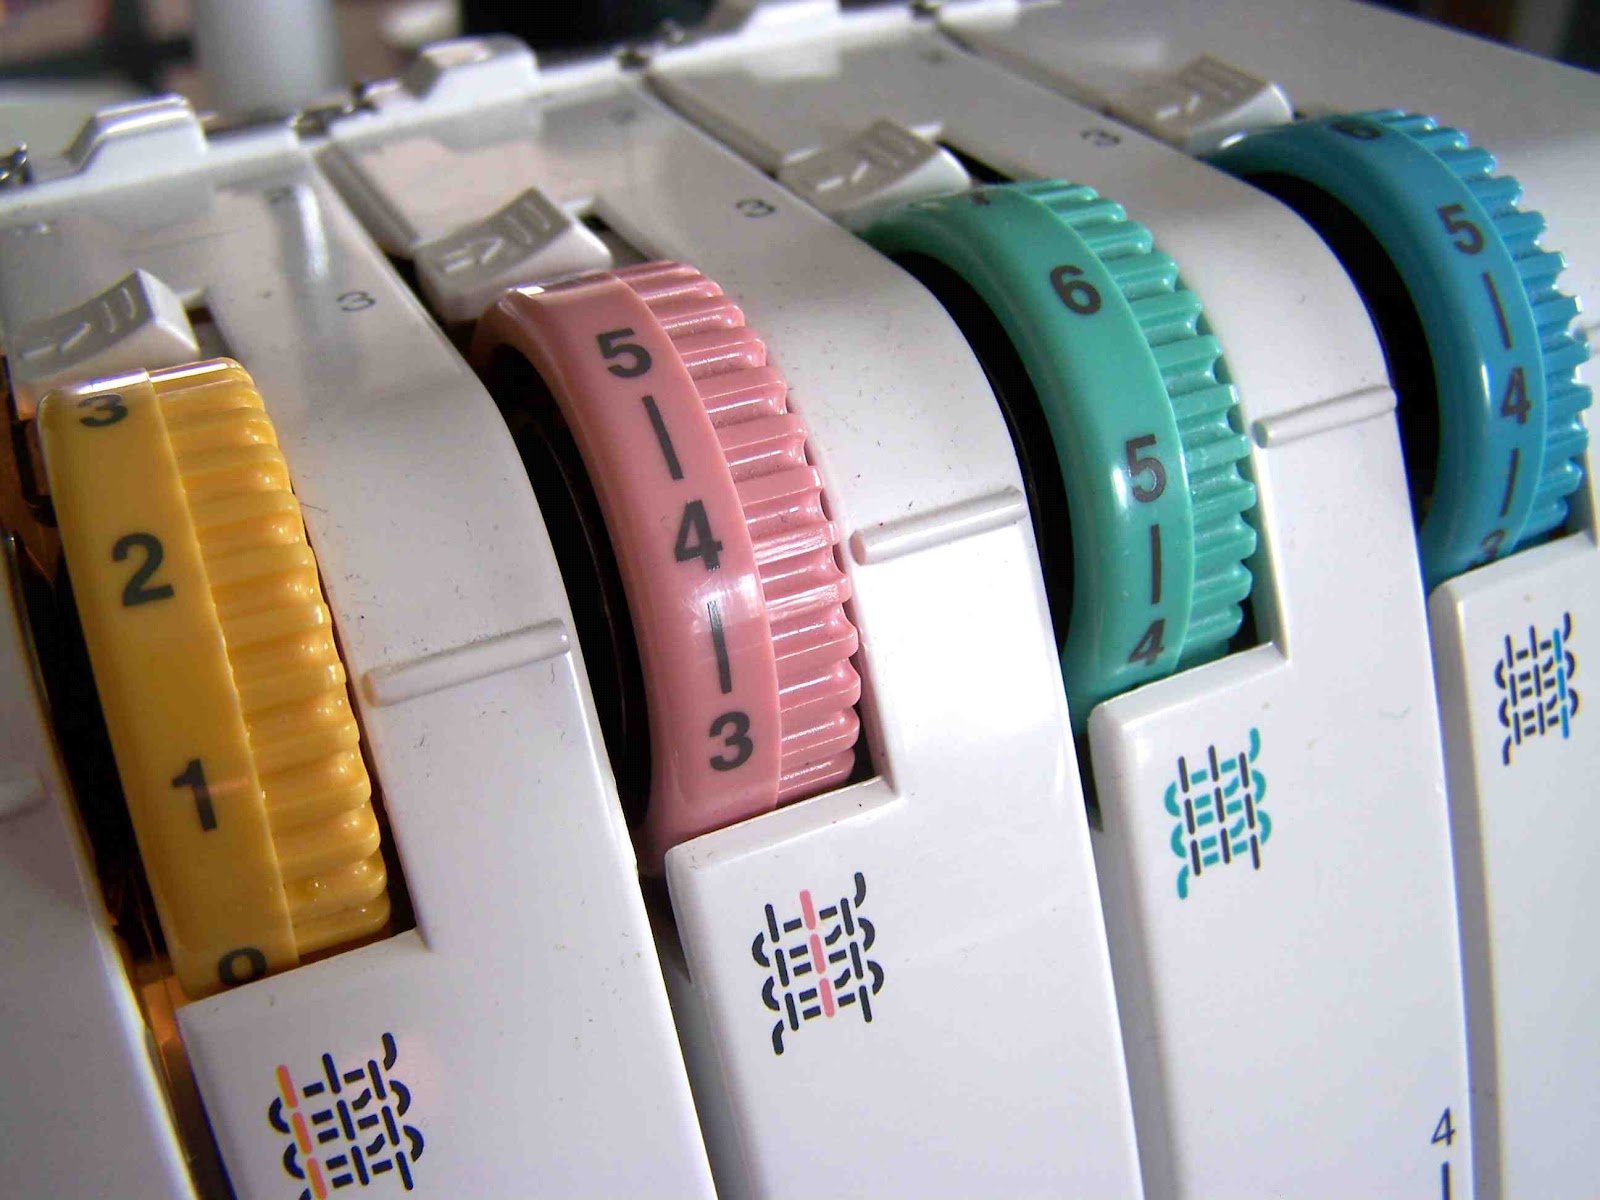
| My blind hem stitch button on my machine. The stitch to the right is used when creating a blind hem on knit or stretch fabrics. |
First off, what is a blind hem? Well a blind hem is a sewing technique that allows you to hem an article of clothing with the potential of having very little visible thread on the right side of the fabric. The stitching occurs on the wrong side of the fabric, and an angled stitch catches the right side of the fabric about every third or fourth stitch. A blind hem can be created on either a sewing machine or a serger if your machines are equipped for them. A blind hem foot is required for machine sewing, and my serger requires a multi-purpose foot. Both of my blind hem presser feet came standard with my machines.

The blind hem presser foot has a small flange in the center of the foot that acts as a guide as you feed your material through your machine.
If you gave ever hemmed a pair of dress pants by hand, this technique is going to blow your mind, and save you a whole-lotta time.

Now, setting up my fabric for the blind hem has always been the most mysterious part. My manual talks about marking the hem, basting 3mm from the raw edge, turning it over, rubbing your stomach and patting your head.
This post from Sew 4 Home made the material and hem preparation so clear. I'd highly recommend reading their tutorial, especially if you are setting up your standard sewing machine for the blind hem. The tutorial is really well written, and explains the whole process really clearly. Hop on over, read through their tutorial, and come back for some additional tips, and the full serger set up.
 |
| Source |

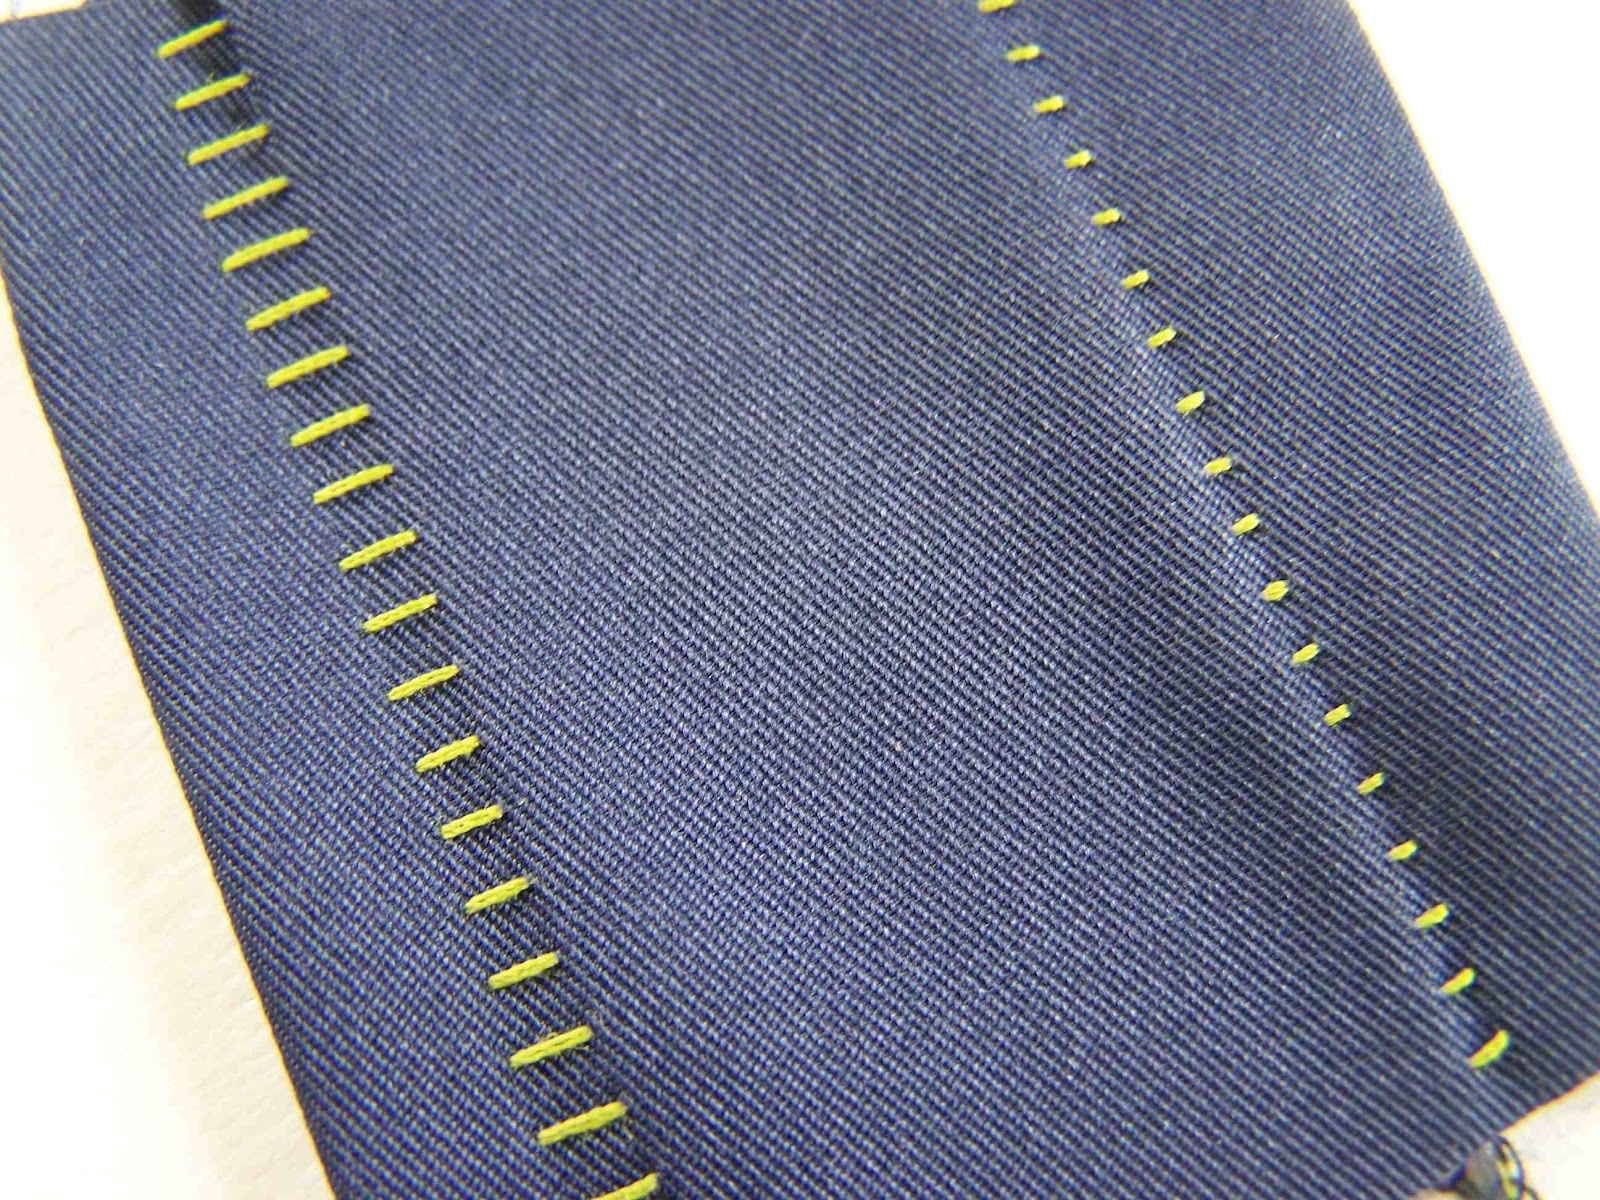
Here's a closeup of the newly sewn blind hem. You can see that it just barely catches the fold of the fabric every fourth stitch. The more that little V stitch overlaps your folded edge, the longer your blind hem stitch with be on the right side of the fabric. My blind hem presser foot works, but I have to be very aware of where my fabric is, it easily drifts beyond the guide, and can result in an uneven length of stitches.

Another problem that I have had with my blind hem, is that the material doesn't feed easily beneath the presser foot. I find myself having to pull it through. An uneven feed can result in stitches that are either too close together, or too far apart. The best way that I've found to fix this problem is to reduce the pressure on my presser foot. My machine has a dial that can be turned to increase/decrease the presser foot pressure. If you are having similar problems with your blind hem stitch, you may want to refer to your sewing machine manual for instructions on adjust presser foot pressure.

I have been able to create successful blind hems on my sewing machine, but I've had much greater success with my serger. My stitches are always uniform. The trick to using a serger is finding the proper tension adjustments prior to taking your garment to the machine.

It isn't necessary to turn your hem's raw edge under prior to serging. You just need to keep in mind that you will be stitching along the attachment point of the hem, but on the wrong side of the fabric.
Let's say that you have a one inch hem. You would press the hem up on the wrong side of the fabric along the one inch mark. The two inch mark on this photo shows the attachment point of the fabric.

Hem turned up once (up to the two inch mark).

The turned up hem is them folded under the fabric. The wrong side of the fabric is still face up, and a new fold is created along the two inch mark. Rather than meeting the two inch mark up with the raw edge of the hem, you will fold it so that it is about 1/4" shorter. The raw edge will be trimmed off when serged. The stitching will occur along this fold, when the fabric is opened after serging, the small ticks of the blind hem will be visible on the right side of the fabric. All of the overcast stitching occurs on the wrong side.
Setting Up Your Serger

My brother 1034d machine settings were as follows:
Differential: 1.0
Knife: 5.0
Removable Stitch Finger: On
Stitch Length: 4.0
Foot: Multipurpose Guide Foot (Blind Hem Foot)
The tensions settings that I used for the blind hem were slightly different than that recommended in my manual. I'll list the recommended tension settings in black, and the settings that I used in green.
Left Needle: 2.0, 1.0
Upper Looper: 5.0, 5.0
Lower Looper: 3.0, 4.0
*Test your machine settings on a scrap of the same material as your finished garment. You want to make sure that your tensions are correct prior to sewing.
If your blind hem is not pulling open, then most likely your needle tension is too tight.

This little lovely is your multipurpose guide foot, The wheel on the left will adjust the width of your guide. If you want a shorter stitch on your finished garment you will move the white guide to the left. If you want a longer stitch, move it to the right.

Align your folded/prepped fabric with the guide. The raw edge should be on the knife side. Stitch.
Your finished hem should look something like this. I have two hems on this sample. The left is a longer stitch that is created with the guide to the right or the presser foot. The hem on the right is created with the guide more to the left.
If you are trying to achieve a true blind hem, you would use coordinating thread, and select a shorter length stitch. Always remember to press your blind hem open after serging.

Here's a look at the wrong side of the fabric.
The blind hem can also be used as a decorative finish to hems. Contrasting thread can add a fun design element to a garment.
Any questions?
5 comments:
Tricia,
Thank you for this excellent tutorial.
The very first time I attempted to use the blind hem stich on a pair of dress pants, I nearly gave up. This is truly a visual technique, thank you again.
Contrasting thread is such a fun idea! For some reason I can only make blind hems on skirts and shirts or anything that I'm making from scratch. I can't figure out how to get store bought jeans on my machine arm the right way for the stitches to turn out.
Great tutorial! I have always wanted to do blind hems but have been scared! One quick question for blind hemming on the serger (I have the same model) Do you remove the right needle?
Thanks so much!
Thank you so so much for this tutorial...the instruction book is awful!
It should have a little diagram of your sewing machine or serger pointing to the spots you need to oil. http://sergerworld.com/
Post a Comment