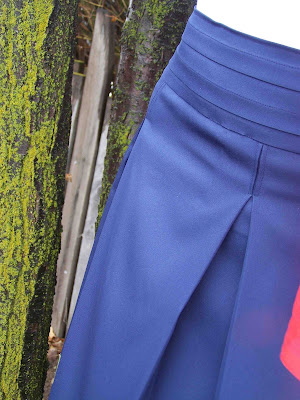
So today I have a skirt to share with you. It is a pieced box pleated skirt, with tuck details on the waistband. I've had this fabric in my stash since early winter, so it isn't as bright and cheery as I'd like for spring, but you could literally have up to five different colors of fabric blocked together in this skirt-use every color in the crayon box if you'd like.
The best part about this project, is that I am going to give you the formula to make your own, perfectly fitting skirt. No pattern, just math.
My skirt is high waisted, and the hem hits me a couple of inches below the knee. You can easily adjust the length of the skirt to fit your body type. I was just in the mood for a skirt that would keep me covered while seated.
Materials:
1 1/2 yards of main fabric-I used a polyester suiting in medieval blue (Joann's)
2/3 yard of contrast fabric. Calla Green
Coordinating thread (both blue and green)
7-9 inch invisible zipper (main fabric color)
Sewing supplies (including measuring tape, marking pencil).
The Math:
To Start with you are going to want to take two basic measurements, your true waist (smallest part), and three inches below your true waist.
Once you have both your high and low waist measurements we can plug them into our little mathematical formula to determine the sizes of our pattern pieces. We are going to use measurements of 30" and 33" as an example.
To determine the width of your front and back skirt panel pieces we will use the formula below. My measurements can be found to the side in red. I used 1.5" pleats, and 5/8" seam allowances.
Front and Back Skirt Panel
Low Waist Measurement / 2=A 33/2=16.5
A+{[pleat width(2)]6=B 16.5+{[1.5"(2)]6}=34.5"
B+2(Seam Allowance)=Skirt Panel Width 34.5+ 2(5/8")=35.75"
Now use your measurement (35.75") to cut your strips for the skirt panels. If you wish to shorten the skirt, you can adjust the strips as needed.
Cut Two Blue Pieces: Skirt Panel Width X 15 3/4"
Cut Two Blue Pieces: Skirt Panel Width X 4 1/4"
Cut Two Green Pieces: Skirt Panel Width X 3 1/4"
Cut Two Green Pieces: Skirt Panel Width X 6 1/4"
Waistband Formula
The waistband of the skirt is angled so that it will fit you both at your high and low waist measurements.
Low Waist Measurement/2=A 16.5"
High Waist Measurement/2=C 15"
Add 2(Seam Allowance) to both your C and A measurements. 16.5"+2(5/8")=17.75"
15"+2(5/8")=16.25"
You now want to cut two waistband facings that are 16.25" wide at the top, 17.75" wide at the bottom, and three inches long. The easiest way to do that is to cut a long three inch strip, fold it in half, and then divide both of your calculated waistband measurements by two. Mark your calculated high waistband measurement(8.125") on the top of the strip, and the low waist measurement (8.875") on the bottom (measuring away from the fabric fold). Using a straight edge angle between the two measurements and cut. Your waistband should be perfectly symmetrical when your strip is unfolded. Repeat for the additional facing piece.
Cut two waistband pieces.
Using the same technique as above, cut two waistband pieces that are the same width as the facings (waist measurements + 2(seam allowance)), but 6.875" long instead of 3". The added length will be taken in during the tucking of the waistband.
*Both my waistband, and waistband facing pieces were cut out of the main fabric material. If you wanted a contrasting waistband, additional material would be needed.
Now that you have your fabric cut, you can begin piecing your strips of fabric together. I sewed the narrower green strip between the two strips of blue, and attached the wider piece of green material to the bottom edge of the narrow blue strip. Use your determined seam allowance while piecing. Accurate seam allowance is important if you would like your stripes to meet up at the seams. Once seams are sewn, finish edges and press down or open. Repeat for both main skirt panels.
Please let me know if you have any questions.


4 comments:
Yet another stunning skirt! I love it paired with the red scarf too. I'm adding it to my list to make for spring!
So lovely! It looks perfect on you!!
I love the shape and style of this skirt. And you can tell it is made beautifully! I shared it today during Pleated Skirt Day of Skirt Week at seven thirty three!
Nice skirt
Post a Comment