Search This Blog

Showing posts with label leather. Show all posts

Friday, June 23, 2017

Red, White, Blue and Metallics Too: Fourth of July Flash Sale


It's that time again. Our fourth of five flash sales!  We are celebrating our birthday month with 40% off select items every week.  This week it is all about the Red, White, Blue, and metallics too. 


Red Leather Earrings
Red, White, and Blue Mini Teardrop Leather Earrings

We have a great selection of patriotic bows and earrings, along with some really neutral metallic leather earrings and leather bows, that are great for any occasion.
Leather Wrap Necklace
All sale items can be found in the Flash Sale section of the shop.
Gold Double Leaf Leather Earrings


 As always, you can use promo code "BIRTHDAY15" at checkout to save an additional 15%.

Mini Teardrop Leather earrings

Friday, June 16, 2017

Flash Sale Friday: Brights and Whites Collection June 16th-21st


This weeks Flash Sale starts now!  Save 40% off regular prices on select items.  Check out this week's collection of leather earrings here.

This week's collection is bright and playful.  


Snag a pair of our lightweight leather earrings, or a trendy little leather bow.


Stack your savings by using code BIRTHDAY15 to save an additional 15%.


Thursday, June 26, 2014

Fabric Wallet and Smart Phone Case


I think that I mentioned in the last post that I'd been working on a lot of custom project for family and friends, well here's a glimpse of one of those little projects.

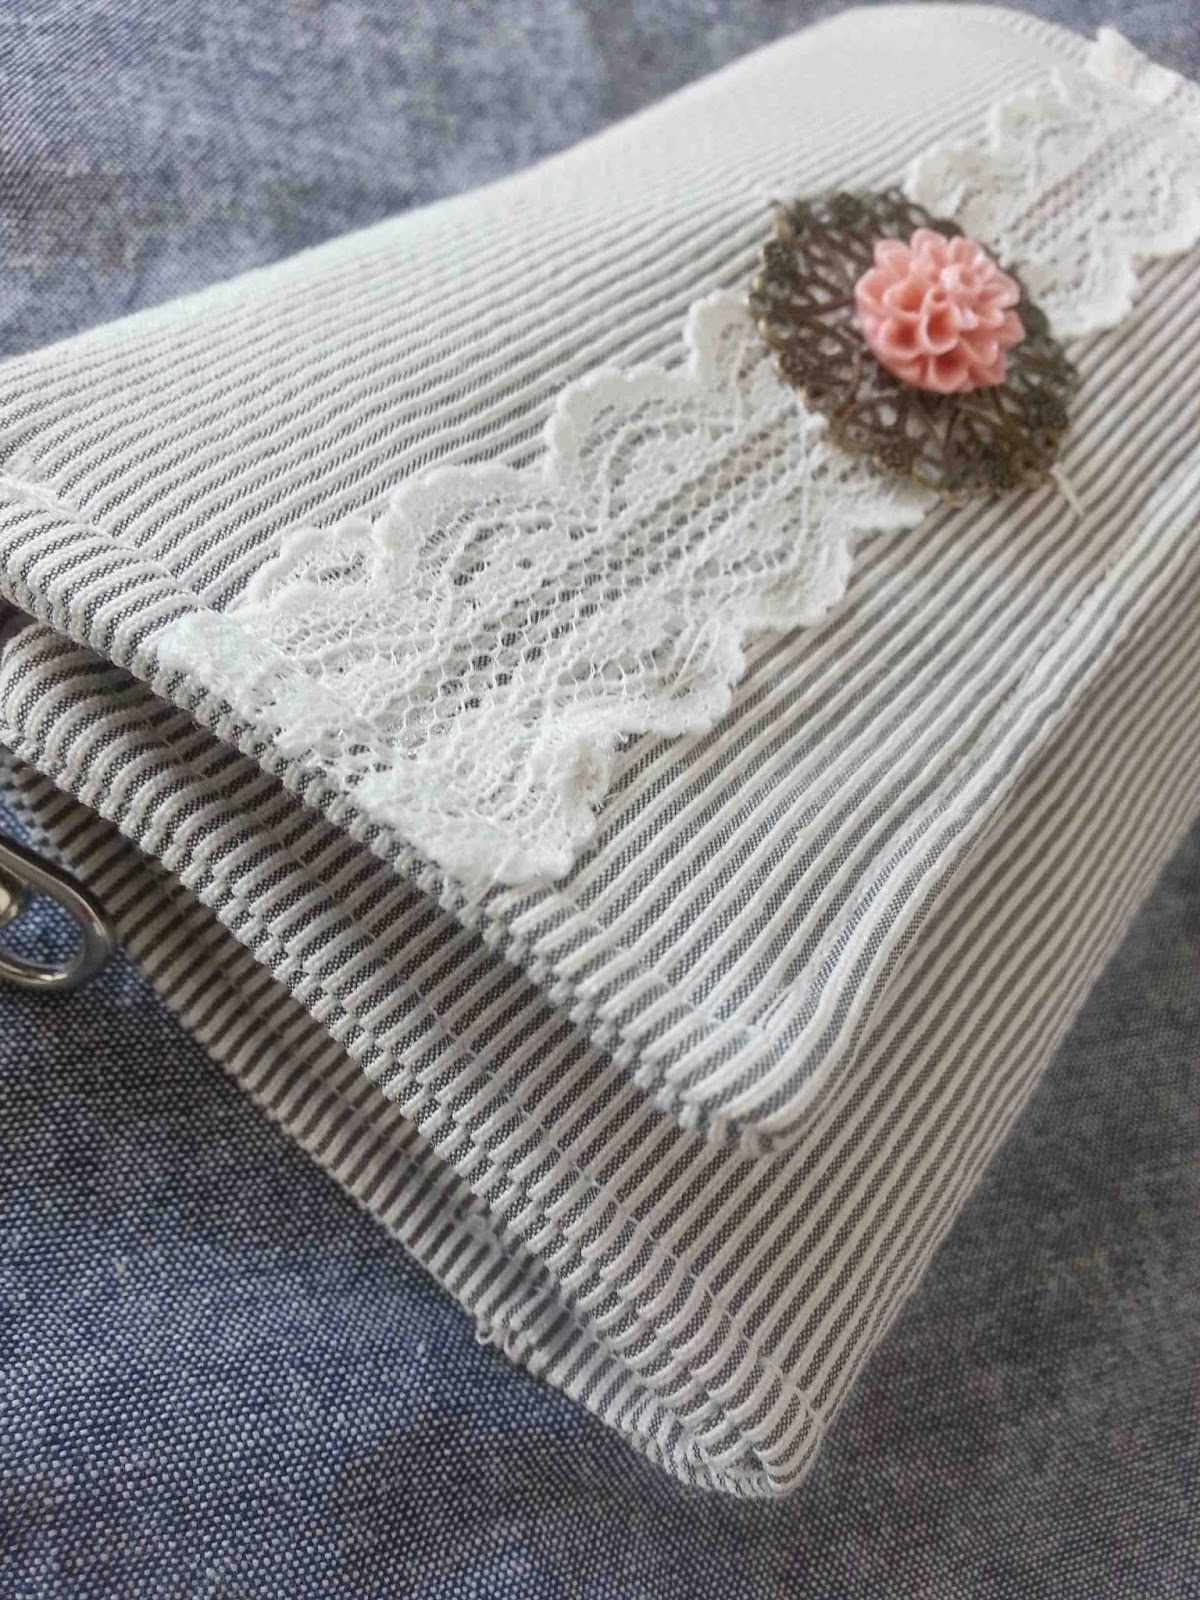
My sweet Mother In Law asked if I'd make her a case/wallet for her new iphone. I've made some basic leather sleeve style cases for ipods, ipads, ect, but I'd never made an official case/wallet hybrid.  So this was a bit of an intimidating project for me.  I knew that to get this project right there would have to be a lot of prep work: measurements, patterns, proper order and assembly, and then hope and pray that I remembered to add all of the seam allowances, and then of course hope that the phone fit in the wallet.


When I finally got over my trepidation, and sat down to make the case, it wasn't that bad. I ended up making a tri-fold wallet.  I added a side zipper pocket for coins, and a small pocket for lip gloss.


 In the middle there is a leather sleeve for the phone, but the phone also fits in on the side pocket, under the cards.

I also added a little leather wristlet, so that she can carry it on her wrists on all of her adventures.  I lace and flower were afterthoughts, the pink zipper felt out of place, so I added more of it.

It's not perfect, and there are things that I'd do differently next time, but all in all I'm pretty happy with the finished product.

Wednesday, March 26, 2014

Wide Elastic and Leather Belt


A local fabric store that I loved, for it's random collection of fabrics and notions, recently went out of business.  I tried stocking up on anything and everything that I thought I might want before they closed.  I'd been eyeing this wide (3 inch) striped elastic.  I loved the look, but didn't have the right skirt in mind. Then it hit me, it would make a perfect elastic belt.  


I dug through my leather scraps, and found some silver d rings, rivets, and a fastener.  With all of my materials gathered, it was just a matter of assembly.


Using my leather sewing needle, I stitched the leather to the ends of the elastic.


Then I punched some holes in some leather strips, added rivets, and attached the hardware to the belt.


 The belt is the perfect width for finishing off a maxi skirt.  

Wednesday, June 12, 2013

DIY Leather Bookmark Tutorial


Another simple leather scrap project for Father's Day.  My husband is an avid reader, and being on summer break, he's catching up on his hobby.  I thought some nice leather bookmarks might be appreciated, especially since there is usually a junk mail envelope, or receipt holding his place in his current read.

These are super simple to make.  No photo tutorial for this one, but I think that you'll do just fine without.

Materials: 
Leather scraps (upholstery weight-not too thick)
Thread
Leather Sewing Needle


 First off, you need to cut two right triangles of equal size.  Mine are about 2 1/2 inches long on the right angle sides.  The hypotenuse (the diagonal), will be longer.  Just make sure that the square sides are equal in length.


Next, this is optional, stitch along the hypotenuse edge of each of your triangles.  This is purely decorative, but I can't resist.

Next, place your leather triangles wrong sides together, and back tacking the start and finish of the stitching lines, sew the pieces together.  I stitch 1/8" away from the raw edge of the leather.  You can lengthen the stitching length if you'd like.  Contrasting thread is always a fun touch with leather as well.

As with sewing any leather project, I recommend using a non-stitch presser foot.  You can also reduce the amount of tension/pressure on your presser foot, to help the leather slide under the presser foot.


Slide the book pages into the open hypotenuse edge, and mark your place in your favorite book.  


Tuesday, June 11, 2013

DIY Leather Cord Strap


After making up some fabric cord keepers for Mother's Day, I figured that it was time to tackle the problem of unruly cords in a more masculine fashion.  Leather is such a great material to work with, and is a great gender neutral material. I love it so much, that I have a really difficult time throwing out leather scraps.  I have a whole bin full of small leather scraps, and fortunately, there is plenty to do with them.

These little leather cord straps require a piece of leather that is only 5/8 inch-3/4 inch wide, and only needs to be about 4 1/2 inches long. I made a few different sizes, just to see what I liked best, and to be honest, the smaller the better, four and a quarter to four and a half inches in length seemed to be just about right for phone chargers, and usb cables.  If you need something for a small but bulkier cord, five to five and a half inches would probably work well.


Materials:
Scrap of leather 5/8"x 4 1/2"
Sew On Hook and Loop Fastener (velcro) 1/2"
Leather Sewing Needle
Sewing Machine Thread


Take your strip of leather, and sew around the perimeter of the leather using your leather sewing machine needle. Lengthen your stitch length if desired.


Sew on your hook and loop (velcro) fastener.  You will attach one side to the right side of the leather, and one to the underside, on opposite ends of the strap. Done.  


If you really want to get organized, you could stamp the name of the cord that belongs to the strap using leather stamps.  I had a clever reader mention that she used her embroidery machine to label her fabric cord keepers.  So smart.

If your leather is particularly thick, or has a difficult time moving under the presser foot, reduce the tension on your presser foot, and use a non stick or teflon presser foot.

Friday, July 27, 2012

Leather Chevron Necklace


I love a good scrap busting project, and this little leather chevron necklace made me giddy.  I was able to use up some of my favorite leather scraps (the ones that I was feeling guilty for holding onto because they were so small).  


 I put them together using some leather cord, and a few jump rings.  They were pretty simple to make, and an awl made piercing the leather a cinch.  The most difficult part of the process was cutting the chevron pieces so that the edges were straight and even.

Pardon all of the white fuzz...apparently the tank came right from the dryer....but what did I dry it with?

I love mixing the different leathers together, for a bit of variety.  

Inspiration piece found here. My chevron pieces are a bit wider, and my jump rings a bit smaller.

Thursday, May 10, 2012

Tutorial: Little Leather Magnetic Frames


Fridge magnets can be such useful little things, they're great for hanging up masterpieces, and keeping hold of the grocery list, but they can also be so unsightly.  All to often the plumbers magnet that come's taped to the phone book ends up stuck on my fridge along with Clark's art collection. 

In an effort to clean up the fridge, and showcase some of my masterpieces, I made these little leather magnetic frames.  They are super simple, and can be made to any size.


 What you'll need: 
1 Piece of scrap leather
1 piece of clear plastic vinyl
2 pieces of felt
4 small neodymium magnets
Scissors
Thread

To figure out the dimensions of your materials, you first need to determine the size of photo that you want to frame.  Wallet photos are 2"x3".  You will want your frame window to be 1/4" smaller in both height and width than the size of your photo (so 1 3/4"x2 3/4" for a wallet).  Next you will add your frame width  times two, to your window size. So if your frame width is 5/8" then your rectangles would be cut to 3"x4".  Your Leather and felt rectangles would be cut to the same dimensions.  Your clear vinyl can be cut slightly smaller.


On the wrong side of the leather, mark the frame window and cut it out. You can use scissors or a rotary cutter for this step.


 On the sewing machine, stitch the two felt pieces together, by sewing 1/8" away from the raw edges.  Leave a 3/8"  opening for magnet insertion.   Next create small pockets for the magnets to sit in.  Doing so will ensure that you have one magnet in each corner of the frame, and will make sewing much easier after they are inserted. You will want to make sure that the pockets are large enough to accommodate the size of your magnets.

Slide your four magnets into the felt sandwich, and position them in their pockets.


 Stitch the magnet pockets closed.


Place clear vinyl under the leather frame.  Stitch 1/8" away from the inside frame window, securing the vinyl to the leather.  At this point you will also want to stitch along the outside edge of the top edge of the frame, as this side will be left open.  


 Position your leather frame on your felt sandwich.  Stitch along the two long edges and the bottom edge, connecting all layers.


That's it.  A little magnetic frame fit for the fridge.  

Dinosaur, Tiger, and Lion: by Clark the Shark

My boys have loved seeing themselves on the fridge, and love playing with the frames.  Because the magnets are encased in the felt, I don't worry about them playing with them.

Sunday, May 6, 2012

Tutorial: Leather and Nylon Cuffs


I LOVE using up some fabric scraps.  I always feel that after I use a fabric from my stash, that I should be making room in my drawers, but unfortunately fabric scraps seem to take up just as much room as a flat fold.  So, when I am able to use up the last little material scraps from a previous project, it is extremely rewarding. 

These little CTR wrist bands used up the remaining nylon webbing that I had from the Nylon D-ring belts that I made a couple of weeks ago.  Wahoo!  Unfortunately, I liked the bands so much that I went out and purchased five times as much nylon webbing, to make some for my bazaar booth.


What I used:

Scrap piece of leather with CTR (choose the right) stamped in it
1" of velcro tape
6.25" of nylon webbing (3 year old measurements)
Contrasting thread


To start out I added a few rows of contrast stitching along the nylon webbing.  I was surprised how easy it was to feed through the machine with the zig zag stitch.


 Next, I attached the velcro.  You want to attach it to either end of the bracelet, with one piece of the velcro on the top of the band, and one on the bottom (underside). I secured the velcro with a triple stretch stitch.


Once the velcro is attached your cuff is basically done.  You can leave it plain, or add a small leather piece to the top of the band.  To do so you will want to use a leather needle for attachment.


 If you are attaching leather, I recommend that the stamped leather piece is no longer than the top of the wrist.

You can find more information on leather stamping here:

Leather Stamping

Leather Letter Stamping

Casing Your Leather