Search This Blog

Showing posts with label technique. Show all posts

Tuesday, August 28, 2012

Technique Tuesday: Basic Three-Thread Flatlock Stitching


Flatlock stitching is a technique that I've wanted to figure out on my serger for awhile now.  A flatlock seam can be decorative when serged on the fold of a fabric, or used to join two fabrics together, while creating a finished flat seam.  


The set up of the machine is pretty simple.  It is a three thread stitch, with the needle in either the left or right position. The multi-purpose guide foot is used, and can be extremely helpful when stitching along a folded fabric.  

Tension Settings: (Brother 1034 D)
Left Needle: 1.0 (wide stitch)
Right Needle: 1.0 (narrow stitch)
Upper Looper: 4.5
Lower Looper: 7.0-8.0 

 See your serger handbook for settings for other makes and models.


Differential: 0 (far left)
Stitch Length: 3.0-4.0
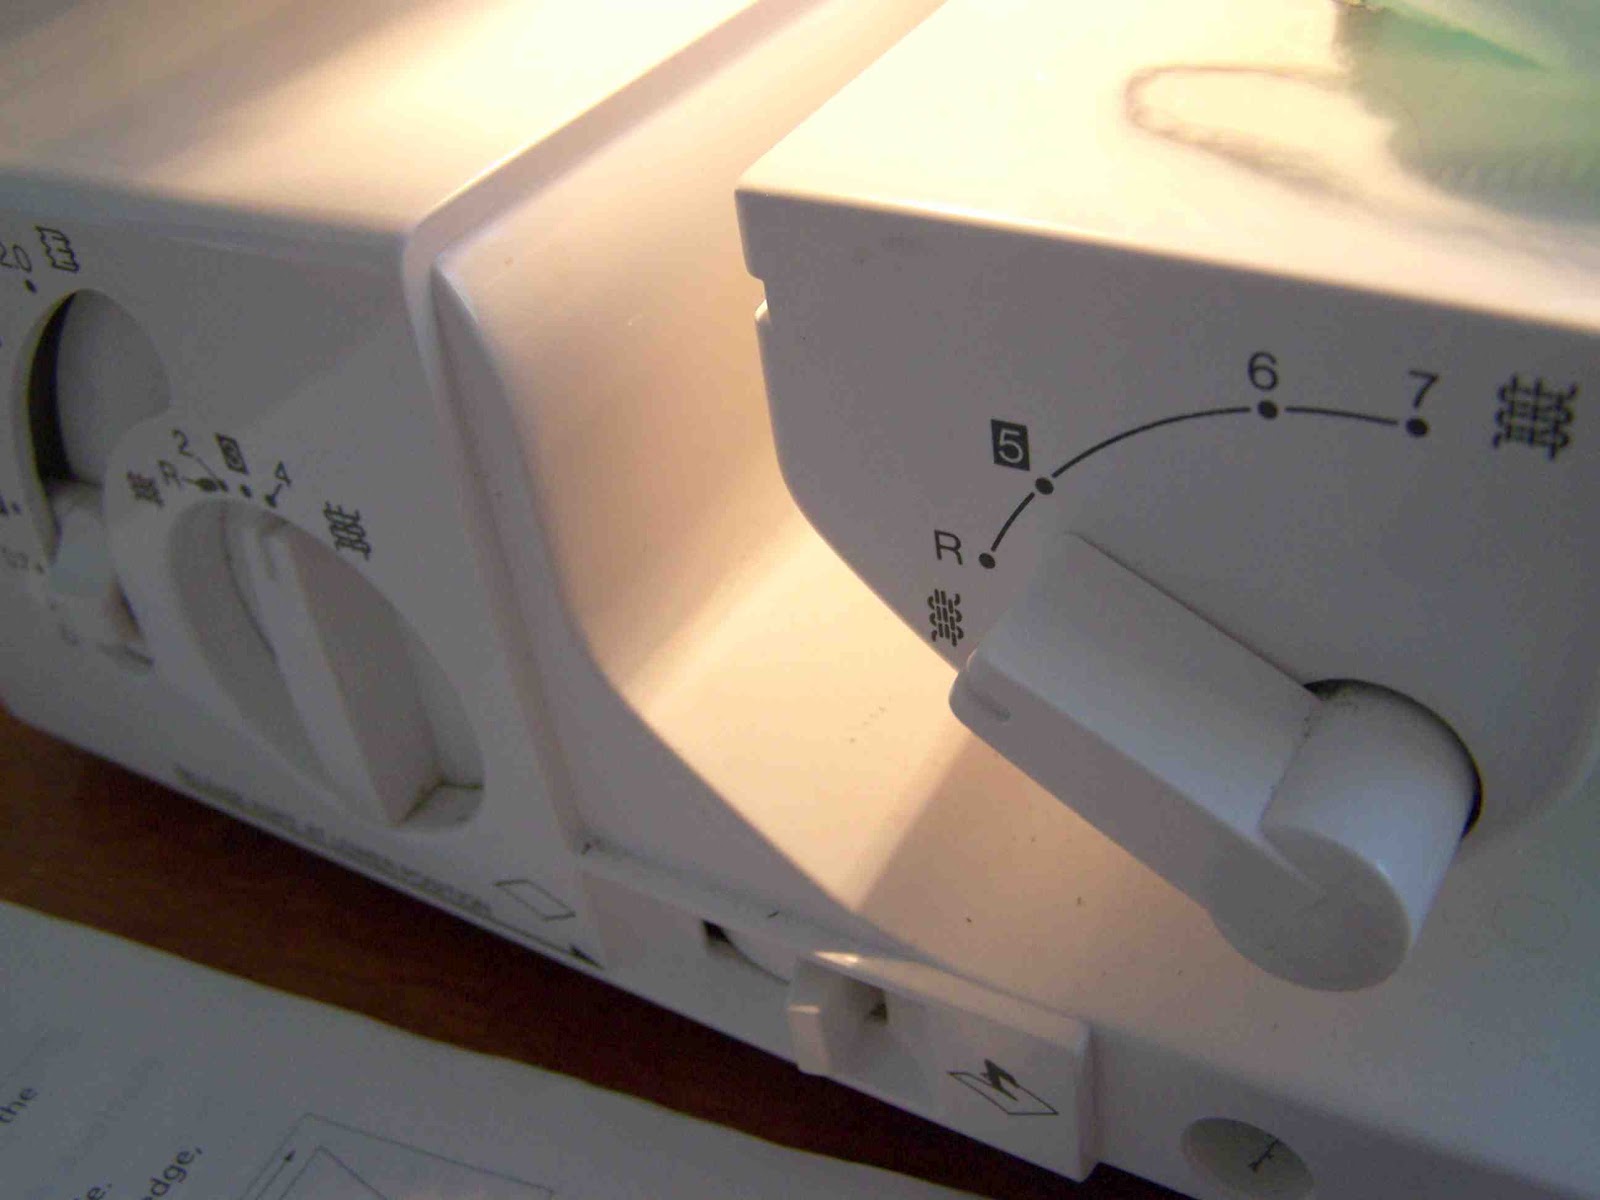

 Knife: 3.0-4.0


 Multi-purpose guide foot attached.  The white plastic piece on the right of the foot is the guide.  The metal wheel on the left adjusts the position of the guide.


If you are flatlock stitching on the fold of a garment, you will press the fold.  Then align the fold of the fabric with the guide foot.


  I found that my stitches were the best if the guide sat in the middle of the stitching. 


Because the stitching is unbalanced, when the fabric is pulled open, the stitching pulls flat on the surface of the fabric.  

Bunchy fabric.

Initially, I had my guide foot wider, and my fabric always bunched up between the stitching when pulled open, when I moved the guide closer to the left needle, the fabric laid nicer.


The wrong side of the flatlock stitch is decorative in and of itself.  It creates ladder pattern, very similar to the blind hem stitch. Either side of the stitching can be shown on the garment.


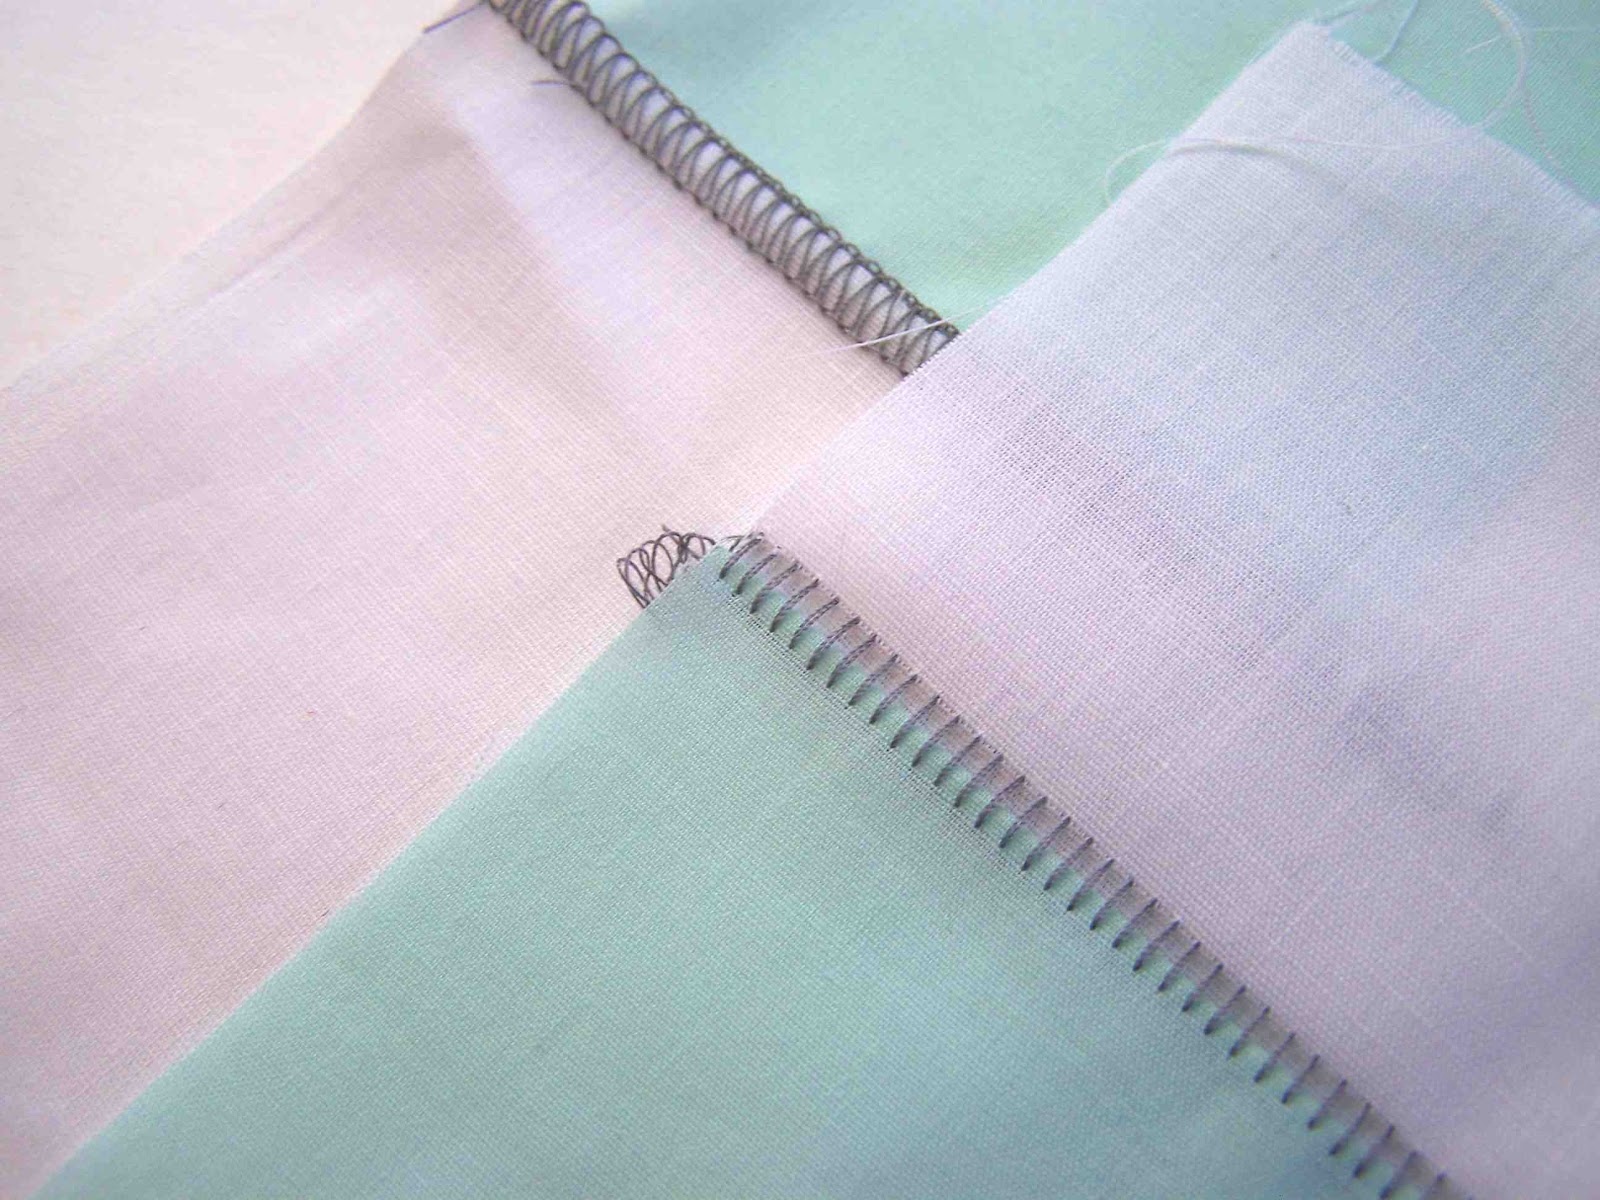
Flatlock stitching can be done to join two pieces of fabric.


 When flatlocking two pieces together, the wrong sides of the material should be facing each other.  The right sides should face outward (unless you want the ladder stitching to be on the right side of the fabric). When joining two pieces together with a flatlock stitch, it is not necessary to use the guide.  Trimming the material with the knife will ensure an even and clean edge.


 Serge just as you would if the material were on the fold.  When the seam is pulled open, the top piece of material will fold over toward the edge of the flatlocked stitch.

I've yet to try the technique out on an actual project, but can't wait to do so.

 Have you used this technique on any projects?  If so, what were they?  

I've seen the stitching on swimsuits, raglan t-shirts, and kids clothing.  I love the look of it.

 Just a little reminder that you can receive 10% off your orders from the P&G eStore this month, with free shipping on orders over $25.  There are several olympic deals going on still, so be sure to stop by and snatch your favorite products from the comfort of your home office. 


Tuesday, May 1, 2012

Technique Tuesday: Attaching Buttons With the Sewing Machine


Button, button who has the button?  Well, I have lots of buttons, and I love them!  But one thing that I don't love about buttons, is attaching them by hand.  I'm so happy that I have a sewing machine that can do most of the work for me. 


Today I'm going to show you how to attach your pretty little buttons with your sewing machine.


We'll discuss the basic button attachment, four hole attachment, small buttons, and creating buttons with a shank.  I know, thrilling right?  It might not knock your socks off, but it might just help you finish up those projects that just need to have buttons attached. Let's get started.


Tuesday, March 27, 2012

Technique Tuesday: Scallop Edge Stitching


This week's technique is the scallop stitch.  Many of you probably have this stitch built into your machine.  It is a satin stitch that forms a shell like shape.  I'm not one to use decorative stitches all that often, but this particular stitch can add a really interesting finish to a hem or raw edge.


The technique requires basic materials.  My machine came standard with a monogramming foot; this foot has a bit wider opening to accommodate the wider stitch. You will also need a sharp pair of scissors for trimming the scallops.  Spray starch, an iron, and tear away stabilizer can also be helpful. 

Tuesday, March 6, 2012

Pintuck Top Tutorial


 Sometimes when I'm working on a project I'll jot down notes on a paper, you know, just in case I decide to write up a tutorial. When I started this maternity dress in the summer I thought that I'd share a full tutorial with you.  Well, half way through the project I realized there wasn't time, and I rushed to get the dress finished in time for a wedding.


I did however, have some photos and notes from the making of the bodice.  So seven months later, I'm sharing a few tips on creating the pintucks on the top, and finishing off the arms and neckline with elastic trim.


The bodice of the dress is basically a cropped cap sleeve top. You can find my notes and instructions on creating a cap sleeve t-shirt here.  I pulled out my go to cap sleeve pattern, and cropped it below the bust, resulting in an empire waisted dress.

I then pulled out my ol' taylor's chalk, and began marking where I wanted my pintucks to sit on my front pattern piece.  Basically,  at the neckline, the pintucks sit 3/4" apart, at the bottom they flare out to be 1 1/2" apart.  The center pintuck is 4 1/2" long, the two to the side are 4", the two further out are 3 1/2" long, and the outermost pintucks are 3 " long.


Now I don't have any decent photos of the actual sewing of the pintucks, but I'll do my best to explain the process.

You will pick up your fabric, and fold the fabric along once of your pintuck marking lines.  Make sure that the wrong sides of your fabric are facing each other when the fabric is folded.  At this point it would be helpful to put a pin at the bottom of your pintuck  to indicate where your stopping point is.

Begin stitching at the top (neckline) of your tuck.  Stitch very close to the fold of the fabric, no more than 1/8" away from the edge.  When you get to the bottom of your pintuck you will then slightly alter the direction of your stitching line, so that you stitch off of the folded edge.  Backstitch to secure stitching, and clip the threads very close to the fabric.  You will repeat this step for each of your pintucks. When the fabric is unfolded a teeny tiny tuck is left.


 I used this same technique for the pintuck sunburst top, with an additional two pintucks on each side.  It is a really subtle embellishment that dresses up a plain top.


After finishing the pintucks, I sewed the front and back bodice pieces together at the shoulder seams.  I then serged the raw edges of the neckline and the arm holes.  I then measured the circumference of the neck opening, and the length of the sleeves.  

I then cut my elastic trim so that it was 3/4 the length of the sleeves and the circumference of the neck.
To attach the elastic trim to the sleeves, you will first want to find the center point of your elastic trim. Pin the right side of the elastic trim to the right side of your bodice pieces at the shoulder seams. Now stretch your elastic trim and pin the trim ends to the ends of your sleeves.  Stretch your elastic trim, and pin in along the length of the sleeve, taking care that the fabric and elastic are evenly distributed.


 Stitch down your elastic trim close the edge of the elastic (closest to the decorative edge. Once your trim is stitched in place, turn the trim toward the wrong side of the material and press.  Topstitch along the length of the sleeve, 1/8" away from the edge.

You will use this same basic technique to add the elastic trim to the neckline, the main difference being, that you will need to stitch the trim into a round prior to attachment.

*I guess if you really wanted to, you could attach the trim to the neckline prior to stitching both shoulder seams.  You could sew one shoulder seam, measure the length of the neckline, find the center point on the neckline, and then distribute the elastic trim.  


Once your trim is attached, you can then stitch the side seams of your top, and add a skirt to the base if you wish.