
I've been in a bit of a creative funk lately. I just haven't had the energy or much of a desire to sew, partly due to a project that was more trouble than it ever should have been.

When I get in a rut like that, the best thing to do is make something that isn't on my to-do list at all. Something that doesn't have a deadline, and is just for me. Since I don't have any girls of my own, dresses are especially fun to make, and this little pin-tucked sundress has recharged my lil' sewing battery.
If you missed my pintuck tutorial earlier this week, and you're not familiar with the technique, you'll want to check it out before getting started.
Materials:
1 package Double Fold Bias Tape-any width will work
3/4 yard main fabric
10 inches of secondary fabric (for underskirt)

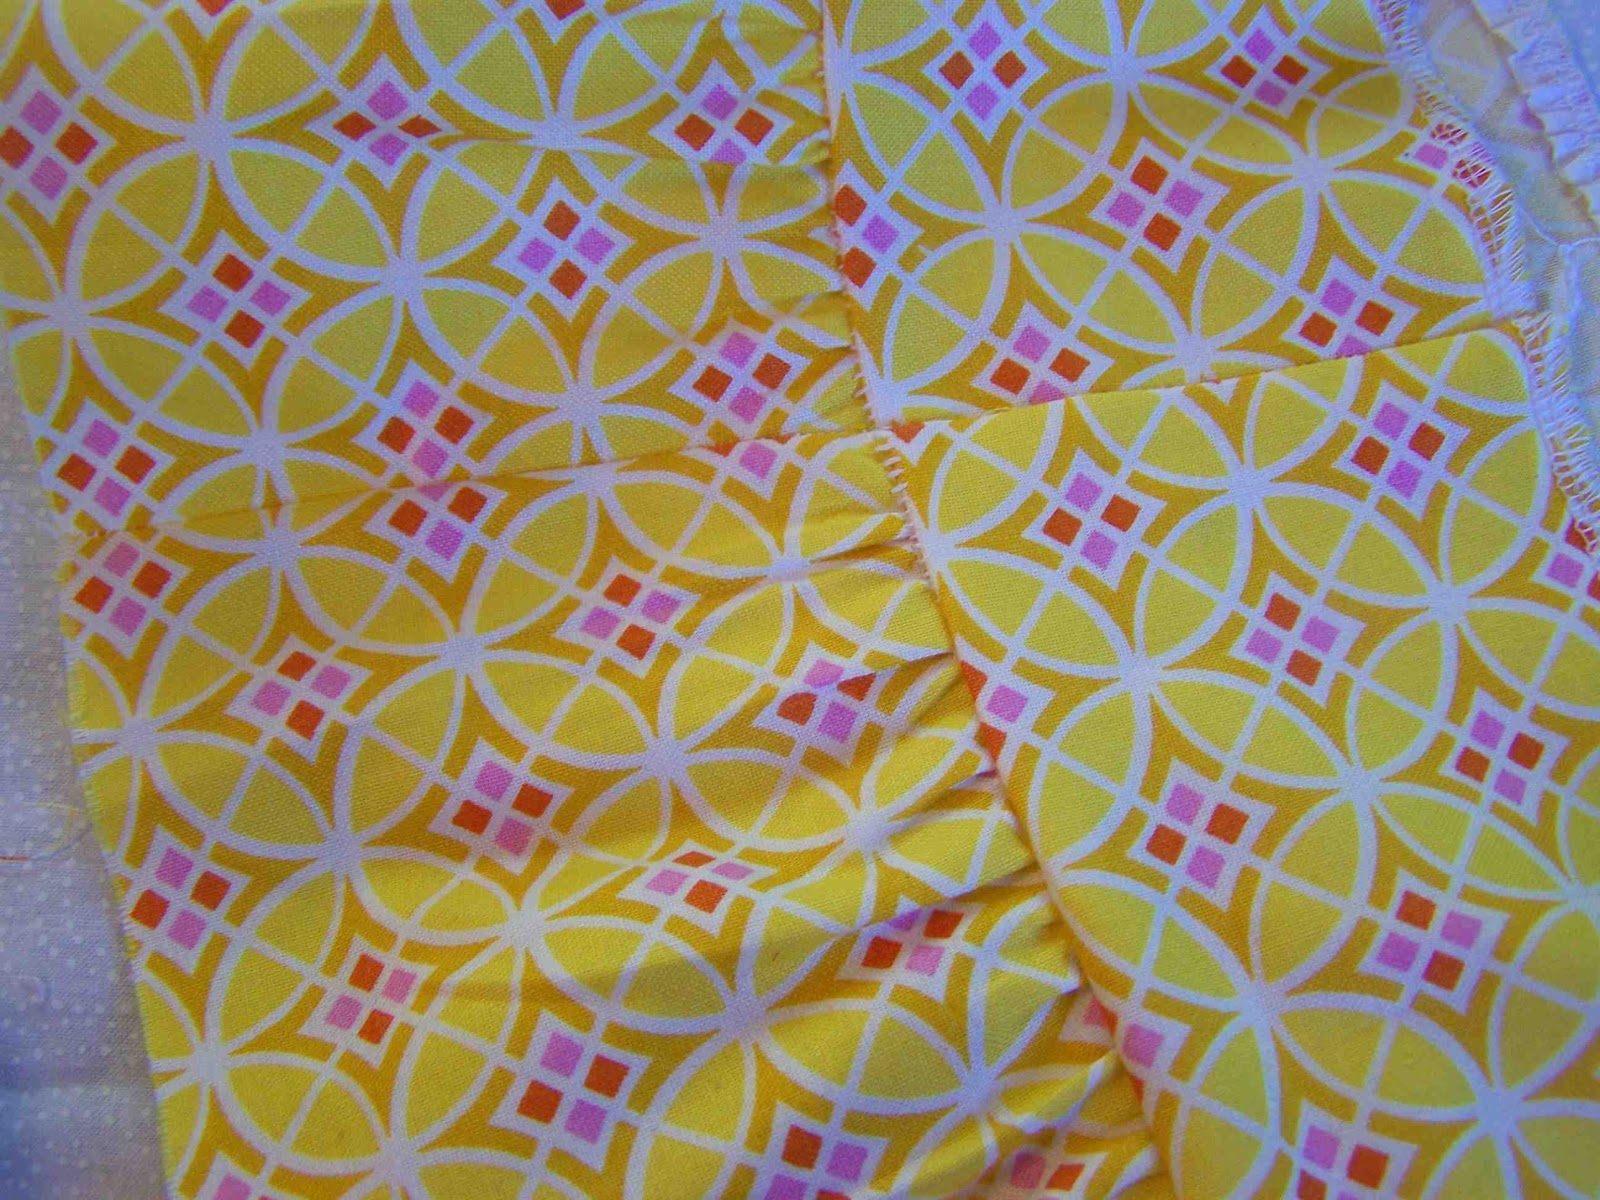
The first thing you need to do is sew parallel pintucks along the bias of a rectangle of fabric. I failed to measure my rectangle before making my pintucks, but 12.5x25 inches should be plenty. My pintucks are an inch apart. Press your pintucks down in the same direction.

Once you have your material pintucked, you will want to cut out four total outer bodice pieces. You will want to cut out two pieces with the underarm arc on the left, and two with it on the right. It's important that as you cut out these pieces, that the pintucks run down from the under arm arc. To achieve this, you will need to cut out the left under arm pieces, with the pattern piece right side up. For the right pieces, flip the pattern piece over, and rotate the pattern piece 90 degrees in relation to the pintucked material. This way your pintucks will run down from the underarm, and when the two bodice pieces are joined, they will form a chevron. You will also want to cut your pattern pieces with the pintucks in starting and stopping in the same place. To do this, it is helpful to make a mark on the pattern piece, indicating where your first pintuck is. That way, if you properly position your pattern pieces, the pintucks will all align when the bodice pieces are sewn together.
Clear as mud?

Cut two lining pieces on the fold. This will be done on your regular (non pintucked) material.

Cut two strips of material, 4.25"x width of material.
For an underskirt, cut two rectangles of a secondary color, 8.25"x16". (no photo)

Begin by stitching one right and one left outer piece together. Take care to match up pintucks as you sew them together. Sew down from the top of the bodice piece, to the lower edge. Doing so will help ensure that the pintucks all fall in the same direction. Repeat with remaining pieces. Press seams open.

Stitch lining pieces to pintucked bodice pieces, by matching up upper raw edges, and sewing along the top edge with right sides together.

Match up the side edges of both bodice/lining pieces. With right sides together, sew along all straight side edges (four total). Do not sew the curve of the underarm. Press seams open.

Turn the bodice right sides out, with the lining pieces on the inside. Topstitch along the upper edges, including the curve of the underarm. Baste the lining/bodice pieces together along the bottom edges.

Cut two lengths of bias tape, each 22 1/2" long. Open up the ends of the bias tape, and fold so that the right sides are touching. Stitch 1/4" away from both ends. Clip corners. Turn right side out and turn points out.

Find the center point of the bias tape, and match up with the side seam on the bodice. Position bias tape so that the raw edges of the bodice under arms, and butted up against the inside fold of the bias tape. Stitch 1/8" away from the edge of the bias tape, sewing through both layers of bias tape, and the bodice. Repeat with both under arms.

Stitch along the additional length of the bias tape. These will become the shoulder ties.

Create a gathering row on two of the fabric strips. Gather the fabric, and attach to the remaining strips of fabric. You can find my tutorial on gathering fabric here. Once you have your gathered rows attached to your straight rows, you will want to cut your strips skirt pieces down to 16".
With right sides together, sew your skirt pieces together at the side seams. Match up the gathered seams. Press seams open. Do the same for your skirt pieces.

Insert your underskirt under your skirt-imagine that! Create gathering rows along the front and back panels of the skirt pieces. Gather the skirt. Align the raw edges of the top of the skirt, with the raw edges of the bottom of the bodice. Right sides should be together. Pin the skirt to the bodice piece. Make sure that gathers are evenly distributed. Sew just outside the gathering rows.

Press the skirt/bodice seam up. Topstitch 1/8" above the seam, securing the seam as you sew. You can also do this along the gathered rows of the skirt, for a more finished look.

Attach bias tape to the bottom edges of the skirt and underskirt.

Stitch 1/8" away from the fold of the edge of the tape. (I know that this is not "the proper" way of attaching bias tape, but it works fine for me).
*TIP: Double fold bias tape has one side that is slightly wider than the other. Positioning the wider side of the tape on the underside of the project, will make it more likely that you'll catch both layers of the tape when you are attaching it.

When you have about an inch and a half left to sew, lift your needle, trim tape, and fold raw edges under. Continue stitching so that your bias tape overlaps the raw edges of your starting point. If you'd like you can stitch down the folded edge of the bias tape as well.

Repeat the process for the underskirt.

Now, I didn't make any bloomers for the dress, but if you're looking for a pattern, Dana from Made, has a great little Diaper Cover Tutorial.
Thanks for reading! Let me know if you make the dress...I love to see photos!
6 comments:
That is so sweet! Pintucks are just perfect for little-girl clothing.
oh pretty! love it
this is adorable! I love your creative use of pintucks! Well done!
This is adorable. It's a shame my wee girls are now 32 and 30!
Oh my gosh what a darling dress!! Love the colors and pintucks. :)
This is an adorable dress! Do you have directions for a larger size or suggestions on how to make this pattern larger size? I hoping to make it for my for a 4 year old : )
Post a Comment