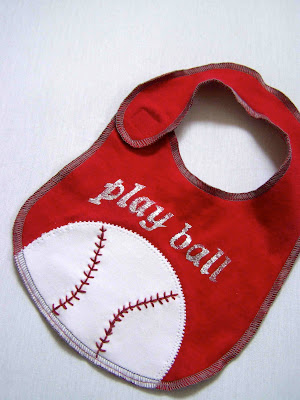
Miles has started drooling like a saint bernard, and in order to prevent him from soaking through his shirts, he's forced to wear a bib constantly. He really doesn't mind, he likes having something to stuff in his mouth whenever he wants. The problem was that we didn't have enough bibs for him. He'd go through several in a day, and I refuse to do wash everyday. So, I'm sharing a pattern, template, and basic tutorial on how to make these simple knit baby bibs (6-12 months). It's a great stash busting project if you have some extra knit fabric lying around. Have a favorite old t-shirt that you can't bear to toss? Turning it into a dribble bib is a great option.
First things first, go and print off the dribble bib pattern. I've included templates for the pattern, appliques, and text.
You'll need to cut out two layers of knit fabric. I fold my fabric in half with wrong sides together, position my bib pattern, and then cut out both layers at once. Doing so ensures that both of your pattern pieces will be facing the proper direction.
Once you have your bib pieces cut out, you'll want to applique or embellish them to your liking. All of my bibs have a bit of applique and freezer paper stenciling on them. The football and baseball also have some simple embroidery stitches. My post from yesterday has some helpful tips on applique.
If your interested in the baseball applique, here's a little photo tutorial on how I embroidered the baseball stitching. Hopefully it's self explanatory. Before I began adding the stitching, I lightly transferred the arc of the stitching on the top of the applique, you can do so with a fabric marking pen, or carbon transfer paper.
After you've appliqued, stenciled, and embroidered to your liking, you will want to pin your bib pieces together, and stitch around the perimeter of the bib. I used 1/8" seam allowances, just make sure that you catch in both layers of fabric.
You will also want to add some sort of closure. I added some velcro. Place the rough side of the velcro on the top side of the main bib area. Having the rough piece here will prevent the baby from being attacked by the velcro. Next stitch the softer piece of velcro to the underside of the wrapping neck section of the bib. If you'd prefer you could use some simple snaps in place of the velcro.
I used a triple stitch when attaching my velcro, for added reinforcement.
At this point you could consider your bib complete, if you like the look of the raw edges. There are a few other options for finishing off the bib edges. One option is using a ribbed knit or knit fabric to bind the bib. I'll show you how I bound the bib with some ribbed knit.
I cut a long strip of ribbed knit, selvage to selvage edge, and 2.5 inches wide. I then pressed the strip in half, causing the strip to be 1.25 inches wide when folded.
Next I turned my bib underside/backside up, and aligned the raw edges of the ribbed knit with the raw edges of the bib. Starting on the side of the bib with the closure, I left a 4 inch tail of binding, and began stitching near the top edge of the side. I used 1/4" seam allowances for this step. I then followed the bib around all curves until getting to the bottom edge of the side of the bib. (I'm sorry I'm having a really difficult time explaining this).
You'll stop stitching when you reach the starting side of the bib, leaving about four open inches on the side of the bib. Leave about a four inch tail of binding.
Next, you'll open up both ends of your binding tails, and meet them on the open side of the bib. Make sure that the binding is not stretched, but the same length as the side of the bib. Pin both open ends together at the meeting point.
Stitch the open ends together where pinned. Trim the extra material. Press the seam open.
Next, stitch the binding down to the body of the bib along the opening. Your bib will now have continuous binding around the outside.
Your binding is done. For another technique on binding with knit you can see this tutorial here. This tutorial uses more of a double fold bias tape technique, and is done using the same knit fabric as the garment.
If you don't have access to a serger, and don't want to mess with binding, you could always cut out bib pattern pieces out with a seam allowance. You could sew the pieces together with right sides together, leaving an opening along the bottom edge of the bib. You would then turn the bib, press the open edges inward, and topstitch around the entire bib. If I make another bib I'll try to use this technique and walk you through it step by step.
Thanks for reading. Enjoy your dribble bibs.


3 comments:
Baby bibs
Your design of the blog is really eye-catching. More over the content is also very productive. Information you have provided is really very beneficial.
Ive got a 3yr old disabled grandaughter who dribbles a lot,what sort of size material would i need to make some for her?My daughter wants some of these bandanas for her.I think they're a great idea
These bibs are so awesome! Your blog is very cute. Thank you so much for sharing this with us.
Post a Comment