

I've got another tutorial for you. Today I'm going to show you how to make this simple plastic bag storage case....though it could be used for a number of different items, I'll be using it to store old grocery sacks in my diaper bag. Grocery bags are great to have in a diaper bag, you can wrap soiled diapers in them, or throw wet or soiled clothing in them while you are out of the house. I'm sure that those of you with pets use them frequently for clean up as well. No pets? No babies? Do you get carsick? Keep a small case full of plastic bags in the jockey box of your car for those windy roads and long drives.
This small fabric case will help reduce the bulk of the plastic bags, and reduce the noise that they cause when you have to pull them out of your bag to search for you wallet or car keys.

I may even use it for storing extra nursing pads. You don't really want those floating around in the diaper bag....just waiting to fall out at an inopportune time.
Want to make one? Keep reading for the full tutorial.

This particular storage container is circle based. Does anyone else hate cutting circles? I always have a hard time finding a perfectly circular item in my house to trace and use as a template.
I used my Accuquilt Go! Circle 2"-3"-5" die to simplify the project. It really made this project simple. Of course you don't have to have the Go! baby fabric cutter to follow this tutorial and make this project, but it did make it go much quicker.

I marked my die with a permanent marker to make the die blades more visible, but I'm happy to say that Accuquilt has now come out with some two toned foam dies that help ensure accurate fabric placement, and reduce fabric waste.

For the circular bag holder you will need to cut four circles of fabric. I used some medium weight fusible interfacing to reinforce each piece of fabric. I then cut four five inch circles. If you wanted your storage case to hold more bags, or accommodate disposable nursing pads, then you could make the circles even larger.
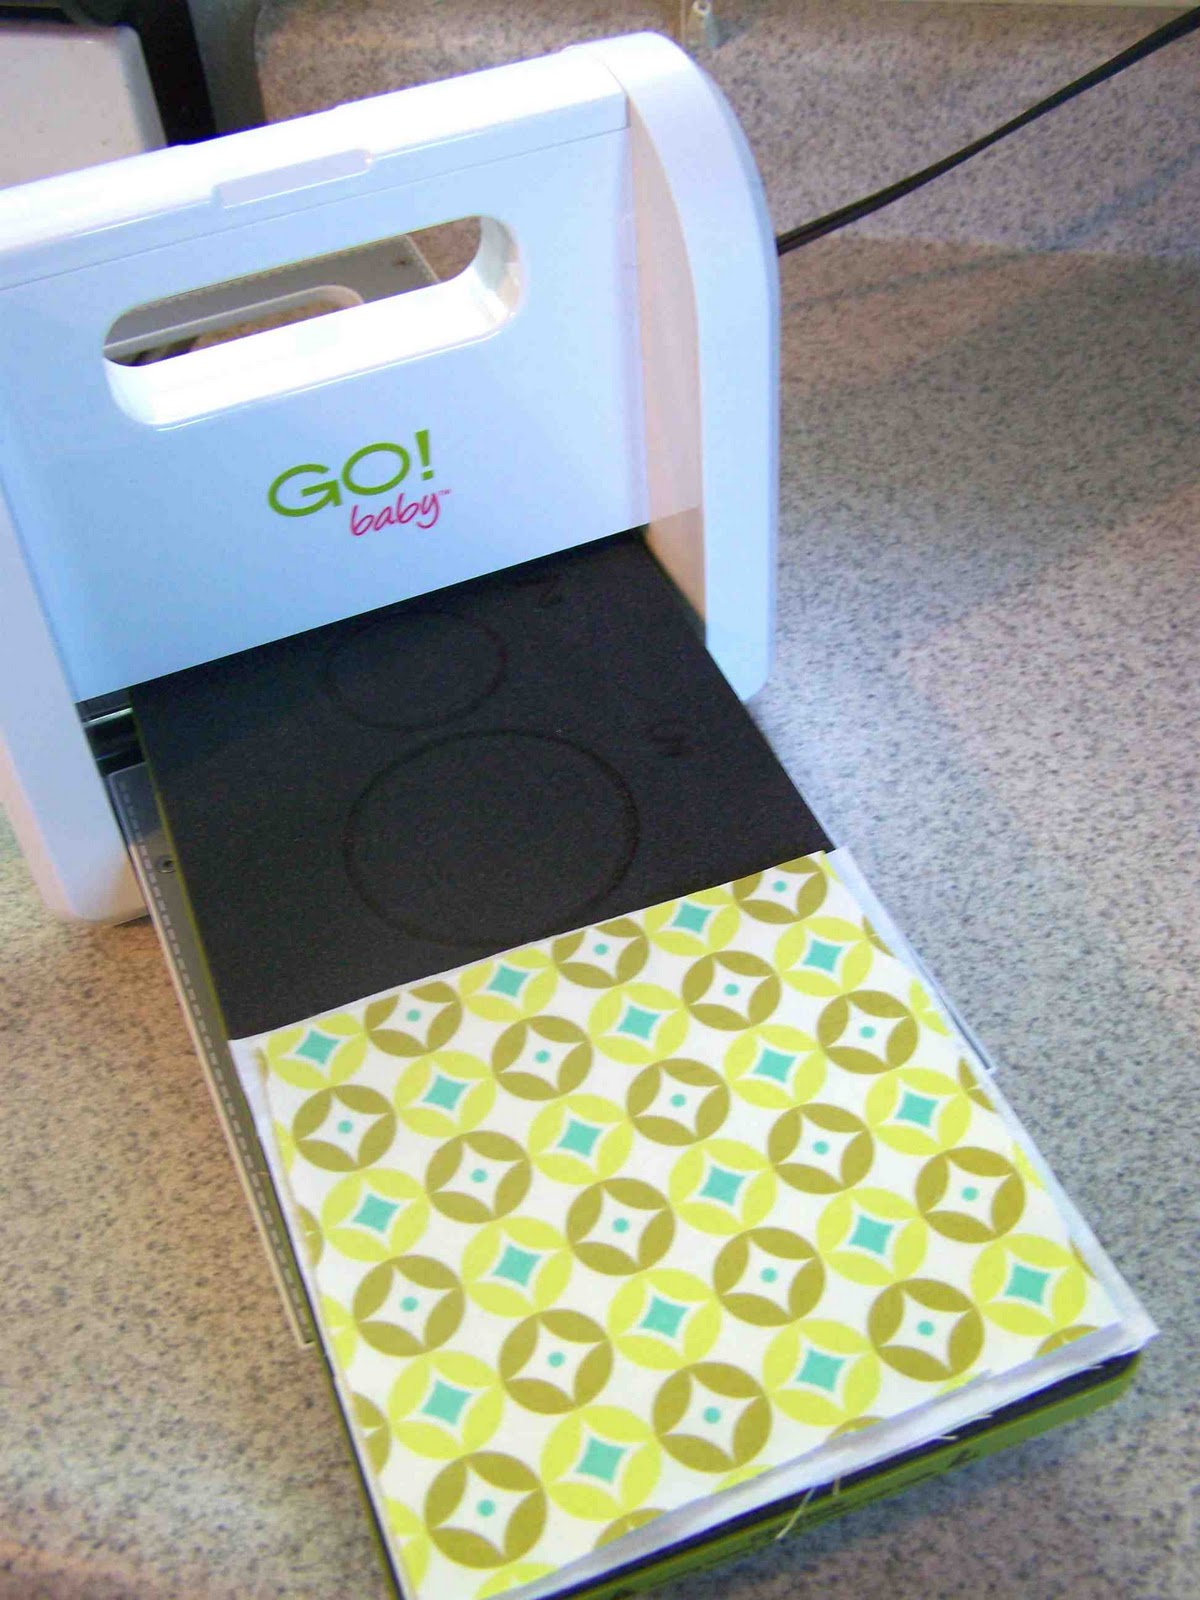
If you are using your Go! fabric cutter and die, place two layers of the interfaced fabric with right sides together on your five inch die. Place the flexible cutting mat on top, and roll it through your Go! baby fabric cutter.


Once your circles are all cut, you will want to take two of the circles and press them in half with interfaced sides together.

Next, stitch 1/8" away from all edges using your sewing machine.

Repeat with both pressed semi circles.

Next take your two remaining circles and pin them with interfaced (wrong) sides together. You will once again want to stitch 1/8" away from the raw edges.

Take a 3" piece of ribbon and press it in half so that it measures 1.5".


Take your two semi circles, and pin them to the top of the exterior side of your full circle.

Using a 1/4" seam allowance stitch around the entire circle.

Using pinking shears or a pinking blade on your rotary cutter, trim the seam allowance to prevent the fabric from fraying. If you don't have a pinking blade you could use an overcast zig zag stitch to finish off the raw edges, or serge them with an overcast serger.

Next make small clips in each valley of your pinked edges. Take care not to clip through your stitching line. Clipping the valleys will help the turned circles lie flat.

Turn your circles right sides out, and press. Notice how nice the circle turned because of the clipped valleys....aahhhh.

And because I love a topstitched edge, I secured the storage case by stitching 1/8" away from the edge of the case.

Your case is now just about finished. You can stuff it full of neatly folded plastic bags.


There you go, a simple storage solution for all of those plastic grocery sacks that you have stuffed in your bag.
Thanks for reading. I'll be linking here.

Don't forget that you can receive free patterns from Accuquilt, just for subscribing by email.

15 comments:
Oh those are perfect for nursing pads! :) I always have an extra plastic bag in the car but I really should put one in my purse. This holder would keep things nice and tidy. Love your fabrics. :)
those are perfect! i was thinking to make something to hold doggie bags! this would be so neat! x
Спасибо! Интересная идея!!!
Tricia - I think this is fabulous! And I may be using them to carry nursing pads too :).
What a great little packet! Love it!
very cute and practical! i always have to have plastic bags for the motion sick ones in the family.
i had to laugh though that you referred to the "jockey box" i used to call it that too until I met my husband and he teased me about it. he says it's a glove box or glove compartment. my parents called it a jockey box too, perhaps it is a west coast term?
What a great idea!
Beth
what a great and cute idea!~!
so very cool!! love your site. and i, too, love that you used the term "jockey box"! my husband had never heard that term before meeting me. (my parents, too, call it that!) :)
What an excellent idea! I think I'll make one for friends with a dog, to make "poo" bags a little more attractive!
I'll be sure to link back to you after I've made mine. Thanks!
What a great idea for your purse! Perfect for putting grocery bags in to take shopping.
Val @ artsybuildinglady.blogspot.ca
Thanks to share these details it’s truly nice.httom/
Your articles make whole sense of every topic. http://www.polyvisions.com/plastic-extrusion-companies/
The blog really assists me much and it’s been a week that I’ve been searching on this topic. Thanks anyway for sharing my favorite information. lowest deductible car insurance
The blog really assists me much and it’s been a week that I’ve been searching on this topic. Thanks anyway for sharing my favorite information. lowest deductible car insurance
I found this looking for easy sewing projects, I'm new to sewing. This was easy and fun. Thanks for posting!
Post a Comment