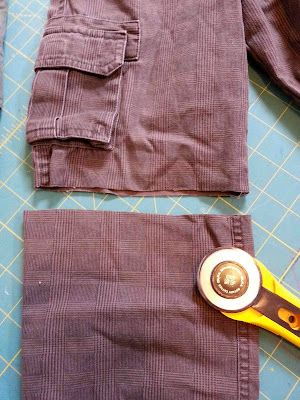
So, in an effort to save money, and make the investment last, I turned several pair of his worn kneed jeans into shorts, but I'm not going to call them cut offs, let's call them refashions. I'll share a few tips on creating successful short refashions.
First off, make them (if for boys), as long as possible. Mid thigh shorts are a dead giveaway that the shorts were once pants. Second, try to incorporate as many of the design elements of the pants into the hem of the shorts. Third, control the fray.
This brown pair of shorts started out as a pair of pants that never quite fit right. We liked them, but by the time they fit with the waist adjusted, they were too short. So in an effort to get more use out of them, we figured they'd get more wear as shorts. I pulled out a pair of Clark's existing shorts that fit well. They served as a length guide. Match up the top of the waistbands, and determine how long you want the shorts to be. Next, determine how big you want the hem of the shorts to be. Add this length (plus 1/4" if turning the hem under), to the length of the short.
If you have a serger, serge the edges. It will control the fray, and make turning the hem easier. If you don't, you can use an overcast zig zag stitch to control the raw edge.
Stitch Witchery, or any sort of sewable fusible adhesive is great for this project. I found this unused package at a thrift store-score.
Turn your shorts inside out.
Align the edge of the fusible adhesive with the raw edge of the shorts.
Fold up the hem along the inside edge of the hem tape. Press with an iron. Your iron shouldn't come in contact with the hem tape at any time, so make sure it's nicely tucked into your hem.
Turn your shorts right side out. Select a thread that matches the existing stitching on the shorts. If you have a golden thread, use gold. It's important to match the existing stitches, and not the fabric. If you don't have a matching thread, consider another contrasting color, and repeat in multiple places on the garment (see upcycled shorts).
Select a stitch that most resembles that stitching on the shorts. If your garment has a longer stitch length, lengthen the stitch on your hem. If it has a reinforced triple stitch, then adjust your setting as well. Repeating these design elements will help the shorts feel intentional.
Stitch 1/8" inside your hem allowance. I stitched 5/8" away from the folded hem, of my 3/4" hem. Try to keep your stitching line as straight and consistent as possible (how to sew a straight line).
These blue shorts had worn out at the knee. The hem is narrow, but I was able to repeat a double row of lengthened triple stitches. It helps the shorts feel more finished.
Single row of elongated straight stitch for these brown shorts.
Repeat on both legs. Done and done. Another example, my pants to maternity shorts refashion.
Another option is to try to use the existing hem of the pants on the shorts. This will only work well if the pants is relatively straight legged. If the pant hem is narrower than the knee/thigh, then you won't have enough material to work with.


2 comments:
These look great! :)
Cut offs are "in" now, maybe that's the difference? These shorts look like they were made as shorts to begin with, so good job!
Post a Comment