Search This Blog

Showing posts with label shirt. Show all posts

Sunday, November 4, 2012

Top Inspiration

When ever I run a series, it always seems that I have more ideas than finished projects.  I simply don't have the time or the attention span to make everything that I'd like to.  I thought that I'd show you a few inspiration tops, that I'd love to recreate.  Little details make the difference, and several of these tops have fantastic details.  Let dissect and discuss the tops.


Shoulder details, I love them.  I love this open zipper neckline, but also appreciate contrast bands and trims that run along the shoulder.


Contrast yokes (?).  I don't know the exact terminology, but I love the contrast in both color and textile.


Sleeve detail.  These little bows would be darling on a girl's top or dress, but they also give a basic blouse a little something extra.


Leather elbow patches.  I can't tell you how much I love this simple top.

Source: zara.com via Tricia on Pinterest

Another little sleeve detail, split sleeve with lace overlay.


This is a fantastic top.  Simple peter pan collar on a sheer front pleat shirt. Those white tabs on the arm band of the sleeve are my fave.


Lace sleeves


Contrasting print on the back panel of a tee.


Solid yoke and bands on a stripe tee.

Do you have any favorite details that really make a top?  I'd love to know what extra details you like to add.

Friday, November 2, 2012

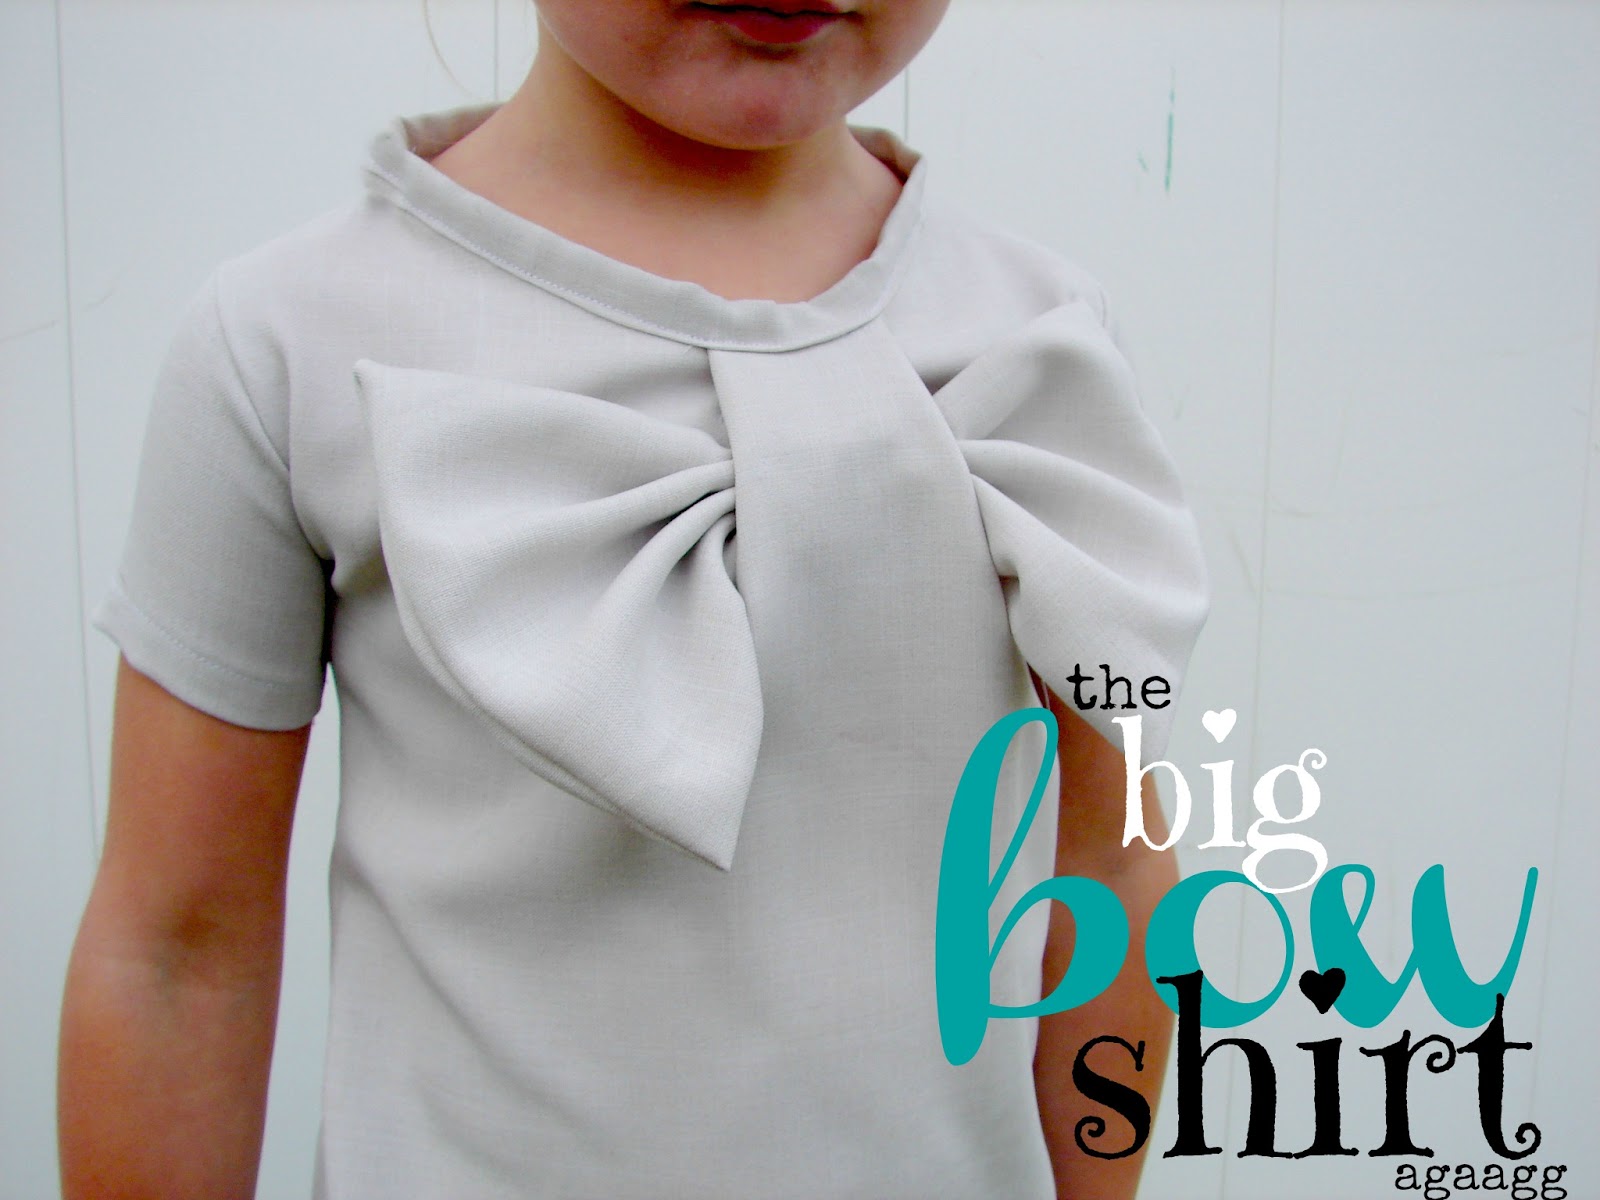
The Big Bow Shirt Tutorial with Kim of A Girl And A Glue Gun

Today we have Kimbo of A Girl And A Glue Gun, she's wrapping up Top-toberfest for us, with an adorable Big Bow Top. I'm sure you all know Kim(bo), from her fun blog.  You've probably seen her in many a craft competition as well.  Who didn't love her winning look from Project Run and Play? Want to know a secret, okay, it's not a secret.  Kim(bo) and I went to school together.  Yep, pretty awesome.  I can drop her name whenever I want to seem like a credible blogger.  She was TA in one of my beginning drawing classes in high school, so more than likely, there are  a few poorly executed figure drawings of her stashed under my bed in my  parent's house.  I should probably clean those out some time. You don't care about that, but you are going to be excited what she's sharing with us. So here she is.

so excited to be here! nothing puts the fire under by bum like a good guest post....so i knew i wanted to try something that i just wouldn't do without proper motivation....

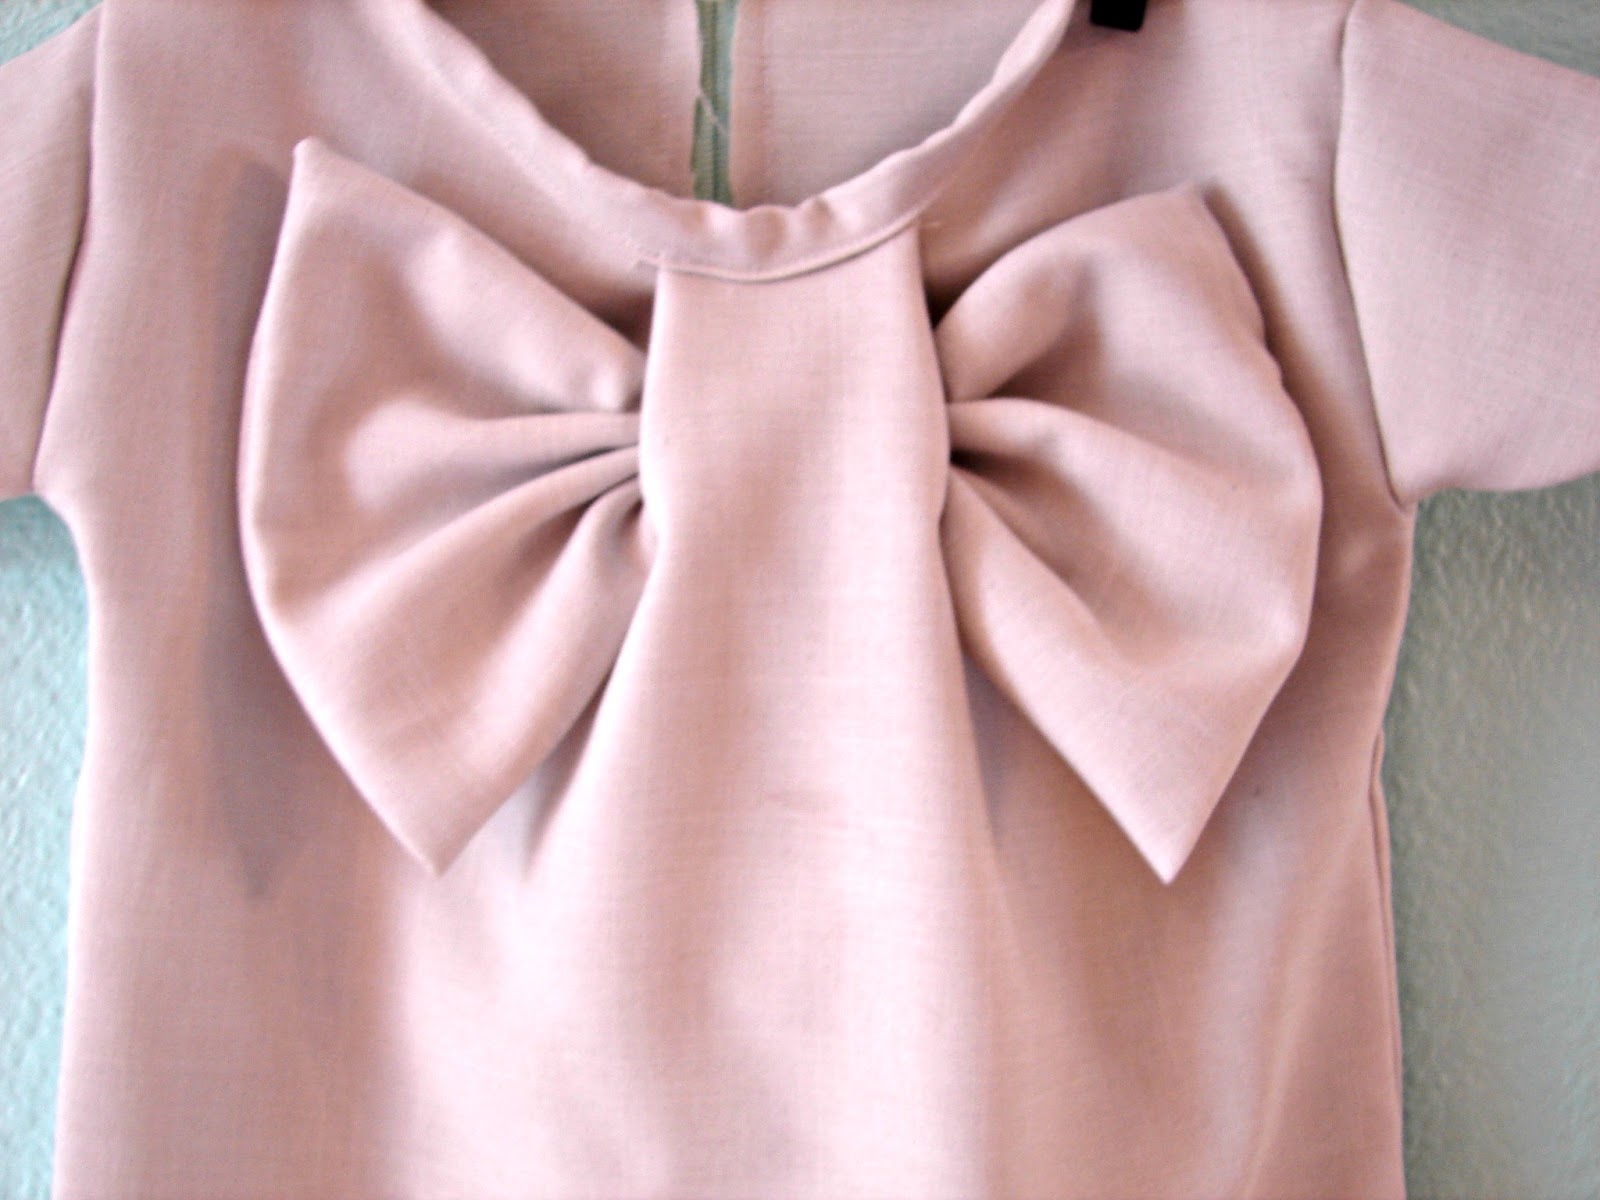
and i have loved this dress from the moment  i saw it on pinterest. something about big bows screams at me.

so i thought i would try to figure it out....and make my own

 I started the shirt like every other made-from-scratch- outfit...
got a shirt that fits and copied it.


 here's the tricky part. the top piece is going to be WAY bigger than the bottom. you cut the back piece to size...and the front piece matches up at the bottom and the sides but the top is drastically oversized. here's a picture of the front piece on the bottom (you may have to squint to see it)


and here's the front piece on top (are you still squinting?)


 you will take the top shoulder pieces and sew them together as normal...this will cause a lot of excess fabric in the chestal area. (i added a little reinforcement around the collar)


 after the collar is reinforced..and the shoulders are sewn...i added sleeves...


 and sewed down the sides and hemmed the bottom (not the collar yet!) you can see all the droopy fabric.

(man...my camera must be dirty. these are all blurry...)
but you take your shirt..and pinch all the excess fabric in the middle and put pins as markers on each side. (these were about 4 inches apart)


 then you get all fancy and add button holes...ignore the mistake that i made on the left....i was just trying to show you that everyone makes mistakes....

 i took a rectangle of fabric and made a decent sized bow...


 then i shoved that sucker in one buttonhole and out the next.


 causes all that excess of fabric to go to the middle...


 but you smoosh it down and pin to the top


 i made some bias tape and ran it the length of the collar


sew it around and realized that it makes it so the collar doesn't fit over my daughter's head. suck.

head to joanns to buy a zipper.


 i snipped right down the back...


 and sewed the zipper right on top. good thing exposed zippers are in style!


i made another scalloped skirt. i'm obsessed. i just can't help myself.....

and i would add a couple little stitches at the corners of the bow to keep it up when your kid is wearing it..
i didn't yet cause i wanted to show you that you could add whatever color in there for a nice pop!
there you have it..a nice big bow. to make any kid feel like a gift!

you can come hang out with me on my blog HERE anytime!

Kimbo
Thanks so much Kim for being a part of Toptoberfest.  I loved that dress when I saw it on Pinterest, thanks for being clever enough to show us all how to do it.  It makes an adorable top.

Thursday, November 1, 2012

Pleated Knot Tunic Tutorial with Jessica of Me Sew Crazy

Who's excited that Jessica is here?  I know I am.  I love Jessica, her blog, and of course her amazing site, Sew Set.  She is down to earth, super sweet, and extremely talented, and one ambitious lady.  You'll find her sewing up adorable tops and clothes for her kids, and for herself.  I'm especially happy that she is sharing a top that she made for herself.  I think that it's important to take time and spoil ourselves with something new every once in a while. So without further ado, Jessica.


Hi everyone! Jessica here of Me Sew Crazy & the creator of SewSet, your on-line sewing pattern search engine. I love Tricia's TopTober Series, and have followed along ever since she started doing it. I think shirts are one of the easiest, and most rewarding things we can whip up simply because they get the most use. And I am all about that.  The joy of sewing for me comes when I see my kids running around in the creations I make for them. So tops, easy tunics, and comfy dresses make up most of our wardrobe. The inspiration for the Pleated Knot Tunic actually came from the fabric, I saw this gorgeous knit at The Fabric Fairy (found HERE) and simply had to have it!!! I was in love, and as soon as I had it in my hands I knew I wanted to make something for myself with it...


The fun always comes in adding the details. Now I readily admit, this TopTober post is a bit of a cheater. It can be seen as a dress or tunic, or made shorter into a shirt. It all depends on your personal style preference. But any which way you make it, it is one easy top to sew together...


I particularly love the back detail of this dress, which can be made with a knot, of even a simple twist - and I will show you how to do both! But this is a perfect project for someone who is beginning to experiment with sewing for themselves. No tricky darts to play around with, no patterns to try to cut exactly right. All you need is a nice body-fitting shirt to cut around, 2 yards of a good thick stretchy knit (this one has 35% stretch, and is a nice really soft and thick fabric), and your basic sewing essentials. Let's go...
When I say ending just beneath the bodice, I mean just underneath your bust line. Approximately 5" down from your armhole on the side. 
I like to keep white wrapping paper on hand (much cheaper to buy), and I draw all of my mock patterns on this white paper.
This is where you can alter the length to adjust for a longer dress, or shorter for a shirt! It is up to you! Just be sure to buy more fabric if you want it longer, I would suggest 2.5 yards.
Now we get down to the fun stuff - sewing it together! Once you have your back bodice pattern sewing together at the top center for both the exterior and the lining, simply...
Twist it or knot it, both will look just great!
Take a break and give your child some attention now...lol
Moving on...
Here is a fun way to sew your shoulders together to make everything look seamless and easy!
Now we will simply be attaching the skirt pieces to your bodice...
This next step you can choose to make however you want, use gathers, pleats, pintucks - whatever sewing method you feel most comfortable with! I happen to like pleats when it comes to sewing for myself because it doesn't add too much bulk in an area I don't want it in (around my belly).
Have excess fabric stretching beyond the sides of the bodice? No problem, simply cut it off!
One last tip - if you are having trouble hemming the knit fabric without causing it to 'wave', you can try either my tissue paper method found HERE. OR you can use the fabulous 'Stitch Witchery' product by Dritz, which I have recently stumbled across and love.  I simply iron it on, and then sew over it to secure. Takes care of all wavy seams - BUT please note - do not use this product if you still need the fabric to stretch. It removes most of the stretch because it has ironed the fabric securely to the hemming tape. But there you have it - a super cute, fun and flirty tunic dress or top that you can wear all year round!

Looking for me things Me Sew Crazy? You can always find me hanging at any one of these places: {blog} {sewset} {facebook} {pinterest} {twitter} {instagram: @jessrabbott} And to find the gorgeous Fresh Produce Shockwaves Fabric used in today's post - be sure to check out The Fabric Fairy and their lovely selection of on-line knits! Thank you so much for having me here today Tricia, I absolutely love your TopTober Series and look forward to seeing what else is shown!

Don't you love it.  I need one.  Want to see some of Jessica's other creations, check out her designer page on Sew Set. The Flying High Fleece, Flower Tunic, and Quilted Fairy Tales Jacket, are just a few of my favorites. Thanks so much Jessica for being here today, and sharing this fun project.