Today we have Kimbo of A Girl And A Glue Gun, she's wrapping up Top-toberfest for us, with an adorable Big Bow Top. I'm sure you all know Kim(bo), from her fun blog. You've probably seen her in many a craft competition as well. Who didn't love her winning look from Project Run and Play? Want to know a secret, okay, it's not a secret. Kim(bo) and I went to school together. Yep, pretty awesome. I can drop her name whenever I want to seem like a credible blogger. She was TA in one of my beginning drawing classes in high school, so more than likely, there are a few poorly executed figure drawings of her stashed under my bed in my parent's house. I should probably clean those out some time. You don't care about that, but you are going to be excited what she's sharing with us. So here she is.
so excited to be here! nothing puts the fire under by bum like a good guest post....so i knew i wanted to try something that i just wouldn't do without proper motivation....
and i have loved this dress from the moment i saw it on pinterest. something about big bows screams at me.
so i thought i would try to figure it out....and make my own
I started the shirt like every other made-from-scratch- outfit...
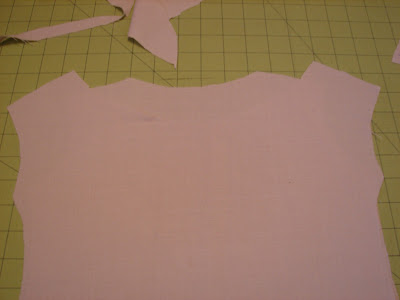
got a shirt that fits and copied it.
and here's the front piece on top (are you still squinting?)
after the collar is reinforced..and the shoulders are sewn...i added sleeves...
(man...my camera must be dirty. these are all blurry...)
but you take your shirt..and pinch all the excess fabric in the middle and put pins as markers on each side. (these were about 4 inches apart)
i took a rectangle of fabric and made a decent sized bow...
then i shoved that sucker in one buttonhole and out the next.
causes all that excess of fabric to go to the middle...
but you smoosh it down and pin to the top
i made some bias tape and ran it the length of the collar
head to joanns to buy a zipper.
i snipped right down the back...
and sewed the zipper right on top. good thing exposed zippers are in style!
i made another scalloped skirt. i'm obsessed. i just can't help myself.....
and i would add a couple little stitches at the corners of the bow to keep it up when your kid is wearing it..
i didn't yet cause i wanted to show you that you could add whatever color in there for a nice pop!
there you have it..a nice big bow. to make any kid feel like a gift!
you can come hang out with me on my blog HERE anytime!


3 comments:
What a fun top and a great recreation of the inspiration piece. :) And that's cool that you two know each other and I appreciate the "keeping it real" picture. Off to check out that darling skirt. :)
Ya!It is a absolute adequate info. Acknowledgment for administration your cavalcade with us.Keep autograph with added attainable topics. burun estetiği
Absolutely darling! I love Kim's ideas!
Post a Comment