Terra is here! Who's excited? Terra of Mama Says Sew is always coming up with adorable clothes for her kids, and herself. She's the queen of the ruffle, and a master of knits. This is her second time guest posting on the blog, and I'm thrilled to have her back. Be sure to stop by her blog, and show her some love. Every blogger loves feedback. Today she's going to show us an adorable pocket tee, a great addition to anyone's wardrobe.
Hi everyone! I'm Terra and I blog over at mama says
sew. I'm exited to be here today as part of Toptoberfest. Tricia's
blog was one of the first that I started following, and I love all the
great things she shares.
Today I'm sharing this simple tee with you. It's pretty basic, but it
has a few details that give it a little something extra.
I used a striped French terry for the main fabric, then some scraps of
pink baby rib knit. I've never sewn with French terry before, but I'm
glad I tried it out. It's nice and cozy for the cooler weather, which
was what I was going for. I was sorting through my daughter's drawer
recently and realized that she has about a million pairs of pants, but
hardly any warm shirts.
Want to make your own? I used one of the few long sleeved shirts my
daughter has as a template, but you could use any basic shirt pattern
sized for knits. Cut the sleeves and the front and back pieces a
little shorter if you want the nice wide bands. Also, cut all the band
pieces twice as wide as you want them, since you will be folding them
the long way.
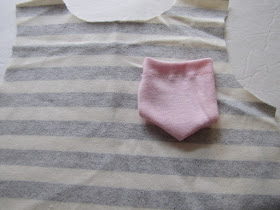
First, sew the top of the pocket down.
Pin it to the front piece where you want it, folding all the raw edges
under.
Stitch around the pocket edges. The little triangles at the tops of
both sides helps reinforce the pocket.
Stitch one shoulder seam ONLY, with right sides together.
Fold the collar in half, then match the raw edges to the outside of
the neckline. Stitch through all layers, making sure to use a stitch
that stretches. Alternatively, you could make bias tape with your knit
fabric and use that to finish the neckline.
Sew the other shoulder seam.
Fold the arm band in half and line the raw edges up with the end of
the sleeve. The sleeve is right side up in this picture. Stitch the
arm bands to the ends of each sleeve.
With right sides together, sew each sleeve into the shirt. This is a
handy technique my mom taught me but I never really used. I was
reminded of it when I tested patterns for Terra's Treasures and Blank Slate
patterns, and it is so much easier.
Sew the waistband to the bottom of the front and back pieces the same
as for the arm bands.
Stitch up the underarm and continue down the side seam on both sides.
Turn right side out and you're done! Thanks for having me today
Tricia!
You can check my blog for other ideas for tops. Here are a few:


What a sweet and comfy shirt. :) I never thought to sew the neck binding like that. Totally gotta try it.
ReplyDelete